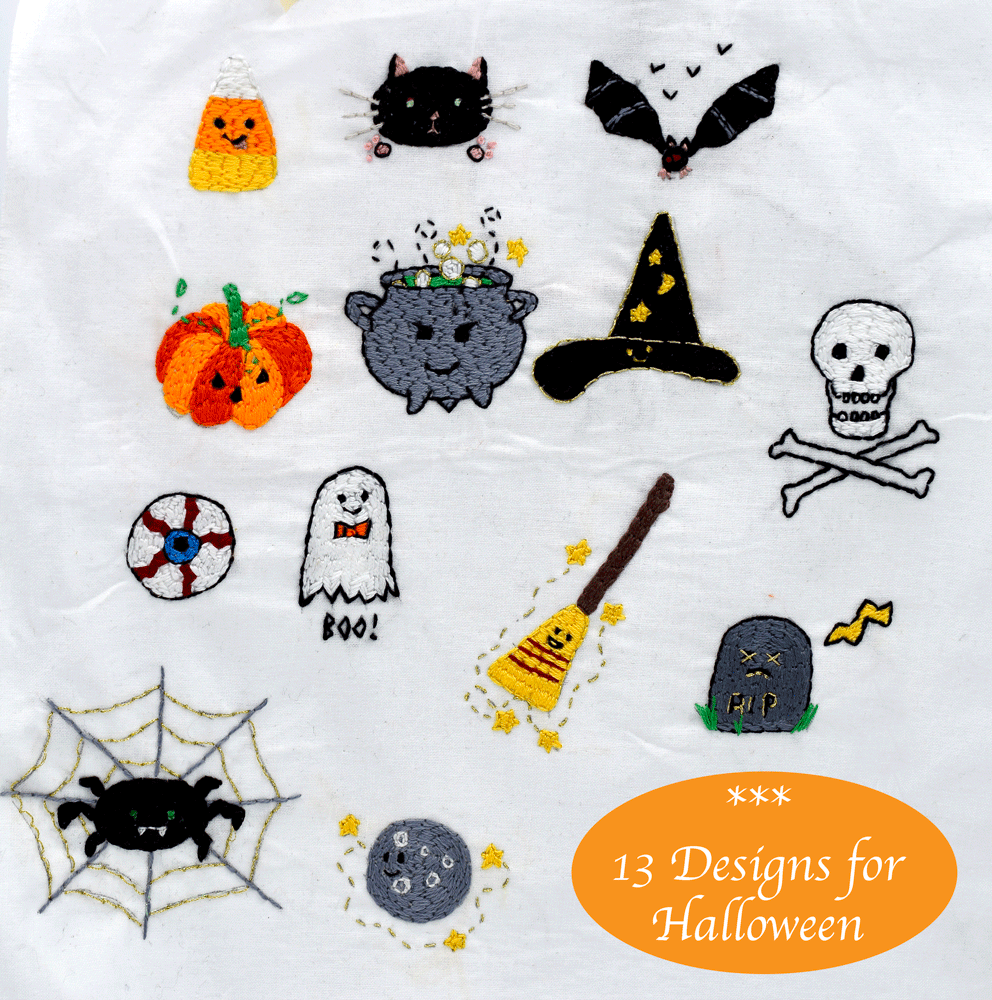
I want to tell you that I just put a brand new item in my Etsy shop. It is a set of cute kawaii style embroidery designs that are very beginner friendly. What I enjoyed about making these was their sweet simplicity. They can be made all in BACKSTITCH and STRAIGHT STITCH. There are so many cute things you can do with these. In case you were wondering what Kawaii means in this context, it is "cute' and or "lovable" which has been popularized in the Japanese culture (think Hello Kitty.)
HERE is the listing. It is a printable pattern you can download right at home. It comes with the pattern, instructions, and stitch/color guide.
Let's play with a few ideas.
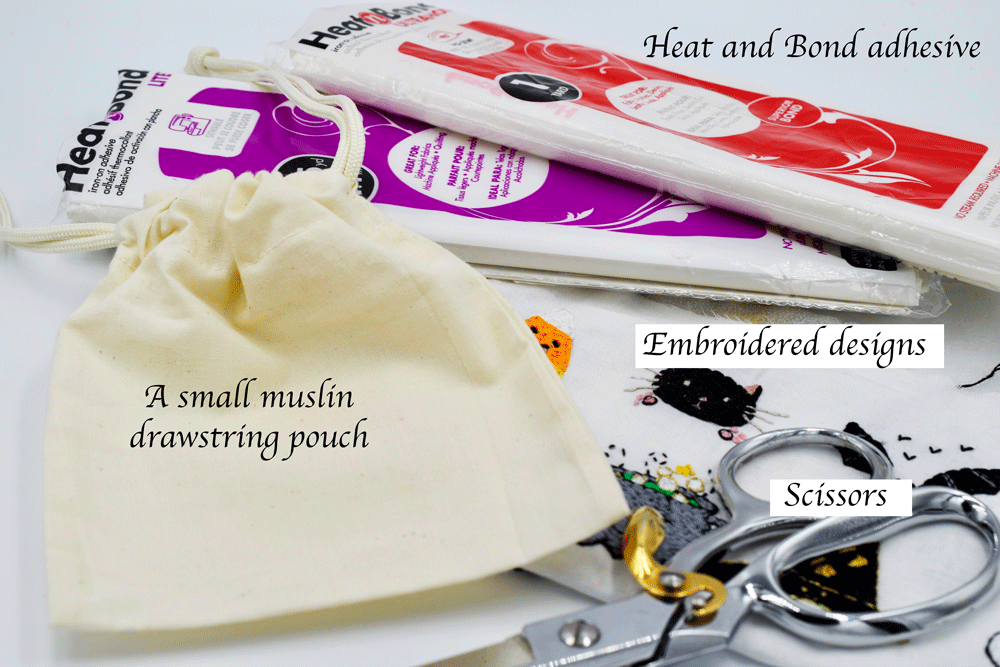
For this first project you will need:
1. EMBROIDERED DESIGNS - These Halloween designs are about 1-3 inches in size so they are perfect for smaller projects.
2. SOMETHING TO ADHERE/SEW YOUR EMBROIDERY ONTO - I chose this small muslin drawstring bag. It was probably less than a dollar and easy to find at any crafting store. See the example below:

3. ADHESIVE FABRIC BOND - This will fuse the embroidered piece to the fabric you use (In this case, the muslin bag.) This process is known as appliqué.
I use two different kinds:

The bond pictured above is permanent and does not require sewing once the fabrics are bonded.
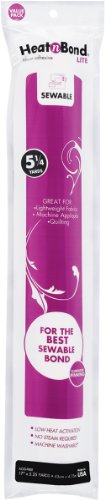
The lightweight bond above is meant to be sewn on so if you want to add decorative stitches over your appliqué you can.
4. SCISSORS - These are used to trim your embroidery designs before adhering them.

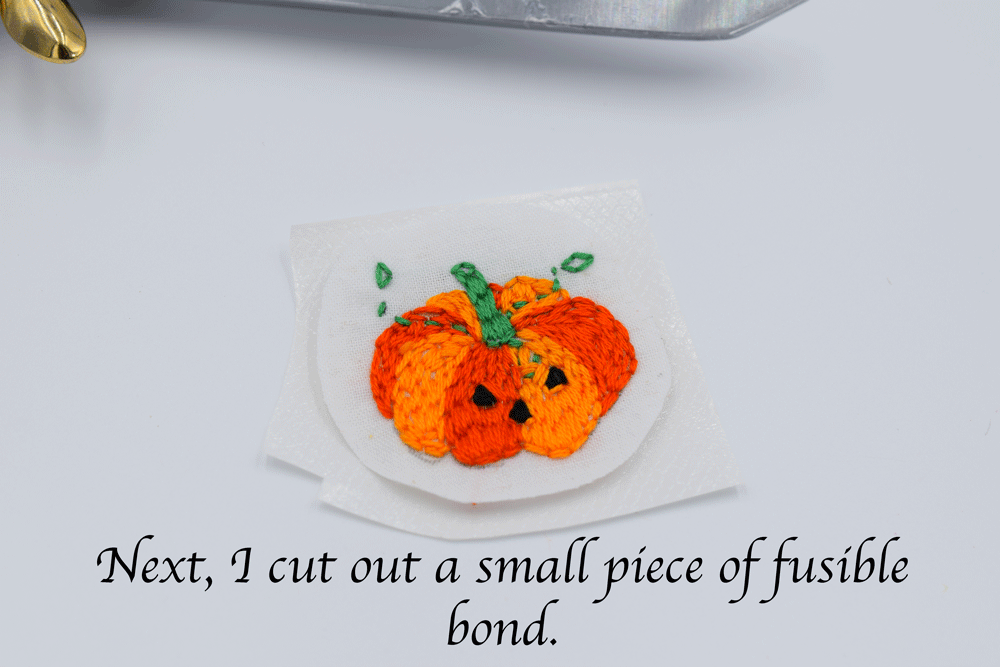
I trace around my embroidery piece so that the bond paper is the same size. Face the non-papered side of the heat and bond toward the back of the embroidery design. If your bond paper is bigger and overlapping, it will stick to your iron so make sure it is the same size as your design or a little smaller.
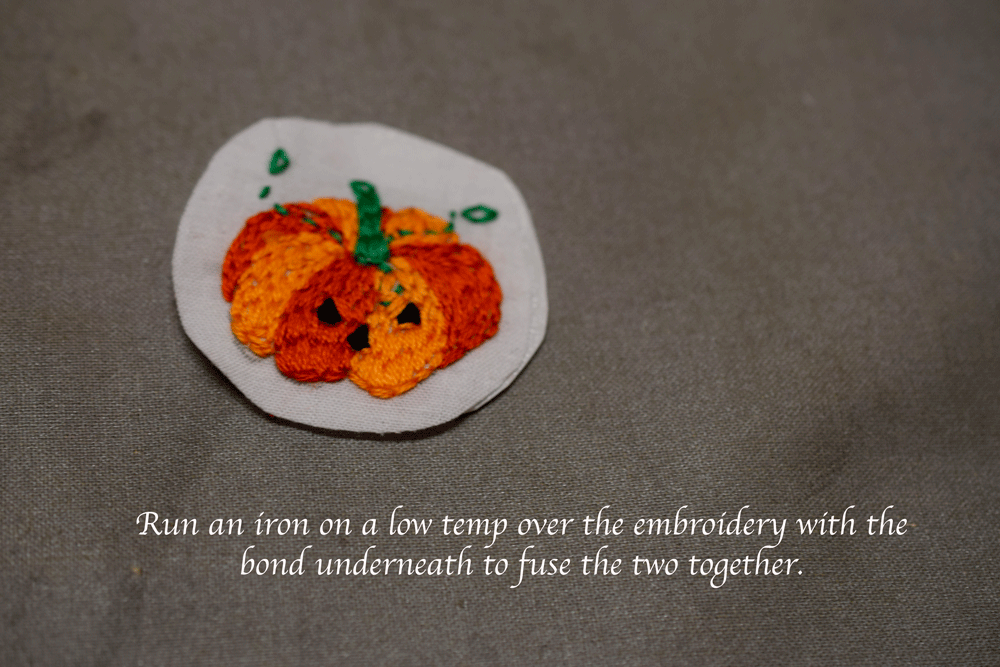

Once you have adhered the heat and bond to the back of the design, peel off the paper backing. There will be a shiny layer of adhesive which can now be bonded to your fabric of choice.
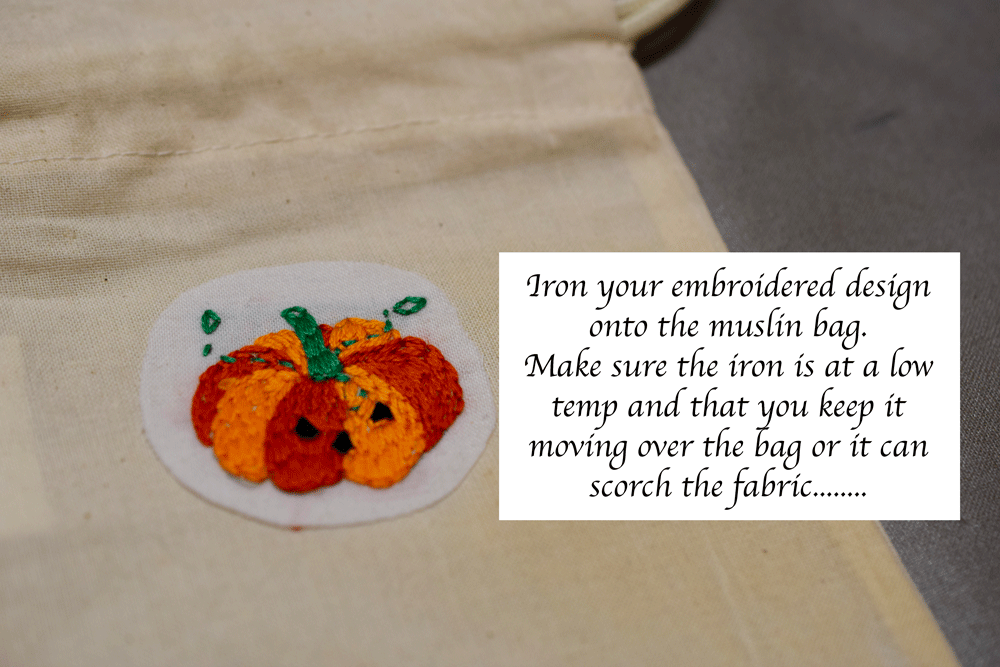
In the example above, my iron was on the highest setting so it 'browned' the thin muslin. Make sure your iron is not too hot and that you don't leave it in one place for too long. The brown did fade a little though, so it looks fine.

To Finish off my design, I added some RUNNING STITCH and some CHAIN STITCH around the edges. I added "Happy Halloween" text by writing in pencil on the bag and embroidering over it.

In the example above, I decorate a small 10 x 10 white cotton handkerchief. The white background fabric of the embroidery design on the white handkerchief blend nicely. Using the permanent bond, you are done!


These designs are great for hand towels, too which make a festive addition to a bathroom or to bring to a halloween party with a tray of cookies.
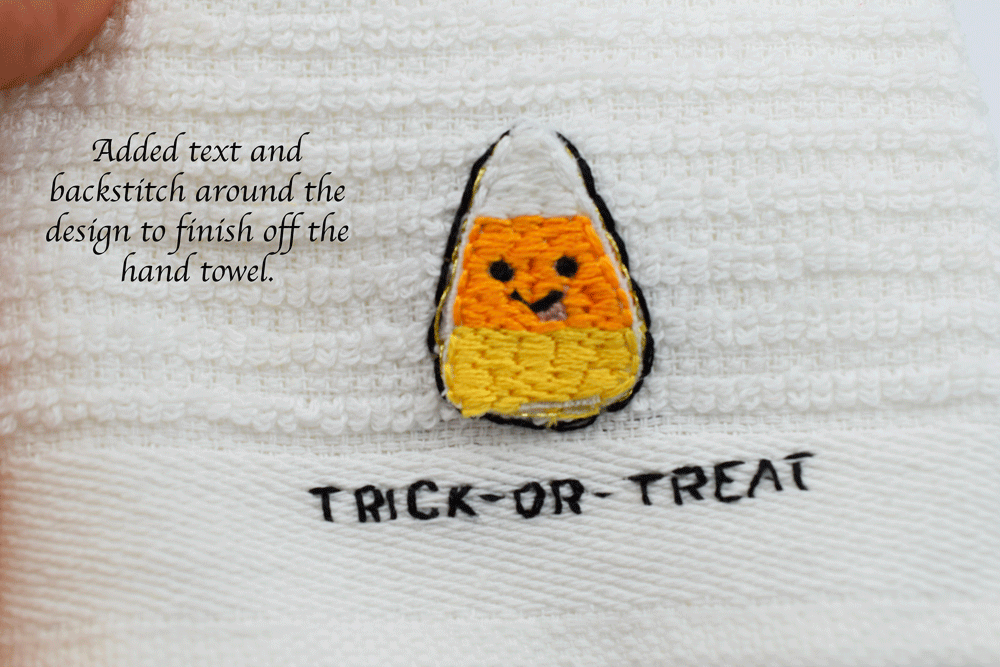
To finish off my hand towel, I added some BACKSTITCH around the edge of the candy corn and some text. I just free handed the text here.


These are what I used. I love having them around for making mini paintings. They are fun for decoupage as well.

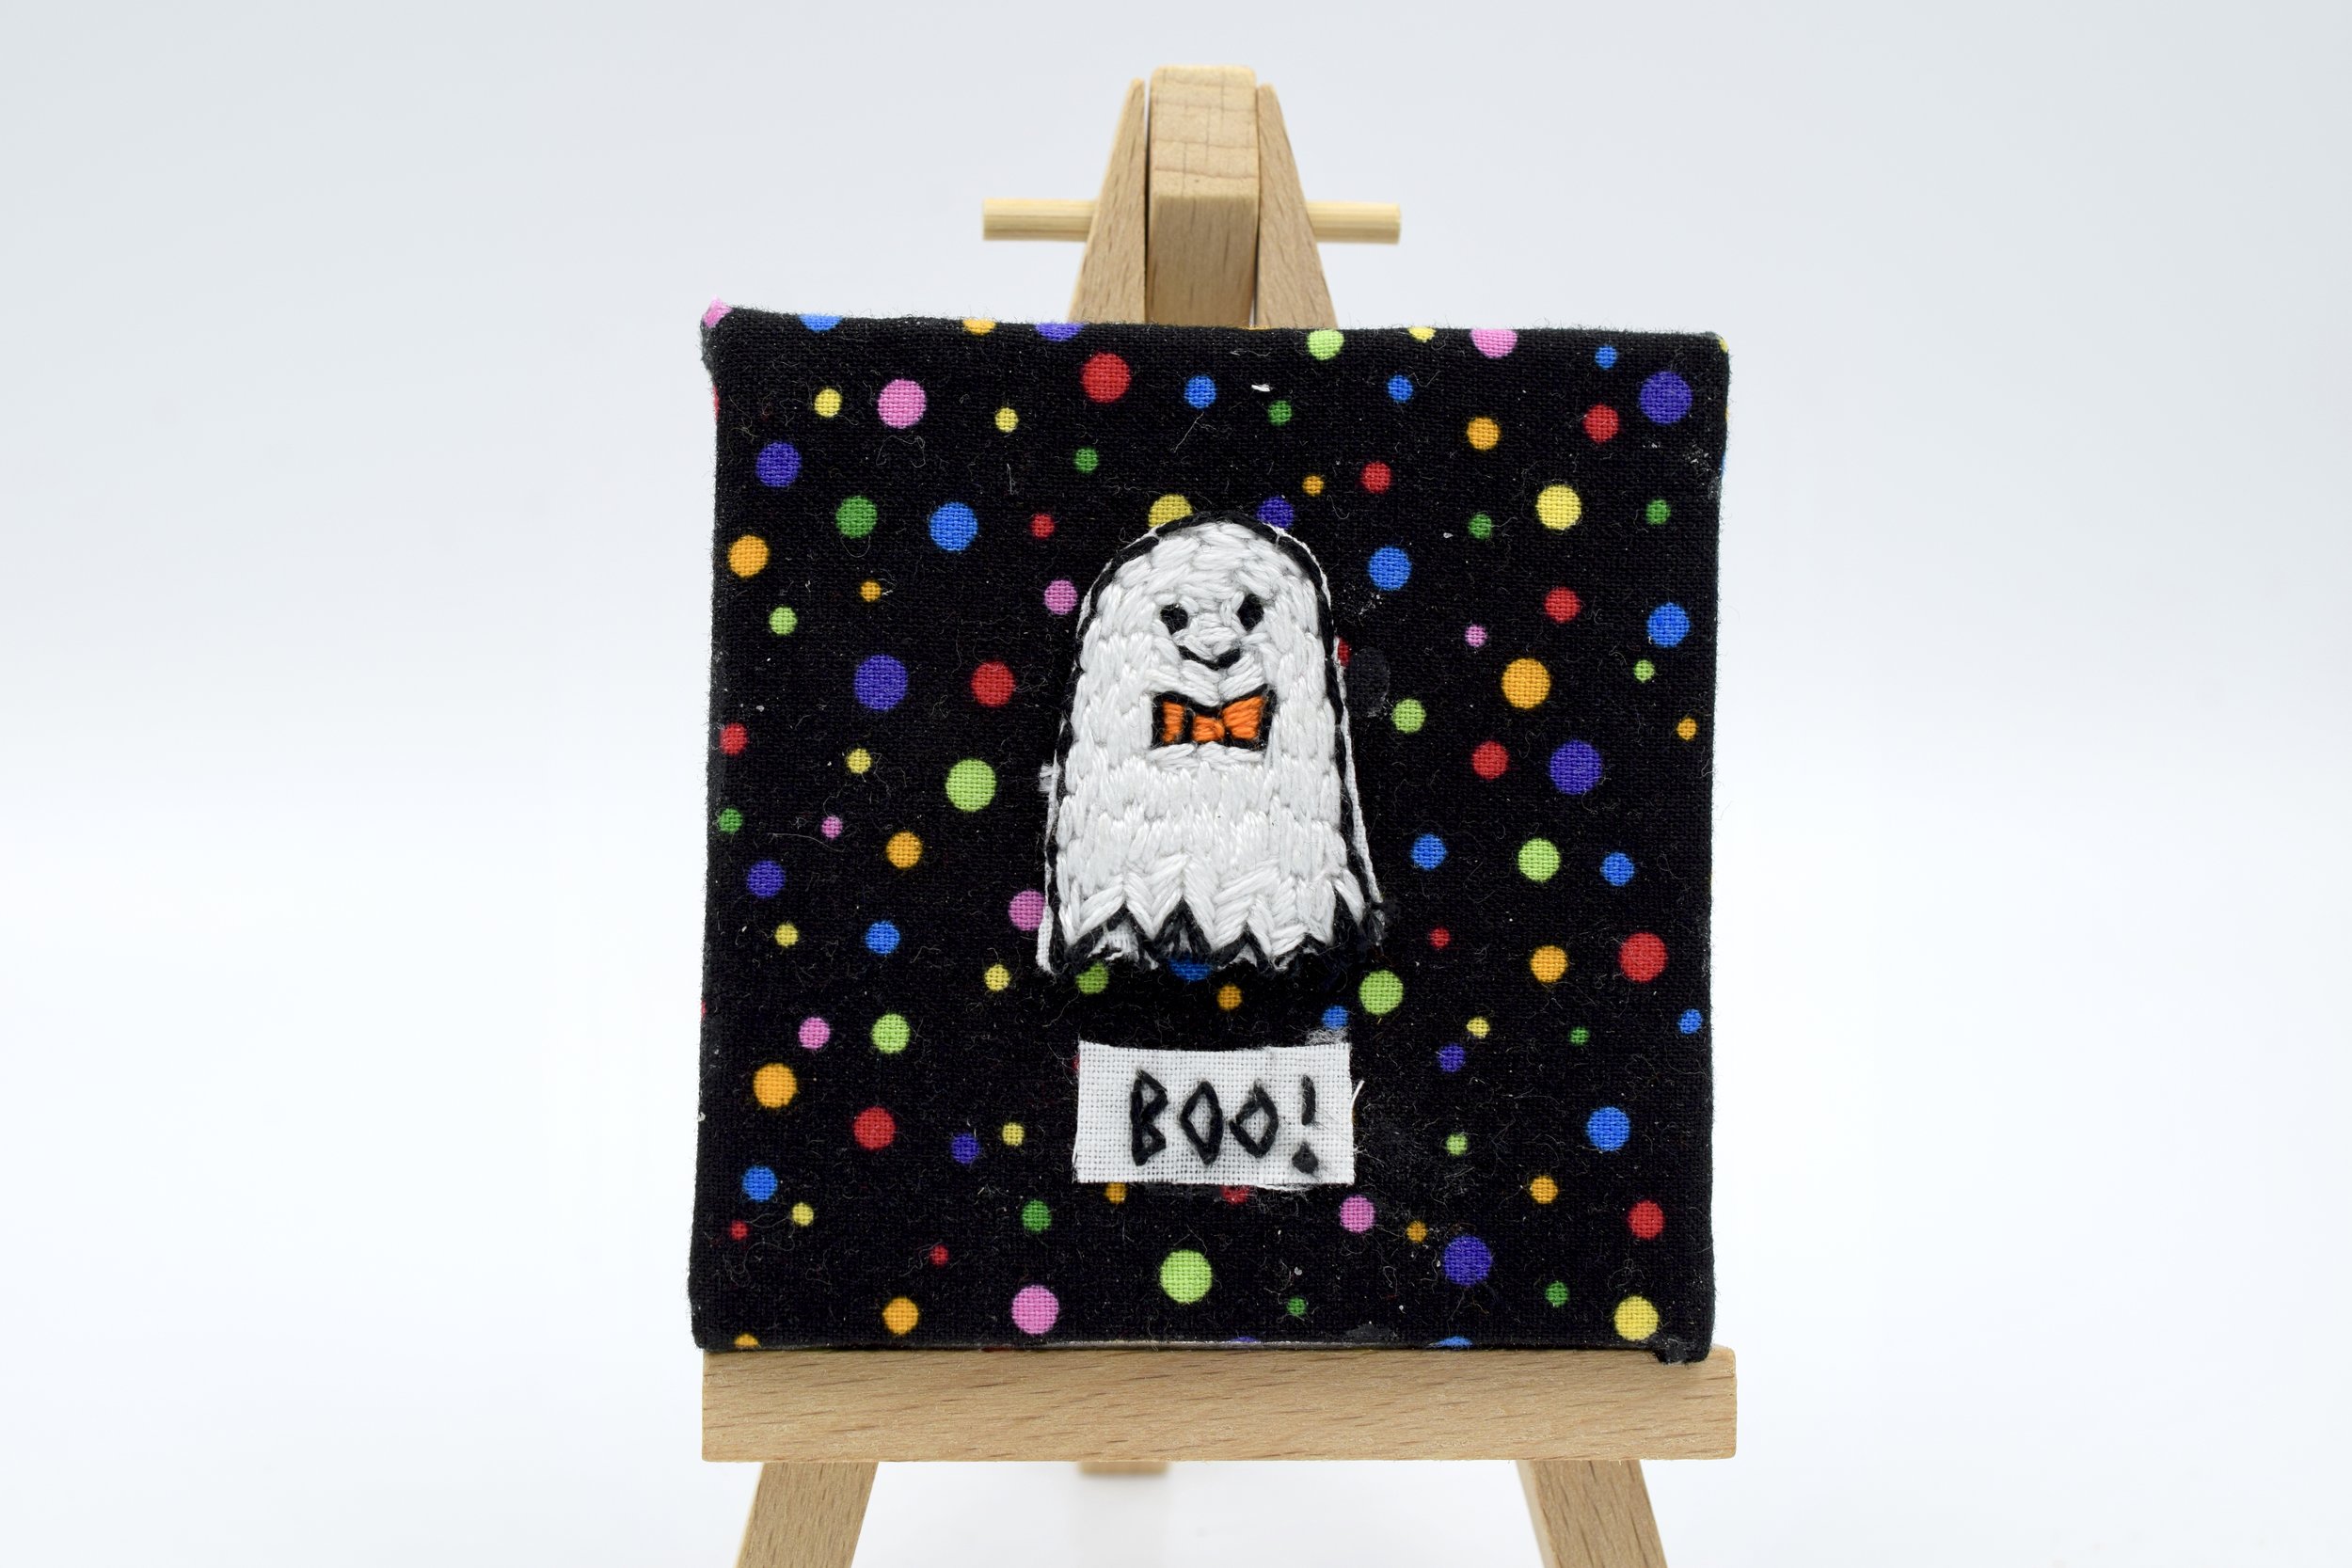
These are the easels. Adorable aren't they? Anything tiny!
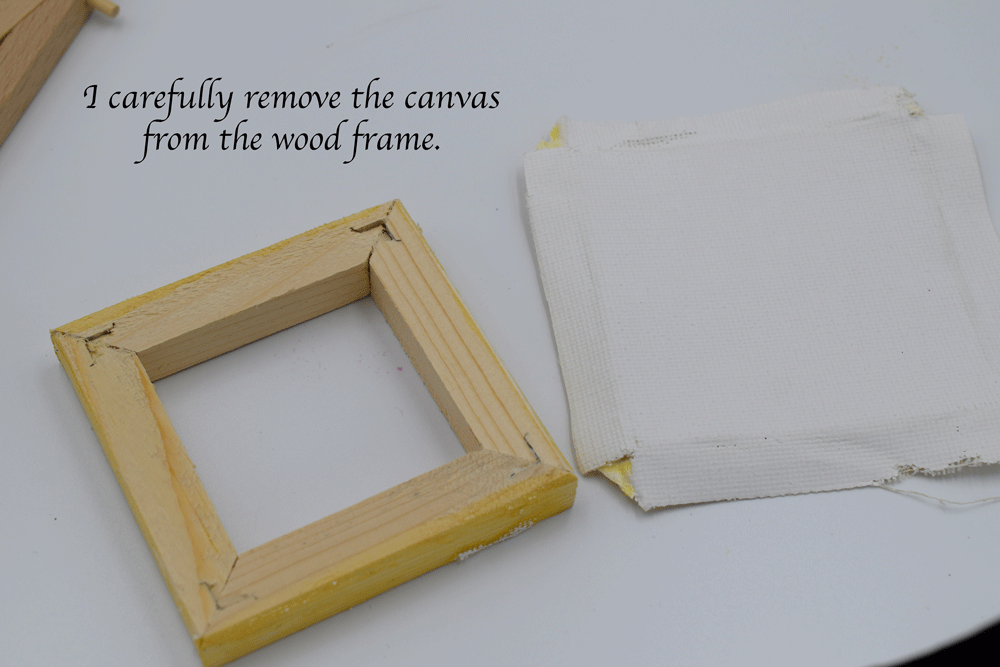
There was a strip of glue holding the canvas to the frame. I just gently pulled and the canvas came loose. Watch how the canvas was wrapped as you are taking it off to give you an idea how to put it back on. The canvas gives you a template to mold your fabric on. At first I was just going to use the fabric but instead I used the fabric and canvas together. The canvas added extra stability. As an alternative, you could bond your fabric to an interfacing for stability.


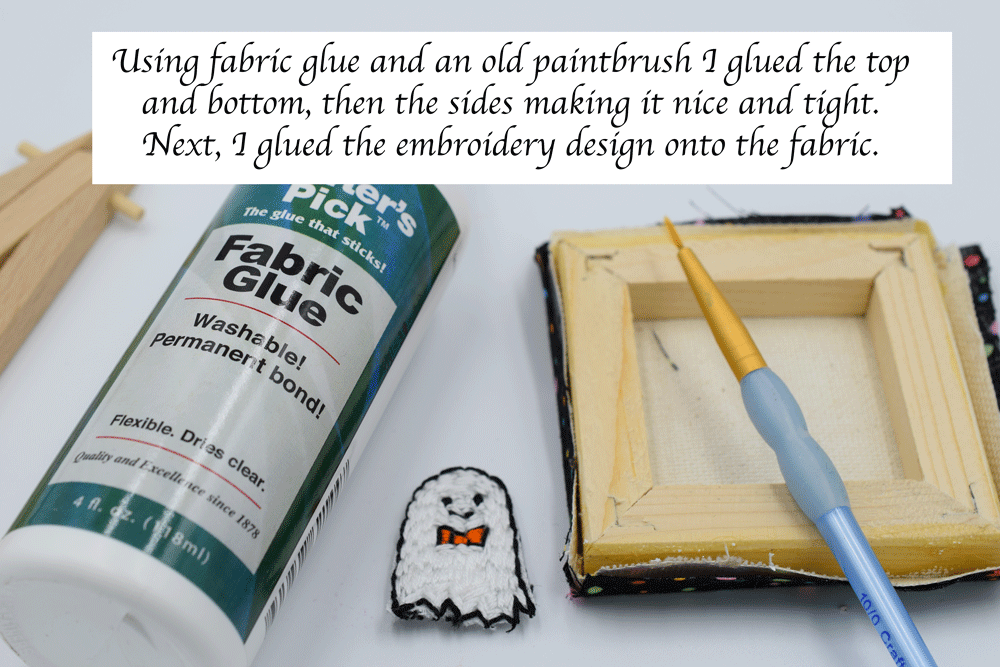
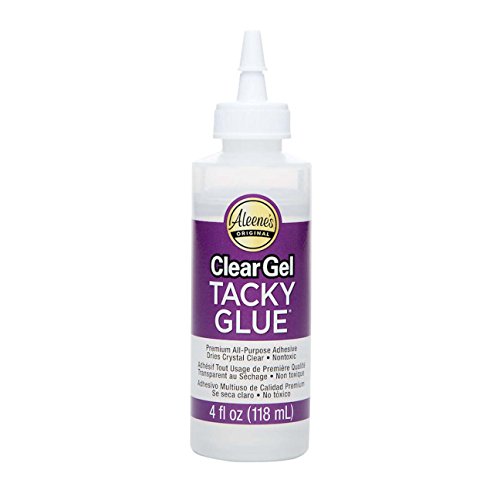
I actually used the glue above for my adhesive glue rather than the one in the picture. I love to use this glue for all kinds of things and use it to glue the fabric onto backs of my embroidery hoops, as well.

Learn how to make the RUNNING STITCH by clicking HERE. There is a cute free printable to practice on!


To learn the backstitch click HERE.

How about a cute pair of Halloween undies? To make these, I traced my design onto a sheet of "Print, Stitch, Dissolve". I figured out where I wanted to place my design, then added some interfacing to the back of where the design would be to add stability since knit is a loose fabric to work on. Finally, I adhered the design in place, hooped the fabric and stitched the design. I added some Kaitlyn Style Calligraphy from The Postman's Knock. There are some AMAZING Printable worksheets available which are also fab for embroidery. Calligraphy adds such a touch of elegance even to something as whimsical as this. Check out the calligraphy worksheets HERE. They are awesome.
There is a also a more detailed description of how to embroider in knits
The dissolving stabilizer I use on knits is pictured just below. I love this stuff because when you are done stitching, you rinse it off in warm water. So EASY! There are other brands as well but this is the one I have at home and love to use.

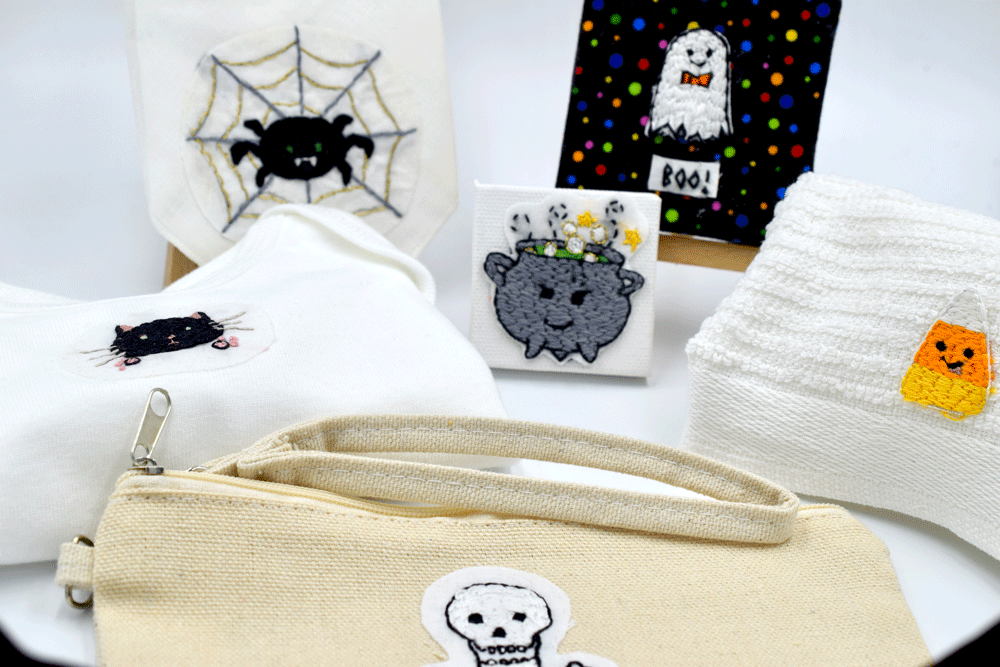
These are just a few of the many ways you can use these cute designs! You can just glue them right onto one of the mini canvas frames as I did above with the cauldron. These would make fabulous PATCHES and also PINS.
They would look really cute on a shirt collar or even on a blank card.
**This post may contain some affiliate links.
The designs you see here can be found at my LOVESTITCHERY shop on ETSY.
Click HERE if you would like to see the listing.
Thanks for stopping by!
Warmly,
Pam