Thought it might be fun to learn a new stitch today called the BRAID STITCH. As the name suggests, it is a stitch with a braid-like appearance. The suggested thread for this stitch is a perle thread (one that is not multi stranded and does not untwist ) but I tried it anyway with a stranded thread and it still looked good. I think what makes a big impact with this stitch is the width. If you are using a thinner thread, adjust your width a little smaller and conversely, if you are using thicker thread make the width a littler bigger to accommodate the thickness of the thread. Probably easier to show you so let’s get started!

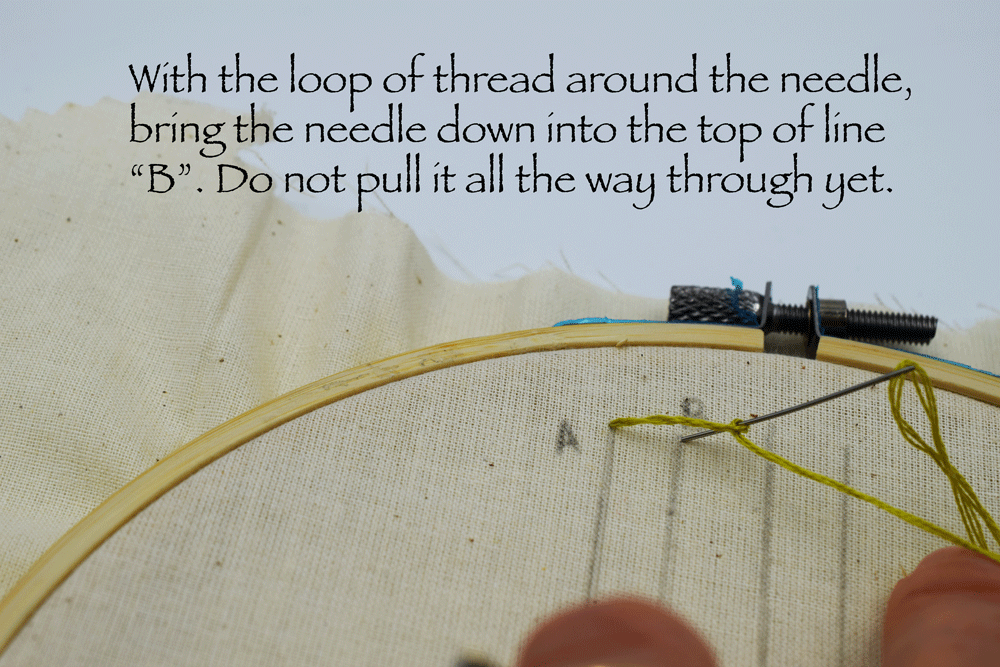
To get started, get a scrap piece of fabric to practice on. I used a piece of unbleached cotton muslin. Place it in a wooden hoop and adjust the edges to make the fabric nice and tight. Use a pencil or fabric marker to mark two parallel lines. I labelled them “A” and “B” for easy reference.


Make a loose loop around the needle with your working thread.

Make sure your thread is behind the needle as you pull it through to make the first stitch which will look like the loopy knot below.


For this example I used three stranded thread and my width was about 1/4 of an inch.


I tried making the width a little bigger but it didn’t have the braid effect so I tried it on the 1/4 inch width with much better results.


Once you get the hang of the motion of the stitch, try experimenting with different threads and widths. It really is such a pretty stitch for outlines.

I really love the variegated thread with this stitch! Pretty fun way to make lettering, too!

Well I sure hope you enjoyed learning this new stitch as much as I have and I hope you have fun experimenting!
Thanks for stopping by!
Warmly,
Pam