Couching is a technique of attaching a length of thread, cording, yarn, or ribbon onto a flat embroidery surface by making even stitches at regular intervals. This is another great technique to add to your arsenal of knowledge!
First, let's go through step-by-step to learn the technique:

Gather a few supplies to practice:
1. Your trusty embroidery scissors
2. A wooden embroidery hoop.
3. Cotton fabric
4. Six stranded embroidery thread
5. An embroidery needle
6. A piece of thread, ribbon, cording, or yarn to attach to your fabric
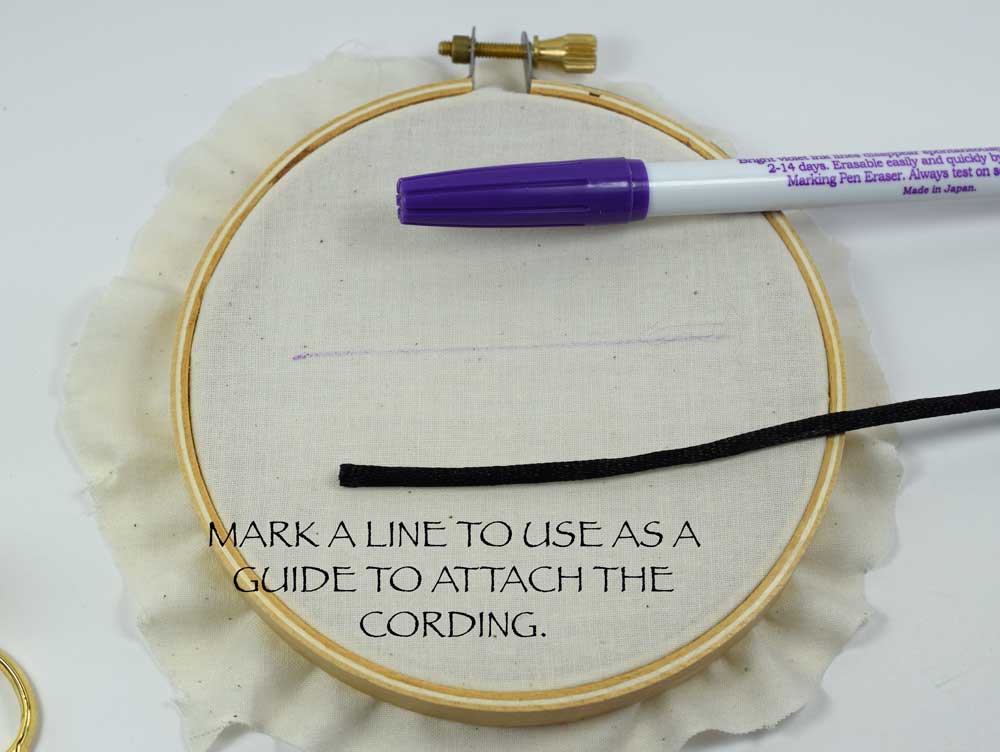
This step is optional but can be helpful if this is your first time trying this technique. Mark a line on your fabric with a disappearing ink pen or a sharp pencil. You can use this as a guide to keep your piece of cording, thread, ribbon or yarn straight as you make your stitches.

Thread your needle. I used three strands. Line up your cording, thread, ribbon, or yarn over the marking you made.

Bring your needle up from the back of the hoop right next to the cording where I have labeled "1".
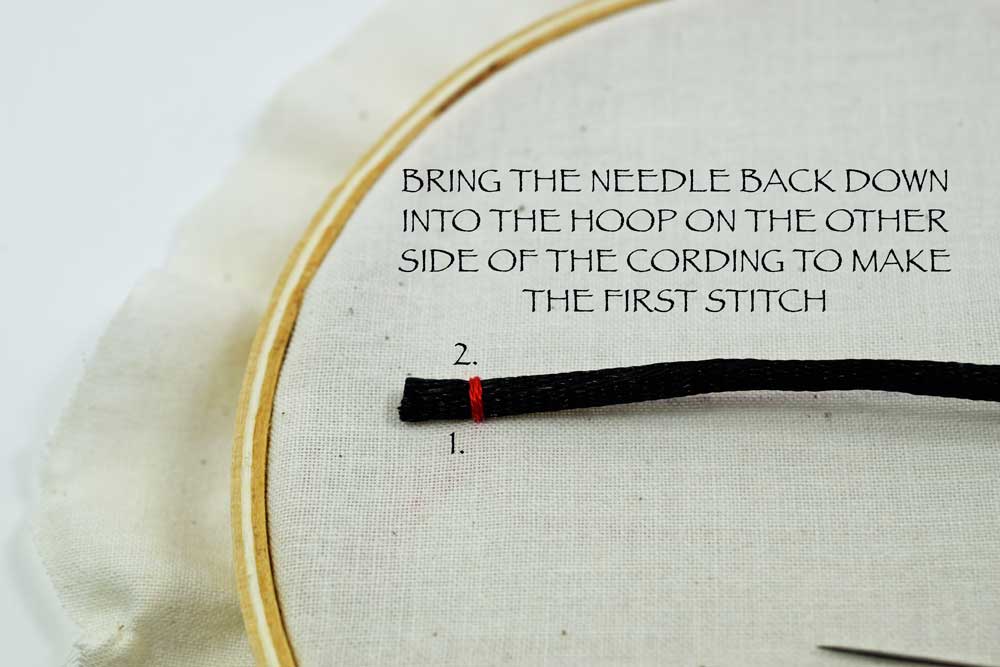

Continue making stitches as you work your way across the ribbon, keeping them evenly spaced. I numbered the first few stitches for clarity.
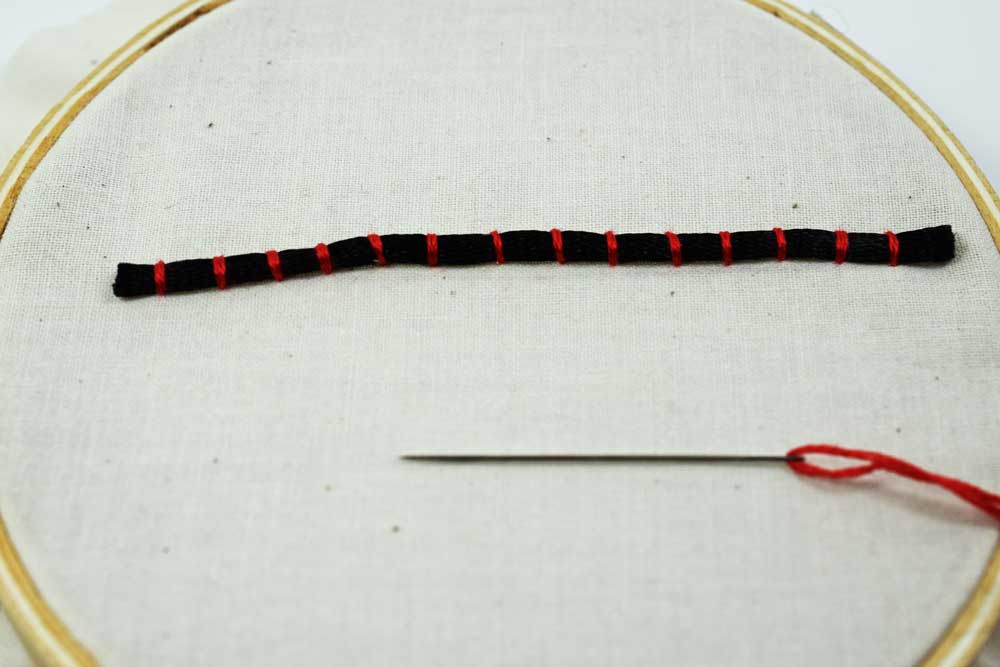
So that is couching! Pretty simple, right? You may be wondering what to use this technique for. It is good for creating a border around something you want to emphasize. It is also handy to create a decorative element to your work by enabling you to affix ribbon, cording or yarn that is too thick to go through your fabric. Let me show you an example putting couching to use in a free form way.

In the above example I used yarn this time to attach to my fabric. I threaded the yarn in a tapestry needle because it had a huge eye and brought the needle up from the back of the hoop letting the knot catch at the back. I marked the fabric with lettering, then attached the yarn onto the lettering using the couching technique. I chose a thread that was close to the color or the yarn making it less visible.


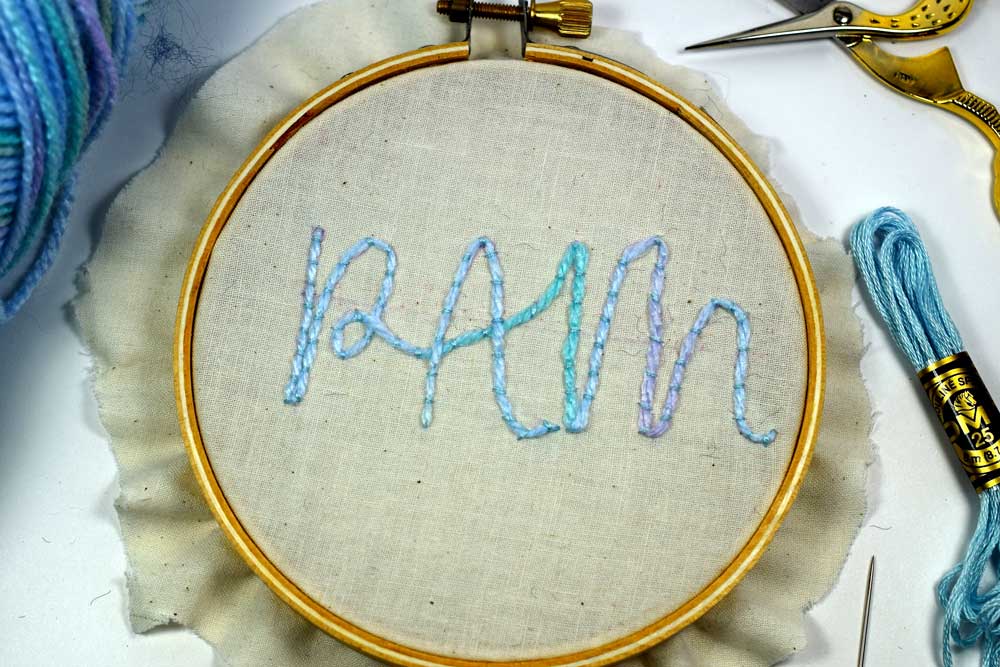
What is cool about this example is that you can make your lines any shape you like. You are not limited to making straight stitches when you are using this technique. You could try cross stitches (little "x's"), blanket stitch, two straight stitches right next to each other and so much more. You could make french knots in a flat piece of ribbon or even the running stitch. The possibilities are endless!
Hope you add this to you had fun learning this and are able to use it in fun and creative ways!
Thanks for stopping by!
Warmly,
Pam