
When I was first starting out in watercolor, white was a mystery to me. One of the first things you learn is that in order to get achieve white in watercolor, you leave the white of the paper unpainted. There are a number of ways in which you can do this and I thought it would be fun to show you some. The more tools in your arsenal, the better you are at being able to express your ideas and let's face it, the world needs to see your ideas!!! Let's get started experimenting!
First, a word about white. Have you ever really observed something that is white? How about snow covered mountains? Clouds? White fur on an animal? Well, if you have observed these things closely, then you will notice that white is almost never truly white.

Take this mug, for instance. Granted, the lighting is not the greatest but you can see that there are yellows, blues, browns, maybe even a hint of violet in this white mug. If you are trying to paint a "white" object on your white paper this is an excellent thing to repeat to yourself as you take note of all subtle shades that make up a white object.
There are whites, such as highlights and reflections in which using the white of the paper is really effective. I'd like to just experiment with you and show you some different ways to achieve white.
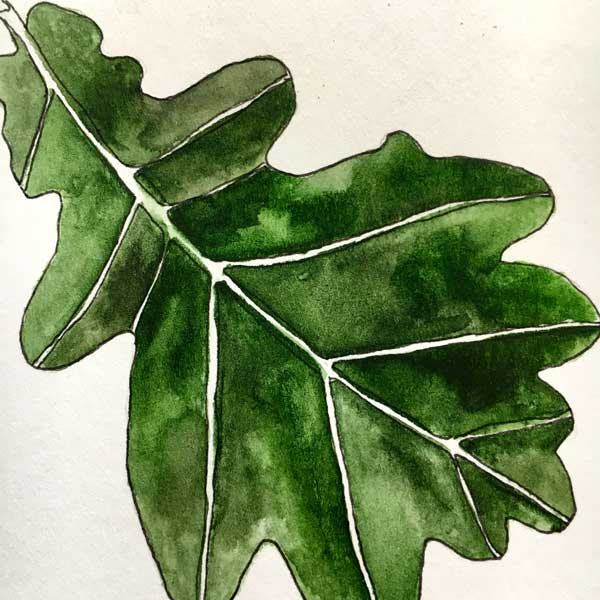
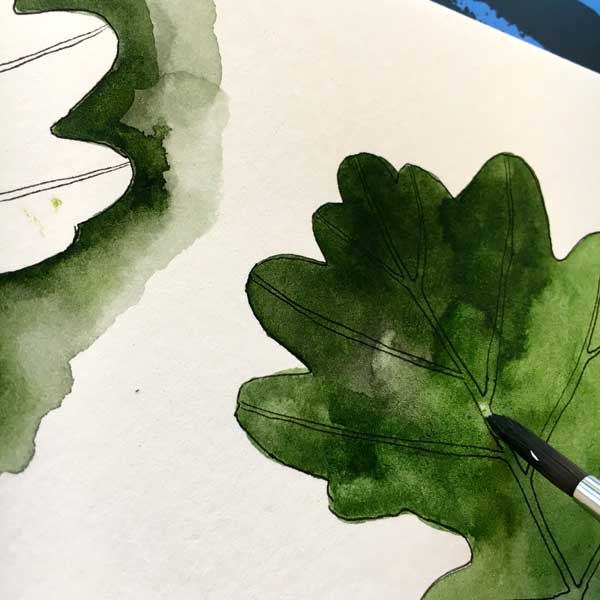
1. LEAVE THE WHITE OF THE PAPER BY PAINTING AROUND IT

I have drawn some leaves to use for our experimenting. In this first example, I leave the veins of the leaf white by using a fine brush to paint around them. This method is very effective and you have a lot of control but it is very time consuming and tedious.

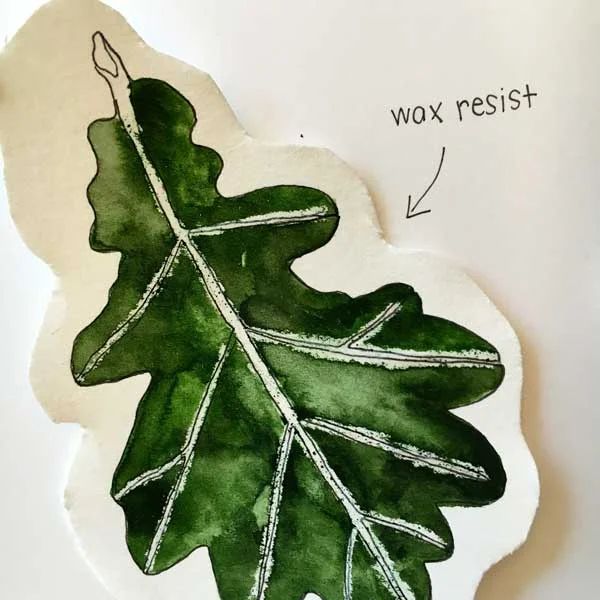
2. THE WAX RESIST METHOD

I did a more elaborate post about this technique here if you want to get more details but you simply lay down some wax where you want to preserve the white of the paper and then paint right over it. The wax will resist the paint. I used a birthday candle because that is what I have lying around but crayons are great too. I think the art supply store carries really thin wax if you want something smaller for more fine lines.

You can go ahead and just lay that paint down right over the whole thing. See it beading up? The edges are a little messy but it is so much faster than painting around the veins. It really just depends on the look you are going for. The wax can be removed if you want to place the painting on a brown paper grocery bag and run an iron over the back of it. Try experimenting on something you are not that invested in to see what works.
3. MASKING FLUID
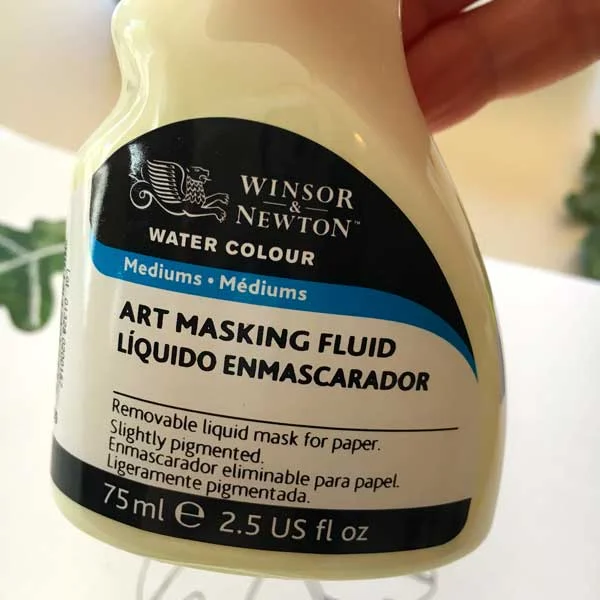
You can buy masking fluid at any art supply store. It is a liquid that you paint onto the white you wish to preserve. Let the masking fluid dry, paint over it, then peel it off once your paint is dry.

You may want to designate a special brush for this. The masking fluid can be hard on your brushes. See how it appears slightly yellow so you can see it when you lay it down?

Paint right over the masking fluid once it is dry. Next let your paint dry then peel off the masking fluid.


I just grabbed a thick part and pulled and it came right up.

Here it is after the masking fluid has been peeled off. Nice neat lines. This is great for really detailed work.
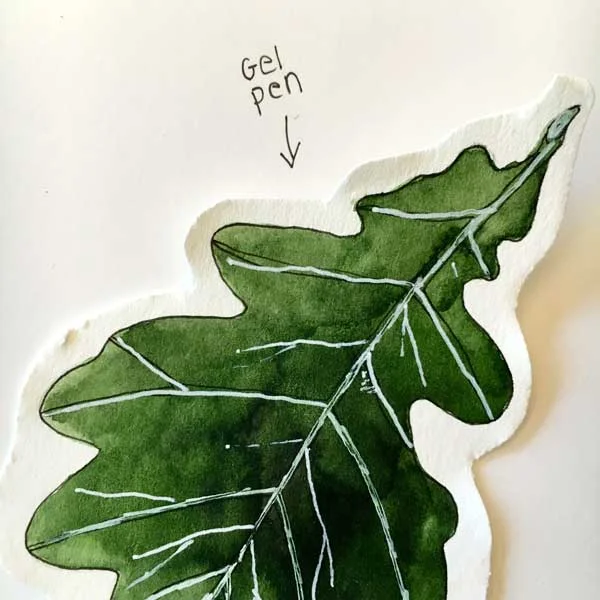
4. GEL PEN
In this method, you paint your entire leaf and add the gel pen at the end. You want to add this step last since, if you try to paint over it, it disappears! It is not permanent which is great if you make a mistake. I am using a sakura gel pen. There are probably other white pens that would be permanent if you would prefer that.

5. GOUACHE
This method is similar to the gel pen in that you paint your leaf first, then add your gouache after you paint. It can be watered down for a more transparent look or more concentrated for a more opaque look.


6. GESSO

Gesso is a glaze which can add a nice hazy effect. Isn't that dreamy? Once gesso is dry you can work over it, unlike with the gouache and gel pen.

7. REMOVAL
In this method, you lay down you paint first. When the paint is partially dry, you use a damp brush to pick up some of the paint and expose the white underneath. It is a nice subtle effect.

This technique is more effective with certain colors than others (Non-staining colors vs. staining colors) so just experiment and see what appeals to you.

8. CONTRAST
The last method brings us full circle back to the beginning. If you want to really emphasize white, paint around the contour to make you object pop and become the focal point of your painting.

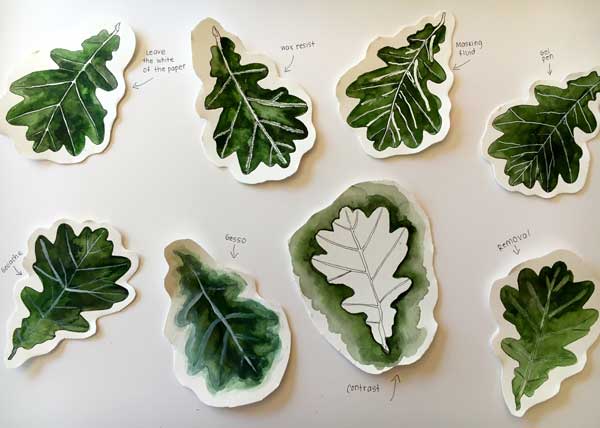
Here are all the methods lined up together for a compare and contrast.
Well I sincerely hope you had fun experimenting with some different ways to use white in watercolor! Happy experimenting!
Warmly,
Pam