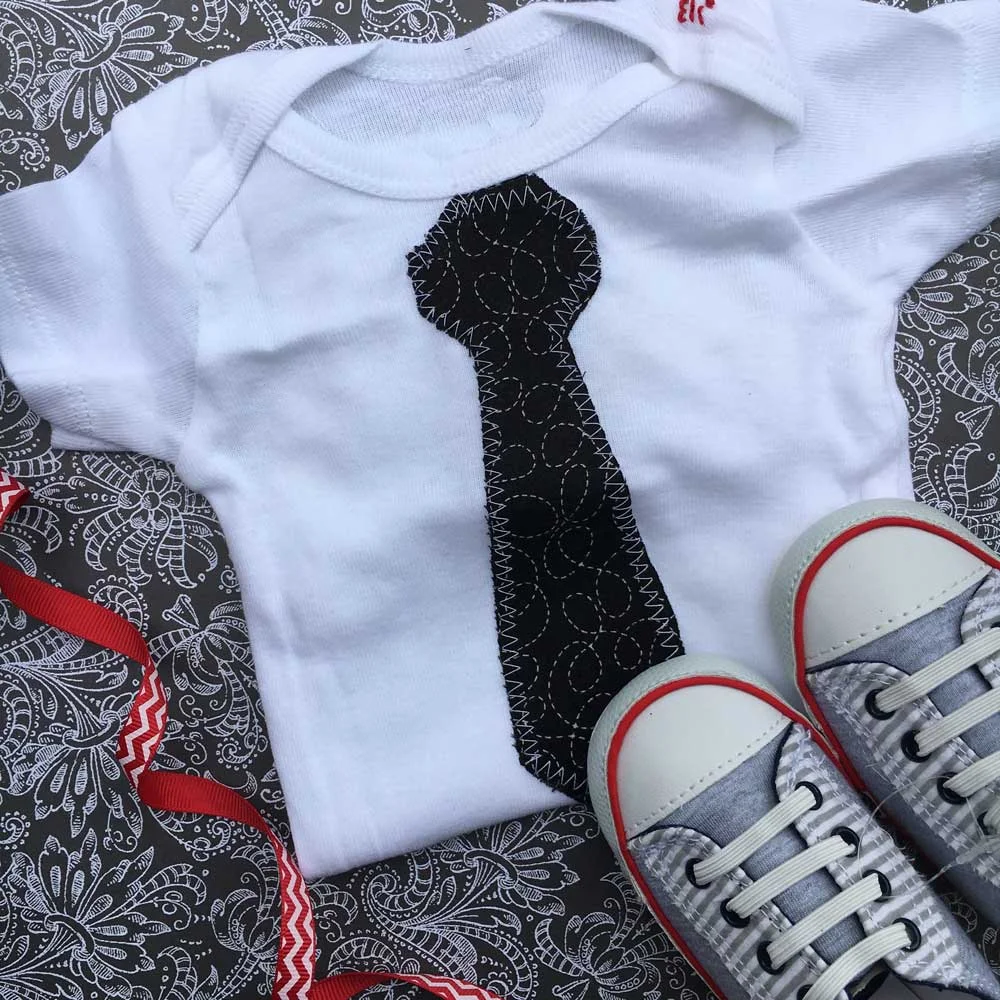
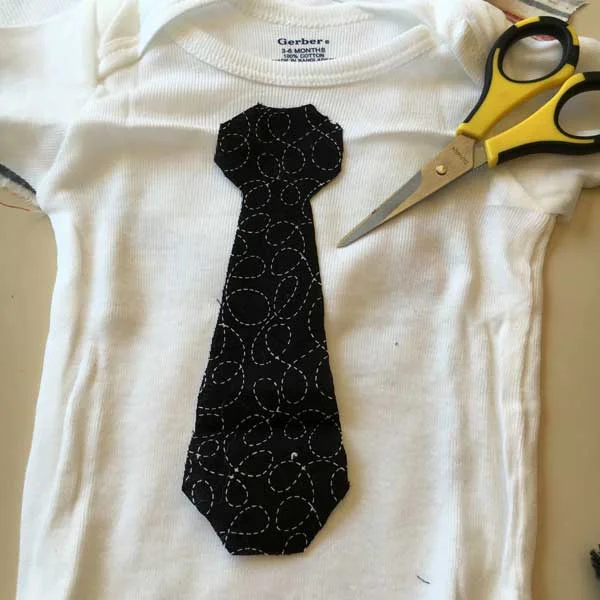
I'm not sure if it's just me but there seems to be a lot of baby boys. Every time I turn around, there is another baby boy being born. I love to send baby gifts to celebrate this incredibly special time. I can remember receiving packages in the mail and how each one meant so much to me. I love the opportunity to do that for someone else. I have a great go-to gift for baby boys and as luck would have it, I know just the perfect baby to give it to. It is inexpensive and simple to make. You have probably seen these trending before. It is the onesie tie shirt! While you can save yourself time and just buy one of these, people seem to really be touched by the effort that goes into something handmade and this is really simple and fun. You can make a bunch all at once and even personalize them if you like. Let's get started;

Start by gathering up all your supplies. First you want to pick out a onesie. Think about when the baby was born and buy your onesie based on the appropriate season. For instance, the baby I am making this for was born 1 month ago. I like to make 3-6 month or 6-12 so that they will not grow out of it too so quickly. In 3-6 months it will be summertime so I chose the short sleeved 3-6 month. They also make long sleeved onesies in case you are making one for the colder weather.
You will also need some cotton fabric. You don't need a lot. Just enough to make the tie so if you already have scraps you can use those but if not, cotton fabric is not too expensive (especially for the small amount you will need.) I have sketched a template for you to print onto card stock and cut out.

Click HERE to get your free PDF printable.
You will also need something called heat and bond.
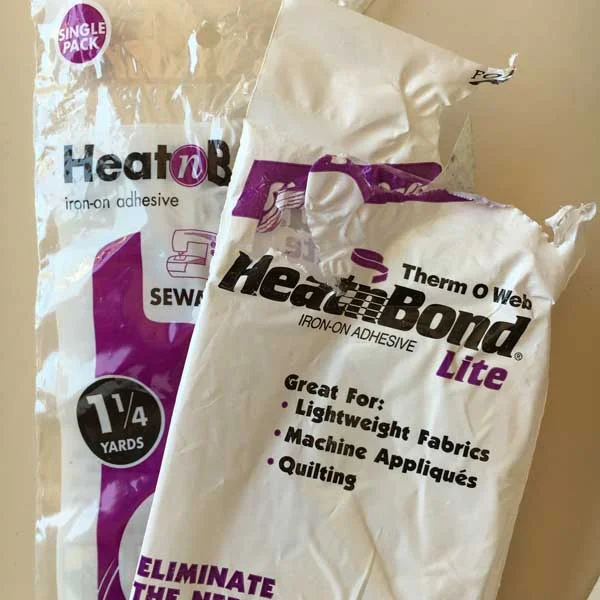
This is an iron on adhesive which you will iron onto the back of your fabric tie and then you will be able to adhere the tie to the onesie. Here is an example of what you are looking for on Amazon but these can also easily be found in your local craft and/or fabric store. This will eliminate the need to sew the tie but I always add a decorative stitch to finish the look. You will also need an iron to use with the heat and bond.
STEP 1. Print out your tie template onto a heavyweight piece of paper (card stock). You will use this to trace a tie shape onto your fabric and then, using a sharp pair of scissors, you will cut the fabric on the line your drew.
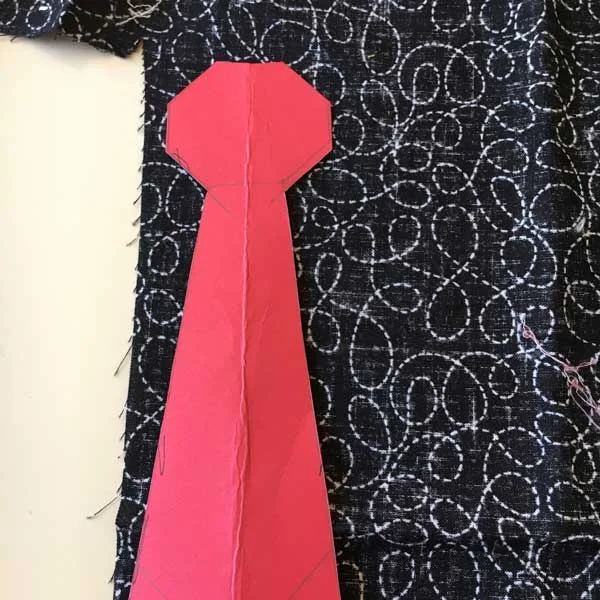
Here is my piece of card stock, all cut out. You may choose to pin the fabric onto your template to keep it from slipping while tracing it but I just winged it. There are special markers you can buy in which the ink will disappear or wash off but I used a white pencil on the black fabric. You can use what you have at home but just be careful about markers that might bleed through the fabric. I have used pens, mechanical pencils, and whatever is within reach!
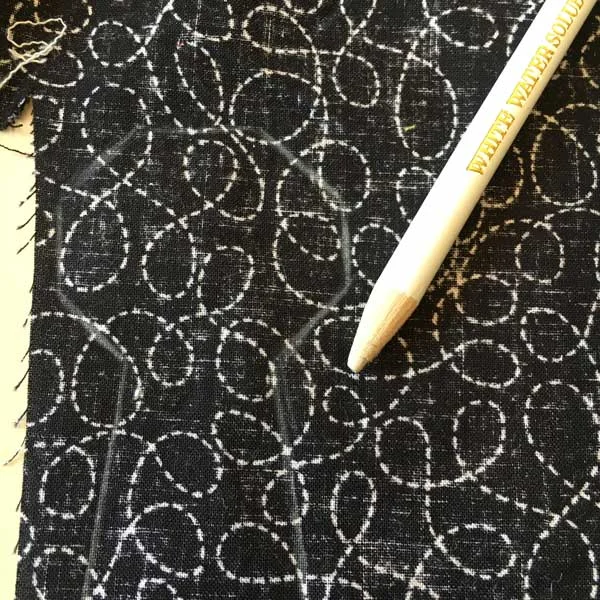
I know this is a little hard to see but I have traced the template onto the fabric in white. Next I will get a nice sharp pair of scissors and carefully cut out the tie shape.
STEP 2: Now get your heat and bond, iron, and scissors.
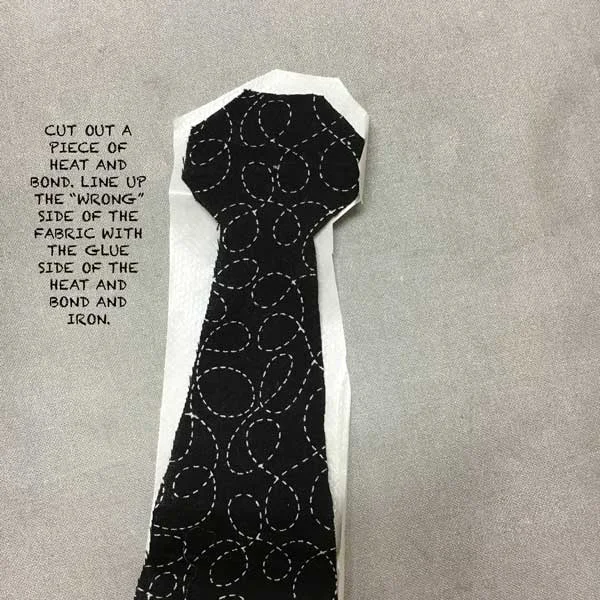
Cut out a piece of the heat and bond that is a little bigger than your tie. The heat and bond has a paper side and a side that has the glue. You will want to bond the "wrong" side of the fabric (the side that is more dull) with the glue side of the heat and bond and then iron it. Be sure to follow the instructions on the package. I have a little tip for you here. Since your bond cut out is a little bigger than the fabric, you will want to put something in between the tie and the iron or otherwise some of the glue will melt onto your iron. I have used rags or even a paper towel but you have to be really careful with a paper towel so it will not burn. You could trace the exact shape onto the heat and bond but I when I have done that in the past, the glue doesn't always go all the way to the edges so I like to leave a little overhang just to be sure.
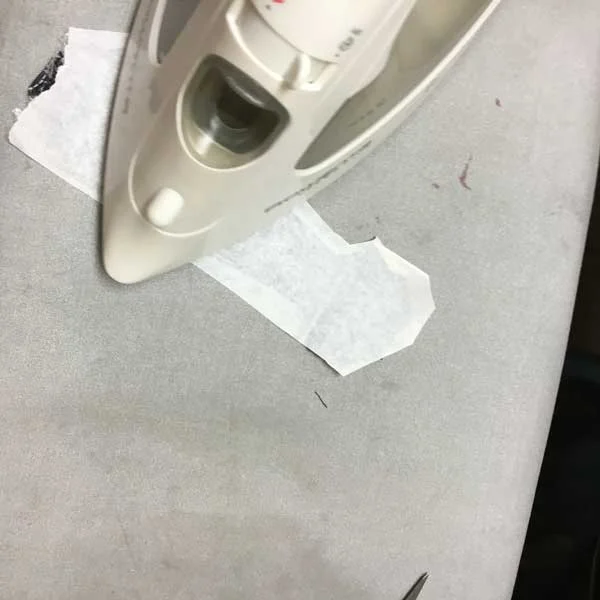
I flipped mine over and ironed it.
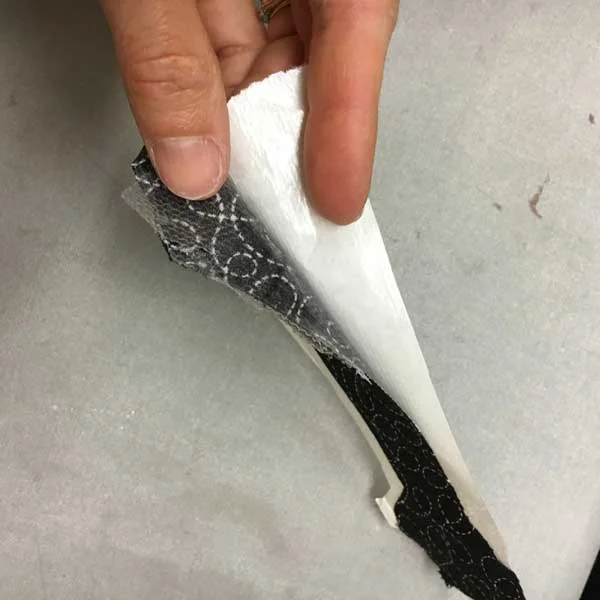
Peel off the paper backing and you can see that the glue has now adhered to the tie.
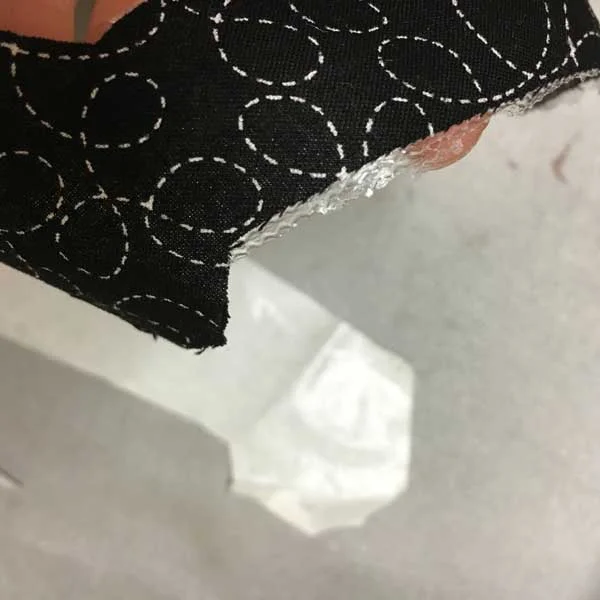
I trim any excess glue before ironing the tie onto the onesie so that it will not melt onto the iron.
STEP 3: Position your tie on the onesie and when you are satisfied, iron it into place.
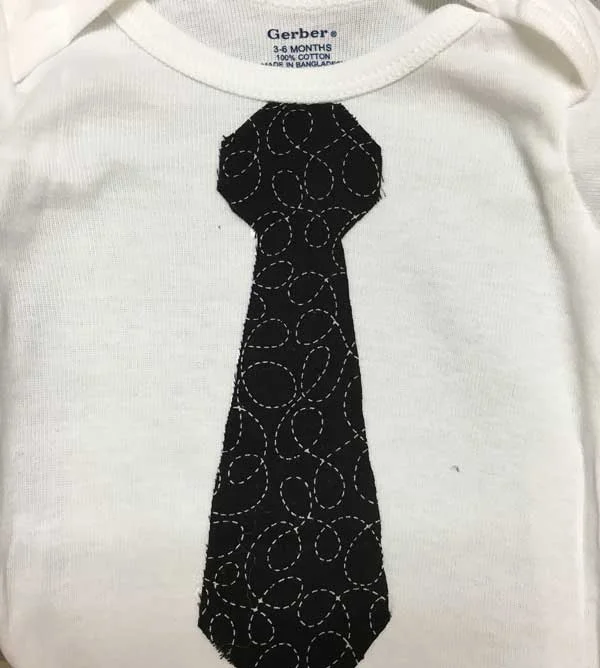
I first iron my onesie flat and then play around with the tie until I have it where I want it. Then I get my iron and run it over the tie several times until the adhesive has melted and bonded.

STEP 4: Now that you have adhered the tie to the onesie, you can really just stop here. The tie will stay in place with the glue but I like to add some stitching around the edges for a more finished look.
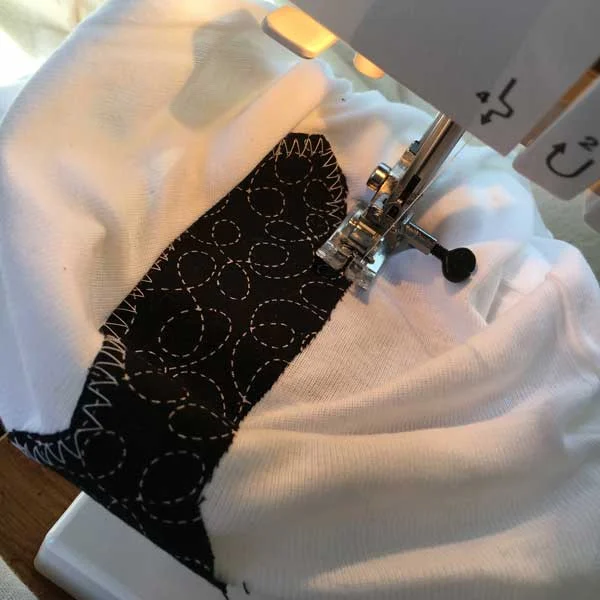
I used a zigzag stitch on my sewing machine and very slowly and carefully stitched around the edges.
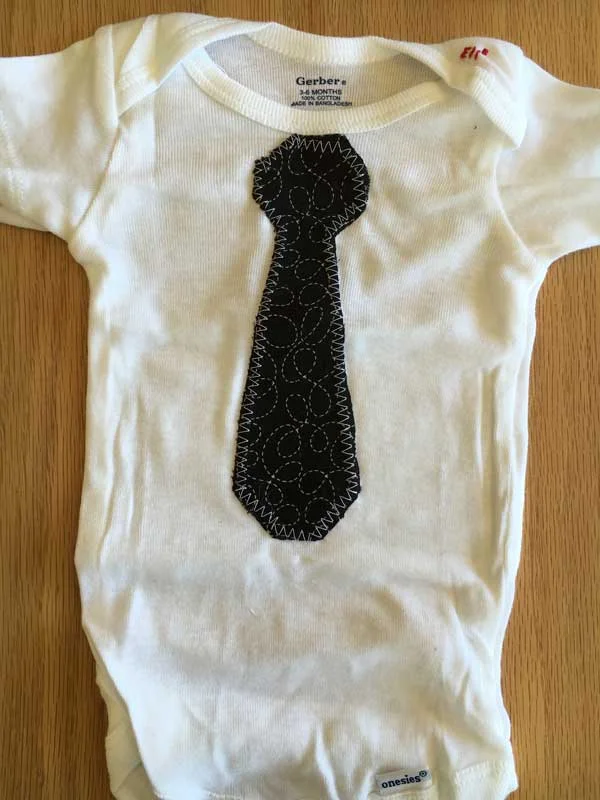
There you have it. I embroidered his name in the upper right corner to personalize it. I simply wrote the name lightly in pencil and then embroidered over it. I like the home-made-y imperfect quality of it. It is what makes the shirt special. I always joke "there is love in every stitch" but there is truth to that. People feel the love the you put into it and all it's perfect imperfections!
This is an adorable little gift on its own but feel free to get a few embellishments to complement your creation.
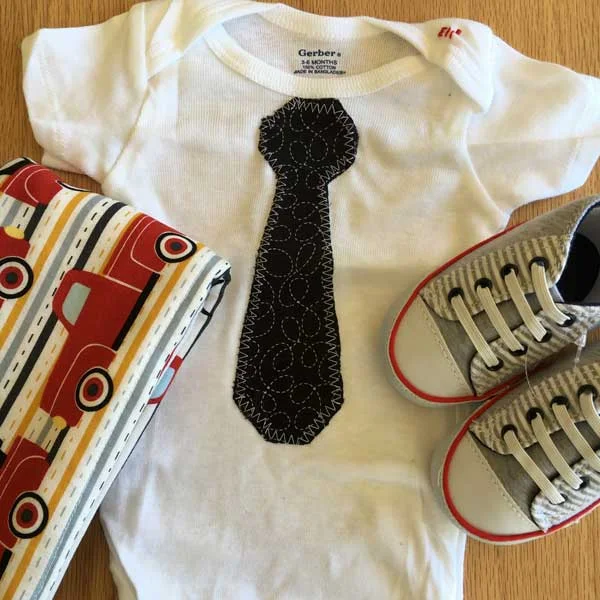
I found some super cute little shoes to go with it. I also made some burp cloths to bring the whole look together. I will show you how to make those in the next blog post. What is so great about these shirts is you can pick whatever fabric you like and coordinate the shirt to pants, a special blankie, or whatever else you can dream up. Stripes are a great fabric choice for these ties, too!
Hope you have as much fun making this as giving it to that special someone at a very special time!
Warmly,
Pam