My favorite medium for artwork is watercolor but a close second is embroidery. It is so much fun to combine these together.
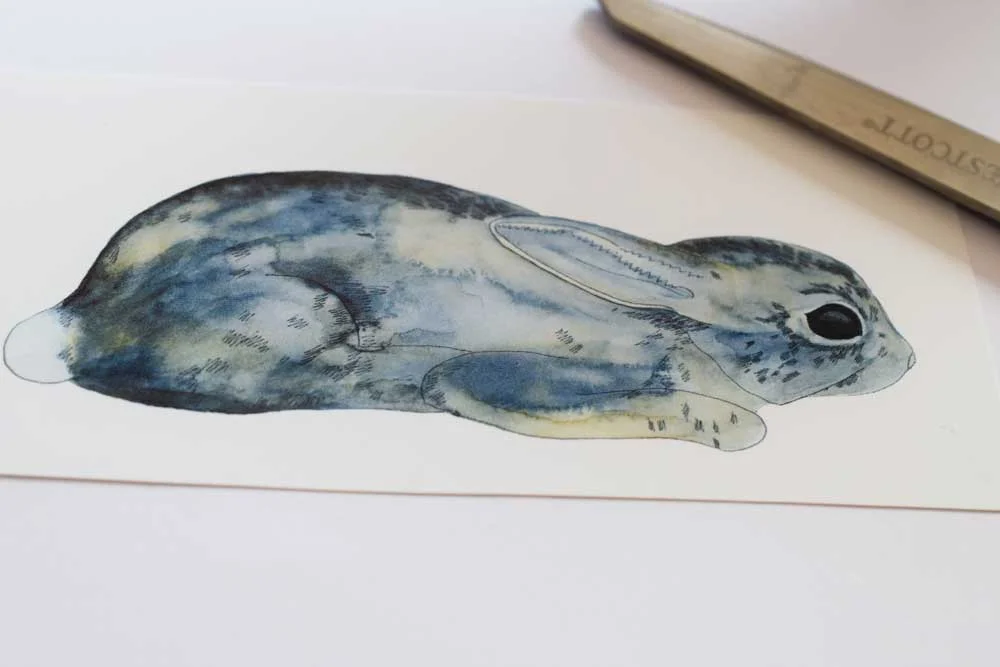
Today I thought I would show you a very simple beginning embroidery stitch called the running stitch. It is pretty easy and a very practical stitch. I have included a free printable watercolor bunny to practice your new found skill!
So let's get started:
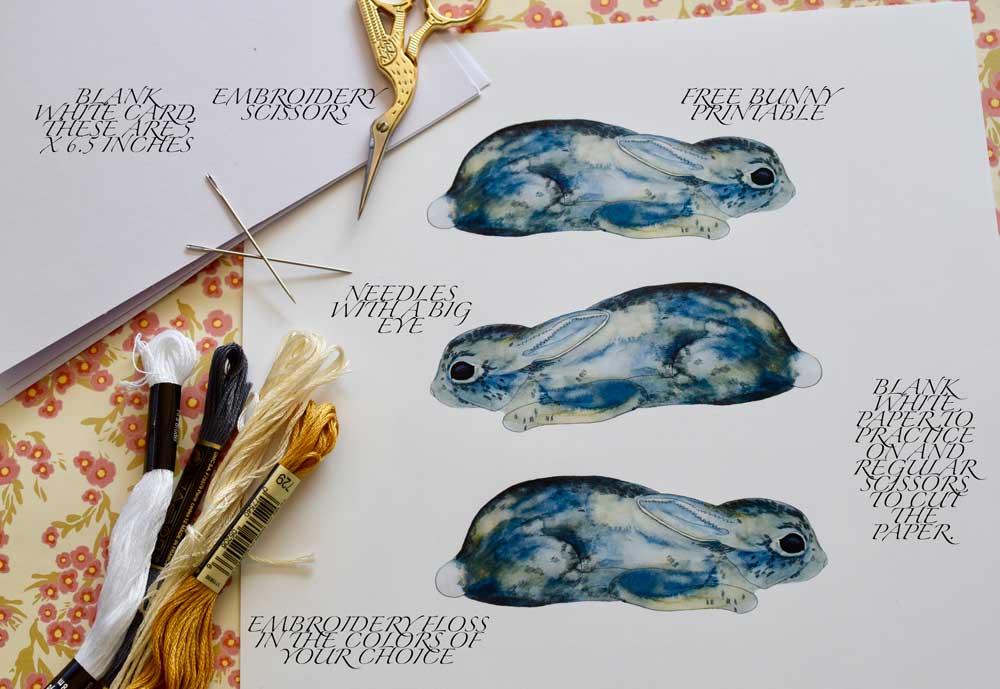
Here are the supplies you will need to get started.
1. You will need a needle with a decent sized eye that will be sharp enough to go through card stock. A sharp ended embroidery needle size 8-9 would work well or you could go with a thicker tapestry needle but the holes you make will be bigger. I find the tapestry needles easier to use because they are more dull, thus less of a chance to stab myself.
2. A practice sheet of paper on which to learn your stitch. I used a 90lb mixed media paper. If your paper is too thin, you will rip the stitches so be sure to use at least a 90lb paper.
3. Embroidery floss in the color of your choice. I used pastels such as rose and light blue for spring and shades of greens for grass. I included a color chart on the printable in case you want to give your bunny some fur.
4. A blank notecard on which to sew your bunny once it is cut out. The bunny fits perfectly on a 5 x 6.5 inch notecard. Not only do these make really cute spring/Easter cards but they would be great as place setting cards too.
5. Scissors (One pair to cut your embroidery floss and another for cutting out your bunnies.)
6. *Optional - A sewing pin or safety pin to pre-poke holes.
7. *Optional - Double sided or scotch tape rolled into a circle to secure the bunny to the card while you are sewing.
8. Lastly, you will need your FREE BUNNY PRINTABLE to practice on.
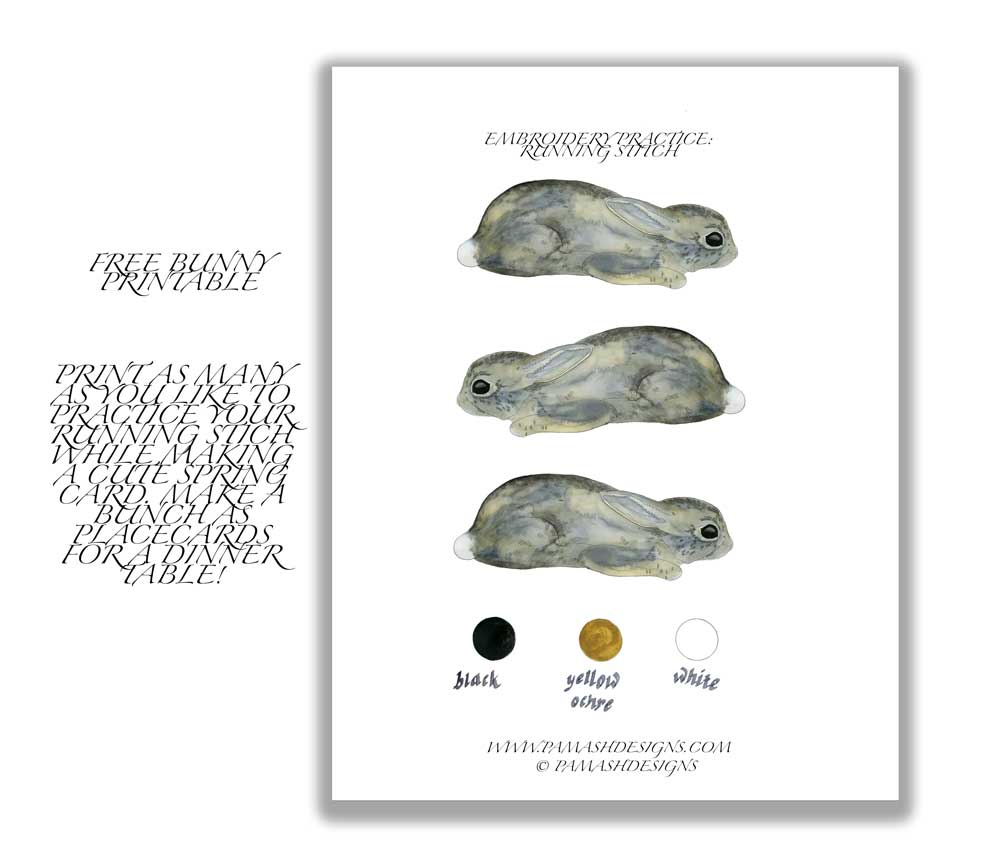
Click HERE to get your free printable.

Start by getting your blank piece of paper and your pin of choice (You can even just use the sewing needle to pre-poke holes).
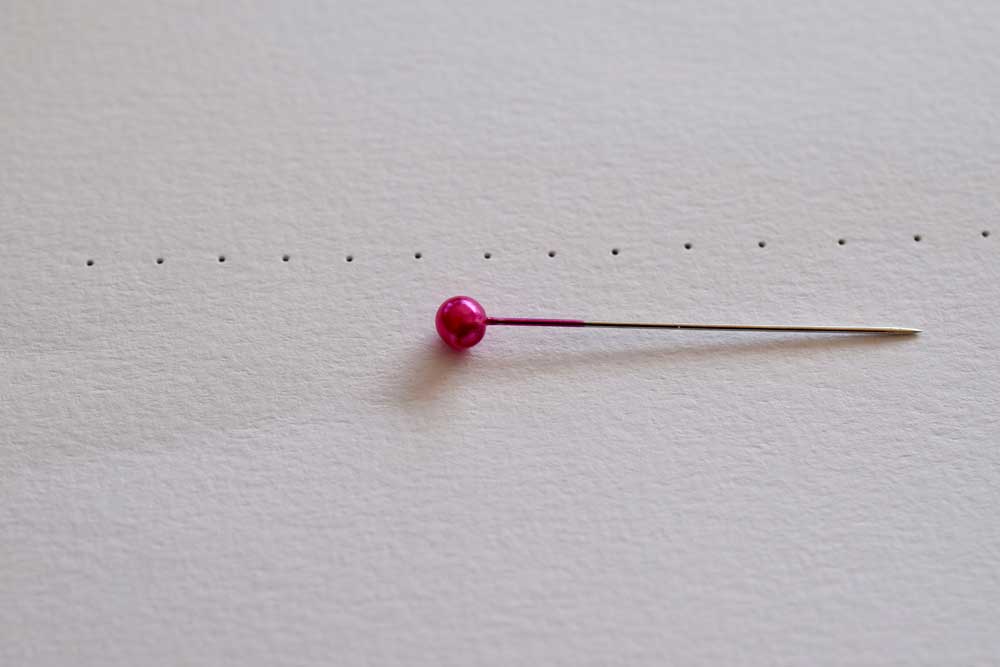
Poke a series of holes in a straight line across the paper. You could use a ruler to make the line and then measure out the dots but I just eyeballed it. I always like the slight imperfection and spontaneity of a home made look. I poked about 22 holes to start out.

Now get your floss and cut a piece that is about 18 inches. I wanted to show you a close up of the floss. It comes with six strands. For this example I use all six which is why you will want a nice sized eye on your needle. For finer work, you can split the thread and use three strands or even two at a time.
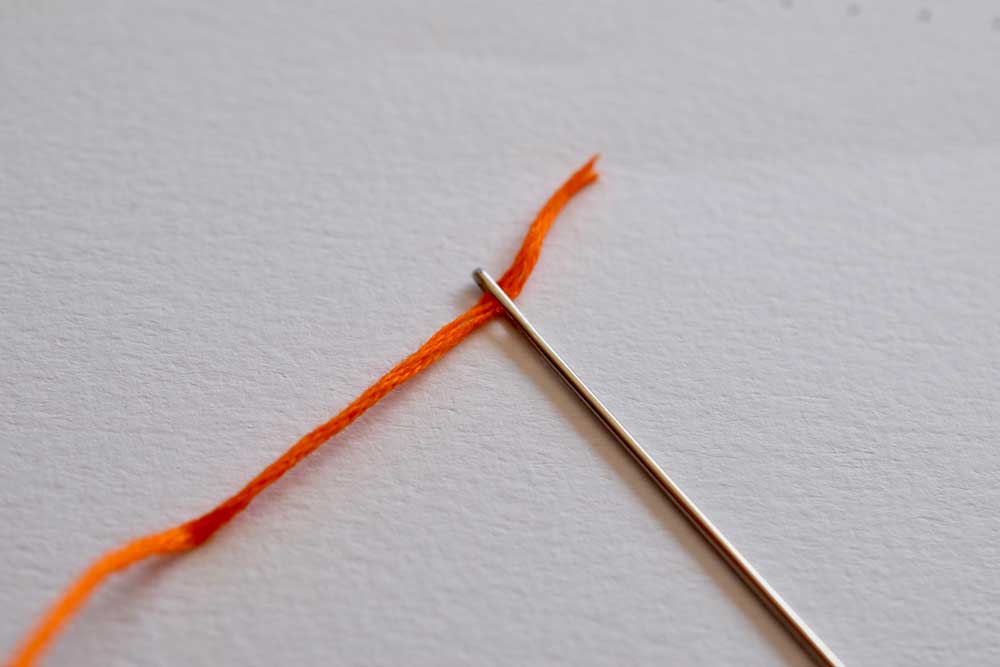
Take your floss and thread it through the eye of the needle.

On the other end of the floss, tie a knot. Then make another knot over the knot you just made. Sometimes it takes a couple of tries but you'll get the feel of it.

Bring the needle up through the back of the paper to the front through the first hole.

Continue to pull the needle through until the knot catches at the back.

Here is the view from the back.

Bring your needle back down in the hole just to the right of the first one and pull it all the way through to the back.

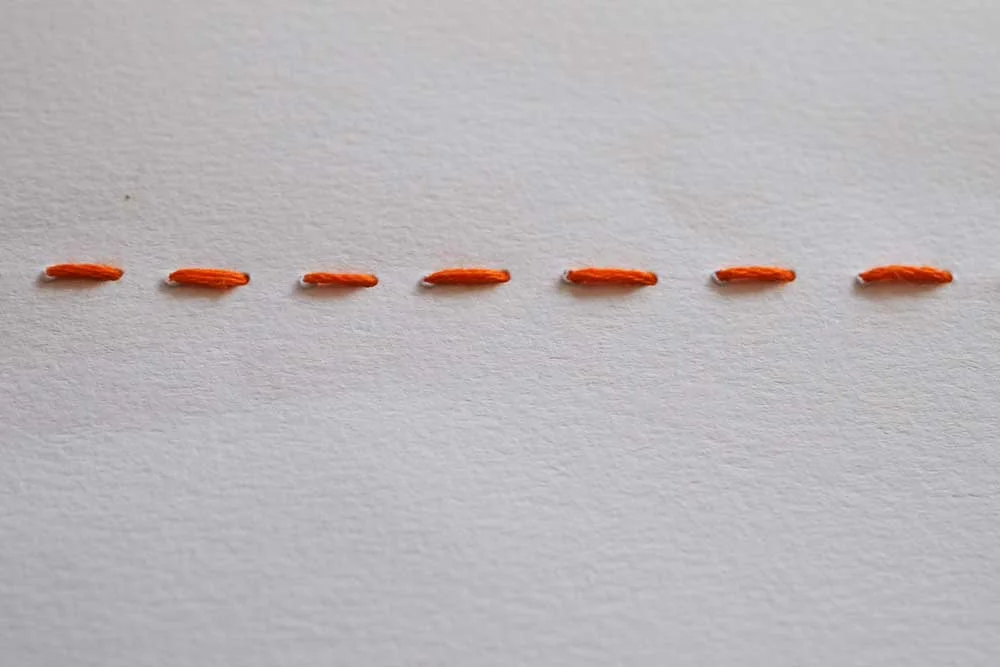
This is what it should look like on the front of the paper. The next step is to pull the needle up from the back through the next hole.

Pull the needle all the way through and then repeat the process on the next hole.

This is the running stitch! Pretty simple. Now you just need to knot off the end to secure it.

You want to end your stitch on the back of the piece of paper. On the last stitch run the needle under one of the prior stitches then through the loop you made to secure a knot. You can make a couple of knots to tighten it if you need to.

Once you have your knots secured, get your embroidery scissors and snip off the remainder.

Now that you have practiced the running stitch, let's put it to use!
Print your bunny page. I love to print these on photo matte presentation paper but cardstock works fine too. Cut squares around the bunny.

Poke holes around the edge of the square using your pin.

Center your bunny onto your blank notecard. It can be really helpful to secure the bunny to the card using double sided tape to keep it centered while you are sewing.

Now that you have secured your bunny to the card, you may use your pin to poke holes through the card through the ones you pre-poked around the bunny. Thread and knot your needle. Bring your needle up from the back of the card to the front through the first hole (I started in the far left corner, as pictured above).

Once you have gone all the way around, knot off the end then trim the remainder.

A simple sweet card.

You can experiment with different colored thread and different colored cards. Here I tried a pure white card and blue floss.

If you are really feeling adventurous, try using the running stitch to attach a piece of scrapbook paper to your card then use the stitch again to attach your bunny on top of that for an added decorative element.

Now if you are really feeling wild and crazy, get spontaneous and add your own touches like grass or flowers.

I made a key on the printable for the fur colors in case you want to give that a try.
If you enjoyed this project, I have dozens of different themed printables at my shop HERE.
You can learn how to make a french knot using a free ice cream cone printable HERE.
Thanks for stopping by. Hope you have a ball making these. Happy Spring!!!
Warmly,
Pam