Today I am excited to introduce you to a new stitch that I'm pretty excited about. I just learned it myself so I invite you to learn it along with me. This stitch is called the woven wheel stitch. It's name aptly describes this stitch. It is basically a circle of weaved thread but it is used quite frequently as a rose in floral embroidery. It looks like it would be hard but I think you will find it deceptively easy and more than a little addictive once you get the hang of it.
Since I have just learned the stitch myself, I have encountered a few pitfalls along the way which I am glad I can share with you while they are fresh in my mind so you can avoid these rookie mistakes!
First let's gather a few supplies:

You will need:
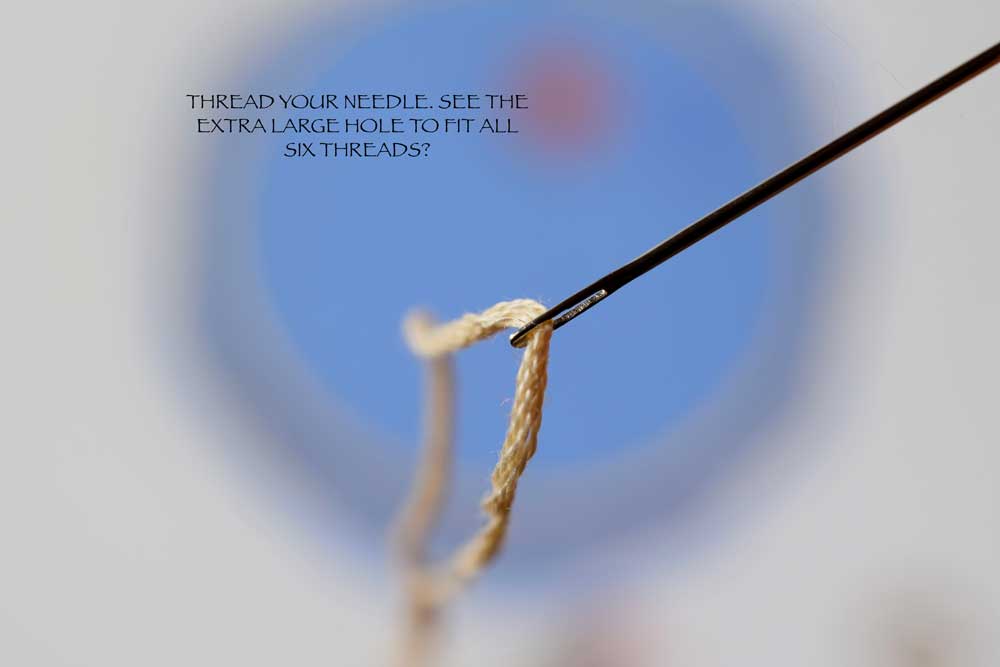
A NEEDLE - Make sure to choose a needle with a large eye that can fit multiple threads. For this stitch you will be using all six strands of thread. *Optional - TAPESTRY NEEDLE -You may want to change to a tapestry needle when you start the weaving part of the stitch. The tapestry needle is very blunt so that you will not snag the threads as you weave.
SCISSORS - For snipping threads
COTTON FABRIC FITTED IN A WOOD EMBROIDERY HOOP - It's just for practice so there is no need to be too fussy here. Grab a scrap of cotton fabric and fit it into a hoop. I think I used a 6 inch hoop.
THREAD - I used six stranded cotton thread. For this stitch, all six strands are used. That thickness is what gives the textured look of the weaving.
A SMALL ROUND OBJECT FOR TRACING - I used a quarter and a nickel and they were perfect little rose sizes.
A MARKING PEN - I love the vanishing marking pens. The markings just disappear on their own without you having to rinse the fabric. For practice, though, anything will do such as a sharp lead pencil, white gel pen, or even a ball point pen.
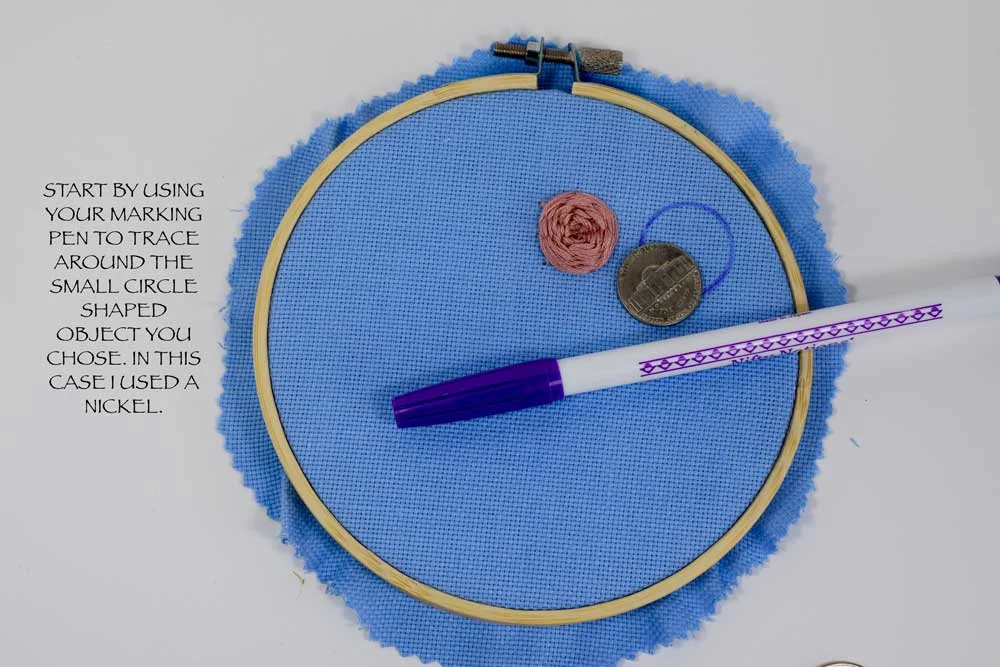

The important part of this step is to make sure that you have an uneven number of lines that join in the center of your circle. The uneven lines allow the thread to alternate (You will see what I mean when you start weaving.) Five is a nice number to start out with. I try to make sure each line is the same size (That is why I thought it would be a good idea to use to circle.) Try to evenly space the lines within the circle. This makes the outcome look nice and neat. When you get the hang of it you can play around freehand style. I think it's always nice to have things a little oddly shaped, like they would be in nature but for learning I think it's good to start out with the circle.


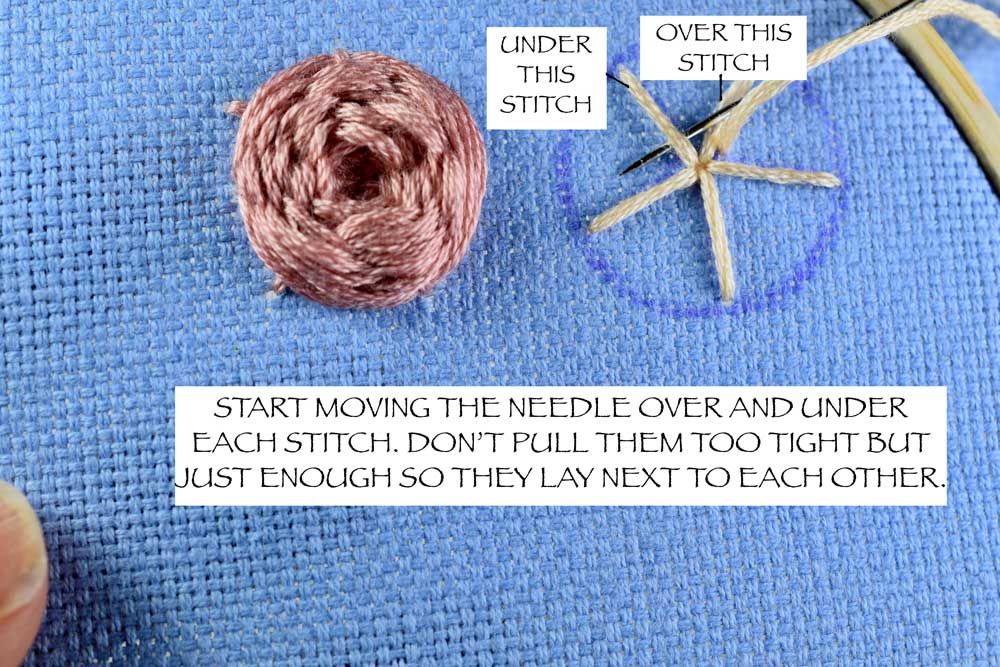
Once you have completed the star, now would be the time to change out your needle to a tapestry needle. I just used the same one because it wasn't that sharp to begin with. I think I was sewing with a tapestry needle all along.

Bring your needle up the center of the star just between two the the 'spokes'. Now you will start weaving the needle over and under each stitch, You can see now why the odd number of spokes are necessary to alternate the weaving pattern.


When you are satisfied with your weaving you can end the same way as you did when you ran out of thread. Bring your needle down at one of the 'unders' and knot.


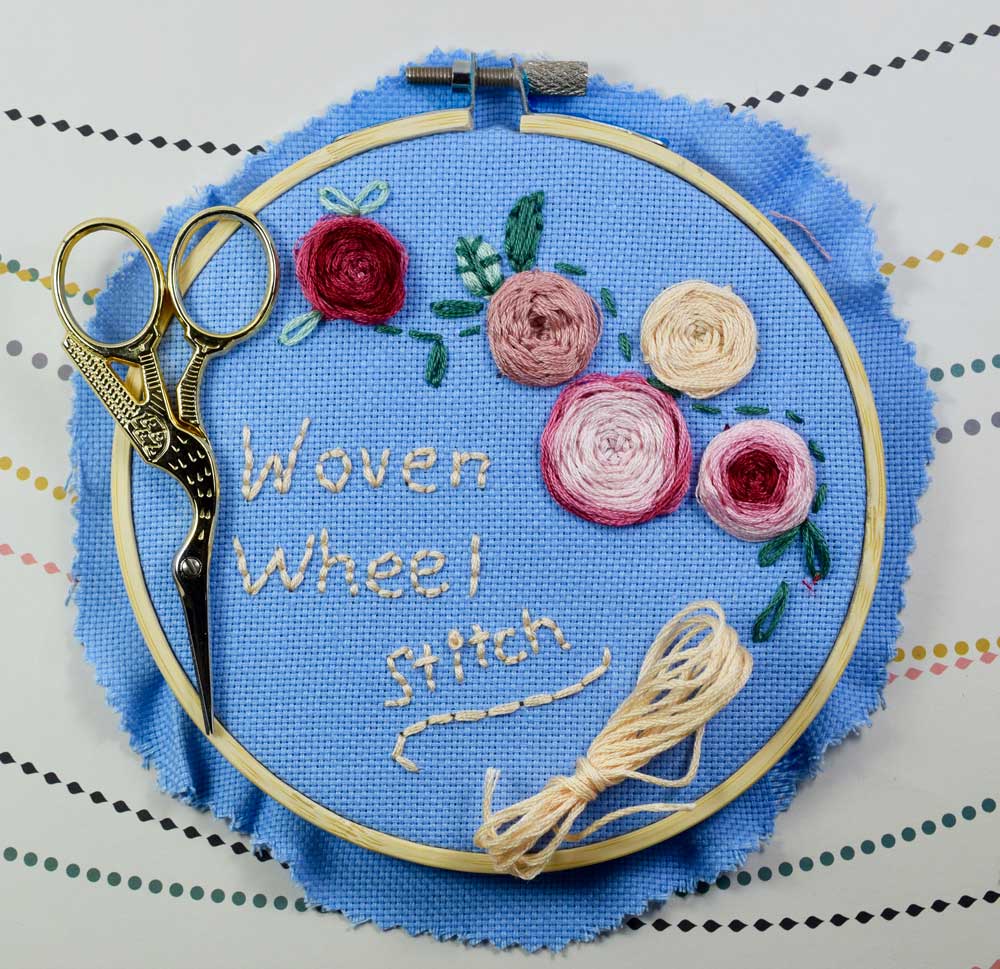
Isn't that fun? I hope you enjoy playing with this stitch as much as I am!
Thanks for stopping by!
Pam