My work has been focused on portraits lately. Part of the process I use in my portrait making is threadpainting which is basically blending threads together in a subtle and gradual way to create a ‘painterly’ look. I thought it might be fun to zero in on threadpainting and take a step-by-step journey through the thought process.
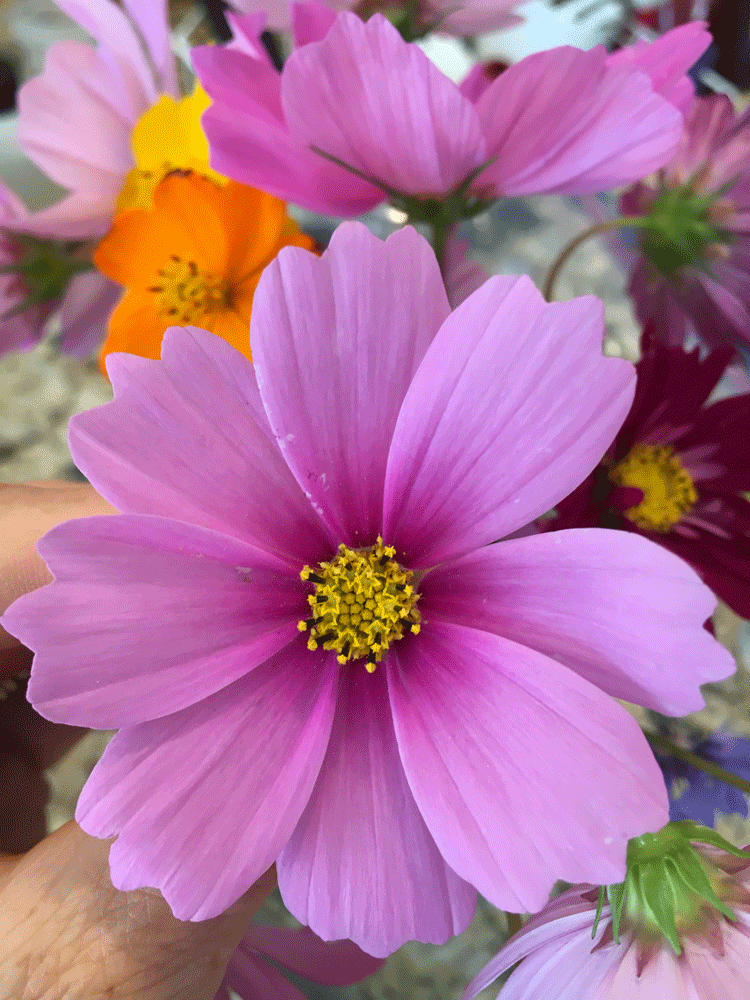
I chose a subject that was a little simpler than a portrait , a flower from my garden.

I tried to choose flowers that had some color gradations and decided on the pink Cosmo on the right. The middle has a darker color which fades to a lighter lavender color. I thought that might lend itself nicely to threadpainting experimentation.
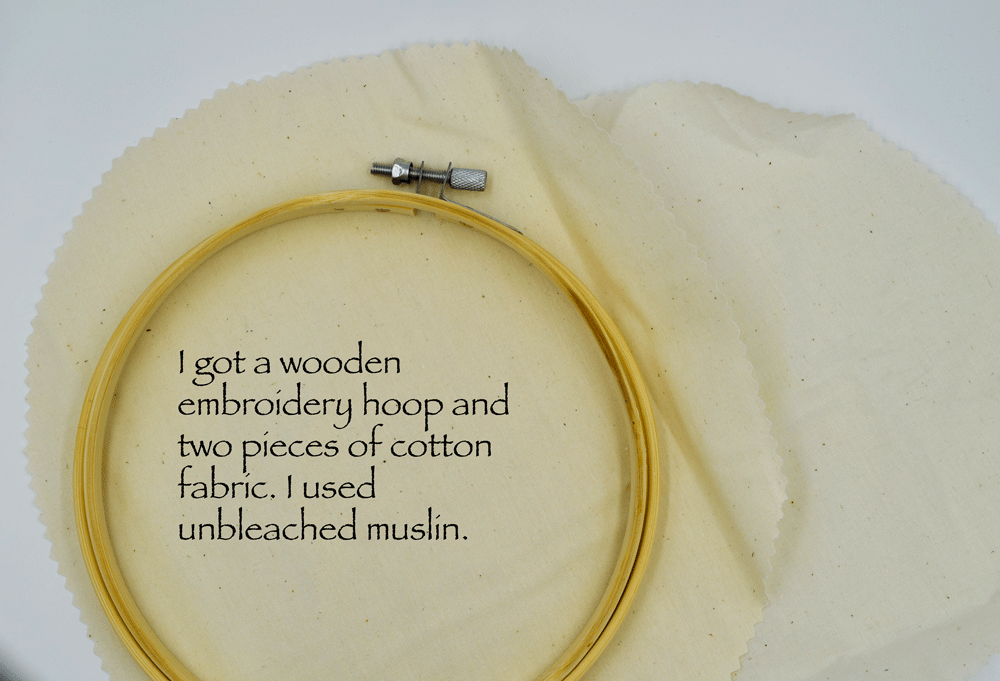
I started by getting a simple wooden embroidery hoop and two pieces of unbleached muslin. I cut two identical sized pieces to overlap the hoop by about an inch. The reason I like to use two pieces of fabric is for stability since cotton muslin can be thin and transparent.
The next step is to transfer the design onto the fabric. I used a mechanical pencil to sketch the outline of the design onto the fabric.
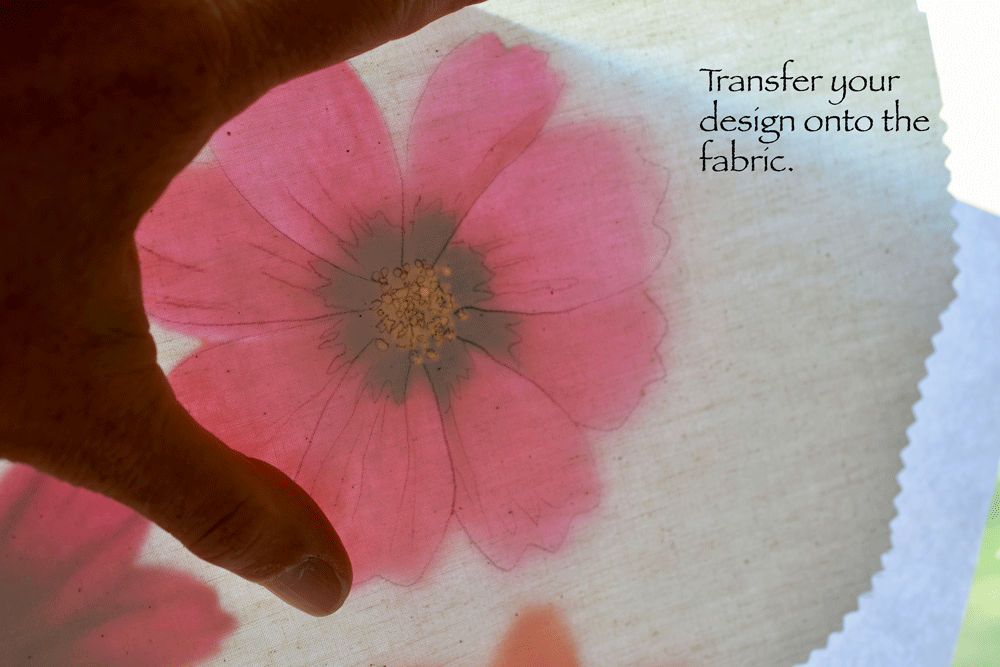
You don’t have to be an artist to sketch your design. An easy way to transfer your design is to place the reference photo on a bright window or light box and put your fabric on top of that to trace it.
Once the design has been transferred onto the fabric, I placed it (and the second piece of fabric beneath it) in my wooden hoop.
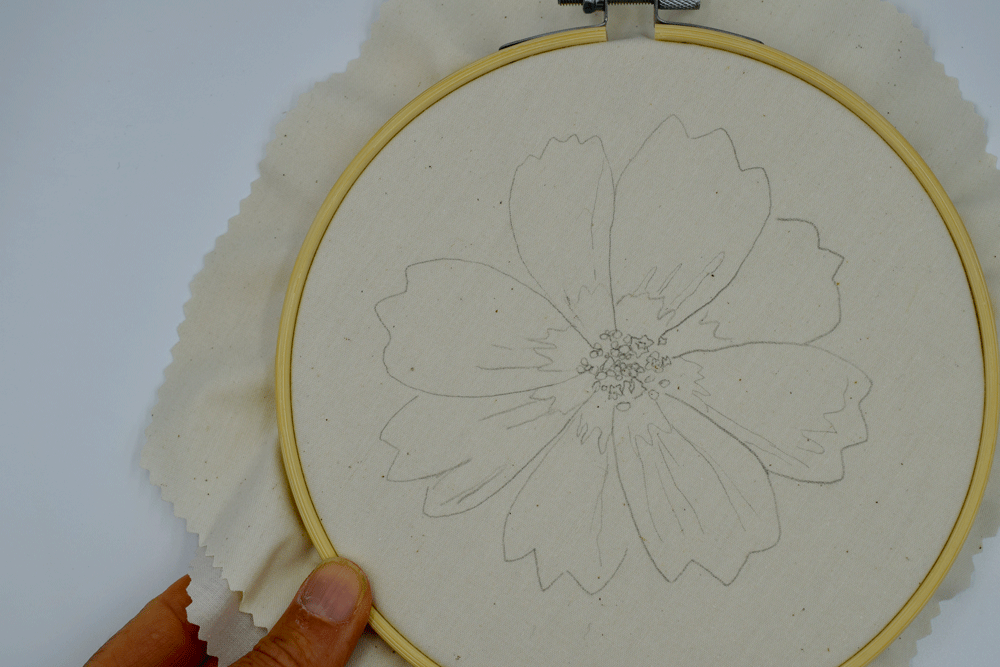
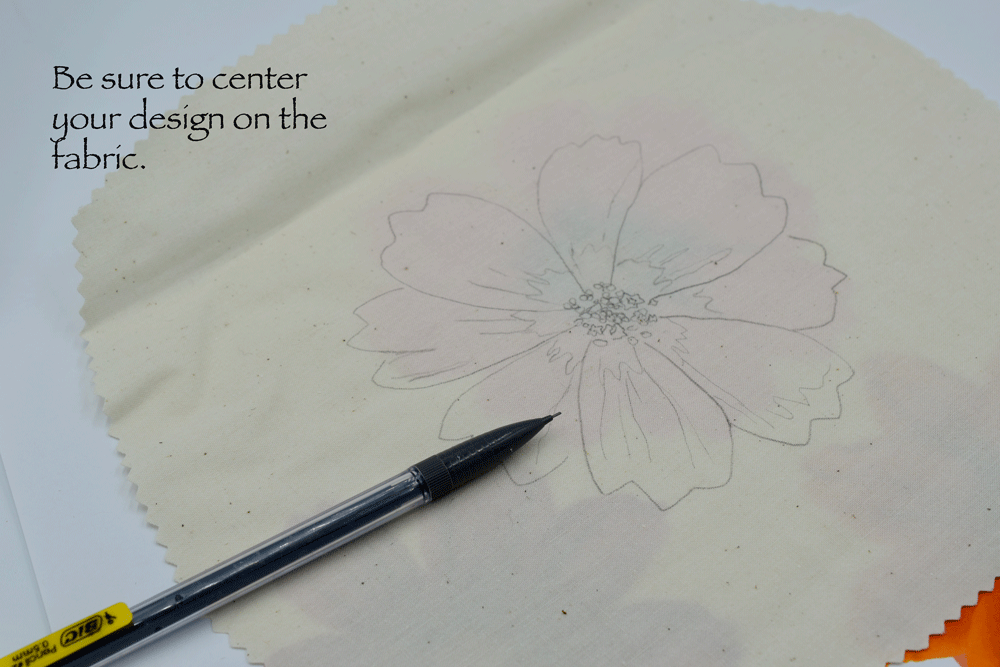
I made sure the flower was centered in the hoop and that the fabric was nice and tight for stitching.

I took some time to observe my reference photo and pick some thread colors to get me started. Often I add more as I go and am always surprised at the end with the handful of colors I never knew were there at the beginning. For thread painting I like to use a single strand of the six stranded cotton embroidery thread. The single thread is more time consuming but the results are so much more detailed.


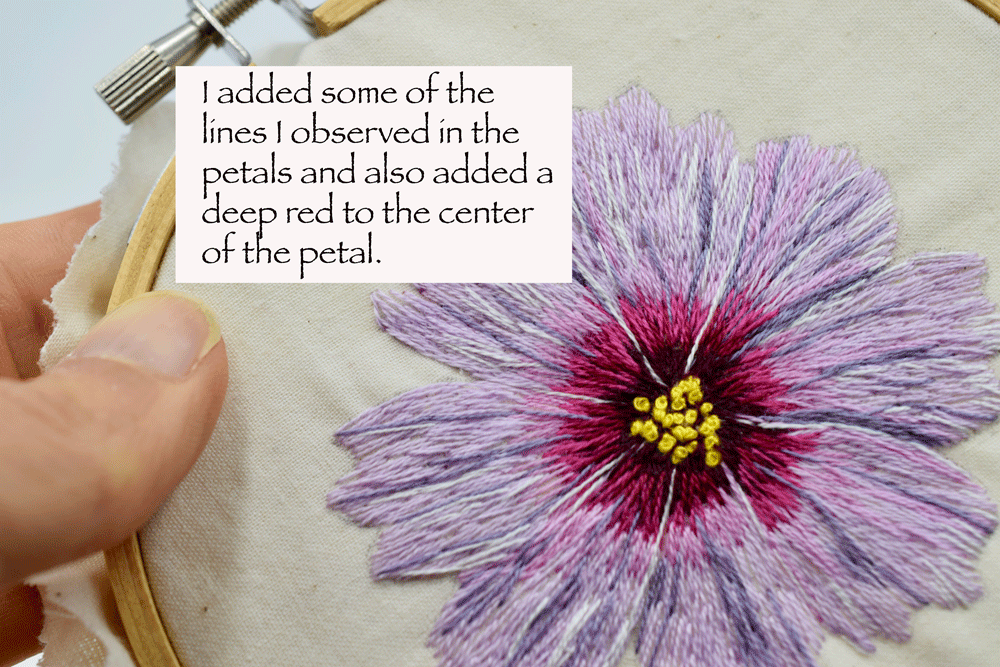
Next I added the pink color using the same technique of varying the stitch length and following the “v” shape. Next came the lavender color. I noticed once I laid down all the colors that I needed an in-between shade of pink for a more subtle gradation.


I like to keep my reference photo in front of me and refer back to it constantly.
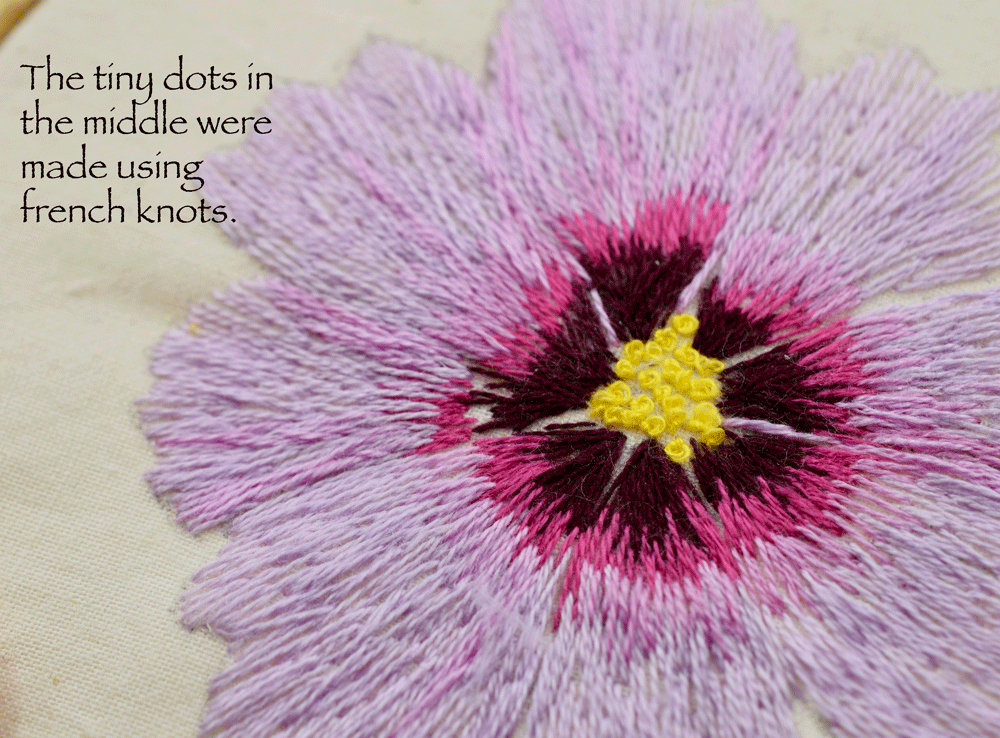

French knot close up.

Once I laid down all the basic colors I took a step back and really observed my reference photo to add some of the finer details.
I often wonder where the proper stopping point is and have a tendency to over-do it.
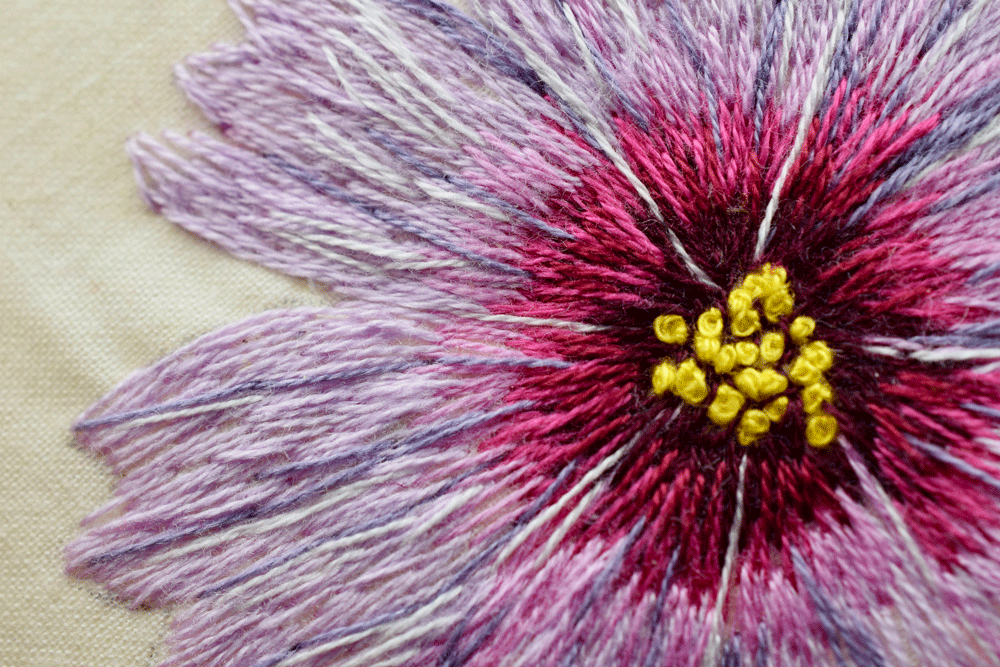
I added lots of layers of subtle color.
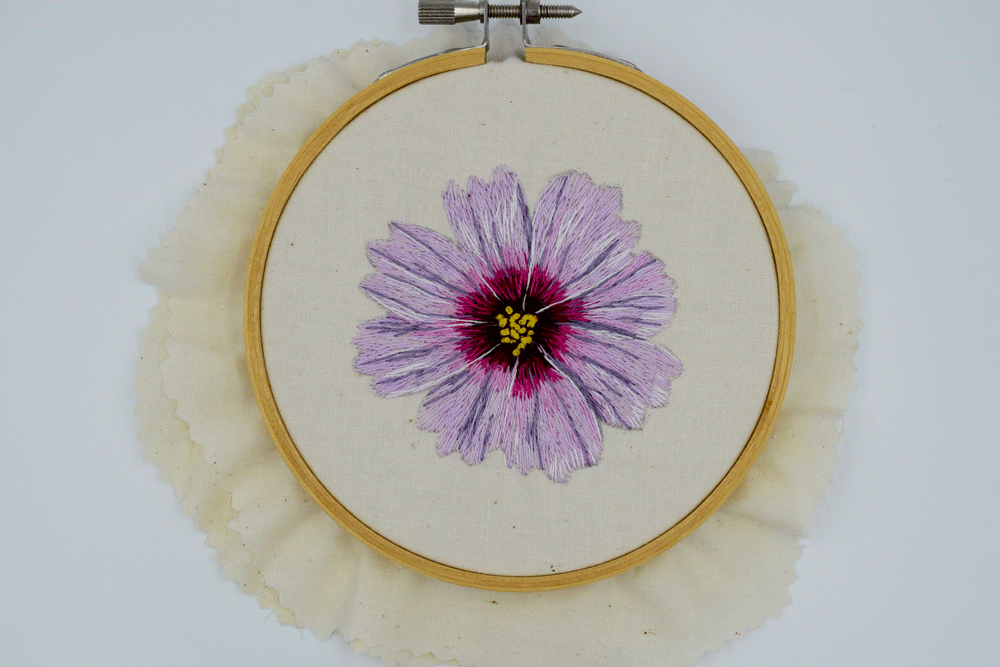
Here is the final result.

Well I truly hope you enjoyed taking the journey through my thought process as I paint in thread. It really is a whole bunch of tiny decisions as I work my way through a piece. I wish I could give you an order or logic (such as dark over light or outside to inside) but I jump where ever my heart and mind take me. I learn so much each time I tackle a project (big or small). I love this medium for it’s slow contemplation and forgiveness! You can stitch over colors and remove stitches so there really are no mistakes.
I thought I would include a PDF file of the flowers in case you would like to give this a try yourself.
Click HERE for a printable PDF version of the flowers.
Thanks for stopping by and following along!!
Warmly,
Pam