I have been very fascinated by needlepainting. Needlepainting is a way of actually using your thread to "paint" an image. The way this is often achieved is by using a hand embroidery stitch called the LONG AND SHORT STITCH. This technique combines long and short stitches, as the name suggests, to create a blended effect with your threads. It is fantastic for filling in large areas of fabric, animal fur, bird feathers, and for areas where there will be a color gradation (a gradual transition from one color to another). Let me show you a simple example:

Start by gathering up a few simple supplies
1. THREAD: Get a few shades of color that are similar. The ones I chose are quite different from each other so that you can see the stitches better but the effect is so subtle and beautiful when the colors are more similar to one another.
2. SCISSORS
3. NEEDLE: An embroidery/crewel needle. I picked a size 10 for this example but size 8 and up and will work great for this.
4. FABRIC: A nice piece of cotton or linen fabric to experiment on.
5. WOOD EMBROIDERY HOOP: A wood hoop to hold your fabric tight while you are working on it.
6. MARKING UTENSIL: I use a vanishing ink marker. A sharp pencil will be great too. You will use this to trace a design onto your fabric to use as a stitch guide.
**Optional: A stencil to use for your design. Totally not necessary, though. You can sketch something freehand if you like.

Use your marking utensil to sketch or trace a simple design. A leaf or feather shape is ideal for this application or even a simple valentine's heart.

I used my marking pen to add some stitch direction lines. This will give me a better idea how to angle my stitches. This is especially handy when working with a curvy shape.

Thread your needle. I like to use an even amount of threads so I can split them in the center when making my stitches. I used two threads for this example. Put one side of the the thread through the eye of the needle and knot the other side.

I like to start in the middle by adding my long stitch then work my way down either side by adding alternating long and short stitches.

Here is the first row completed with long and short stitches. For the next row, you can keep the same color or you can change to your next color. I used the same color for a couple of each of the rows.

To make the second row, bring the needle up through a stitch in the first row at about the top third of the stitch. Try to have the needle come up in the middle of the thread. For instance, if you used four threads, try to make the needle come up in the middle so that there are two threads on each side. Make a stitch about the same size as the stitch you are piercing through. It does not have to be perfect. In fact irregular stitch lengths will make for better blending.

Once you have finished with row two, start row three. Here is where I decided to change colors. You will notice as you stitch back and forth that there are little gaps since the shape increases then decreases in size. You can fill those in with stitches as you go along.

Start to add your third row. If you are using a leaf shape design or oval, you will notice little gaps. Just fill then in as you go along, continuing to make long and short stitches as you go. I have used very contrasting stitches but if you use color that are very similar, the blending effect is much more subtle. This darker contrast becomes more of an ombre effect.
Here is the stitching up close. I am adding a stitch in an area with a gap of space in the picture above.

I have finished making rows with color number two and will now switch to the next color. You can decide the number of rows for each color depending on the effect you are trying to achieve.

I finish the third darker color and I am switching to my final color.

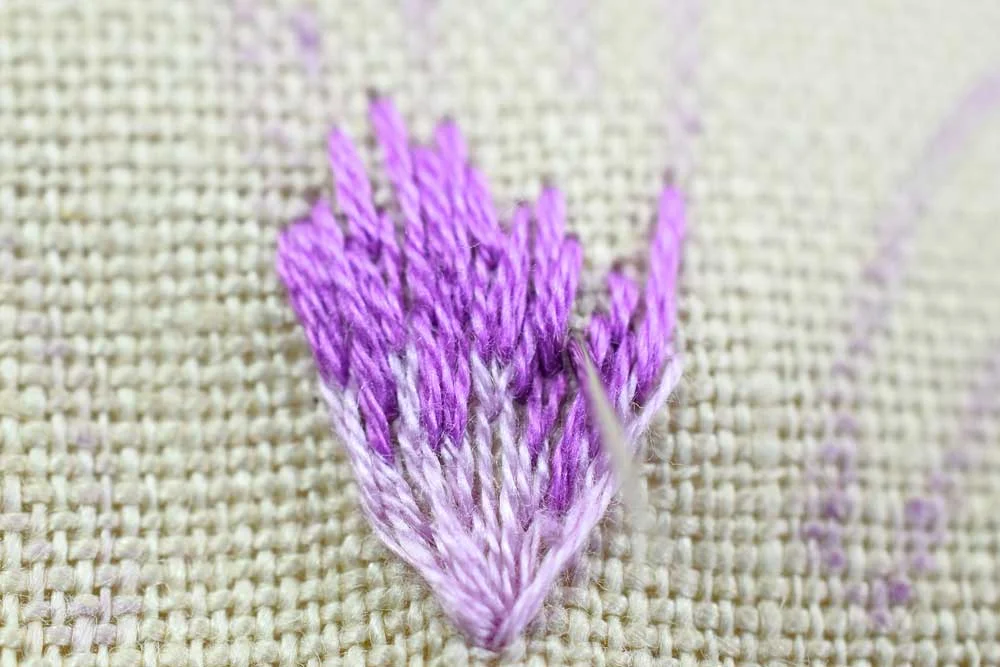
Here is the final color. I went back in some of the transition areas with one piece of thread and added some long stitches to blend them a little more.
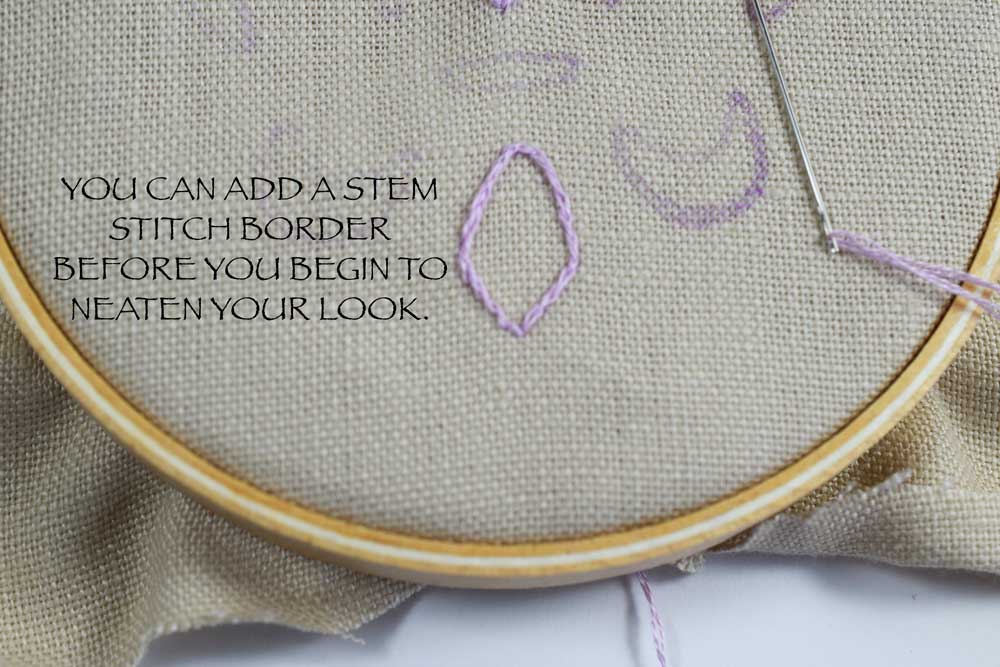
Some people like to start by adding a SPLIT STITCH to the border of the shape. It makes it a little neater and gives you a guideline. The idea is to stitch over it.


There you have it. The LONG AND SHORT STITCH for blending. You can see how this would be an excellent technique for bird feathers and fur. As you practice and play with it, the blending becomes more gradual and subtle but I think it's a really cool look even with more contrasting colors.

If you would like to practice your long and short stitch, I have a pattern available for instant download in my shop LOVESTITCHERY. It is excellent practice for:
FRENCH KNOTS | BACKSTITCH | SATIN STITCH | LONG AND SHORT STITCH

Thank you warmly for stopping by!
Pam