
One of our favorite family traditions is watching holiday movies. We have some legendary favorites including A Christmas Story, The Polar Express, The Grinch that Stole Christmas, and those fabulous claymation specials we all know and love. We will watch any combination of these slowly leading up to the holidays but one of our very favorites has to be Elf. For some reason, that movie gets funnier every time we watch it. We quote the movie all year long and two of the five of us even own elf pajamas (not telling).
I can't think of a better tradition than sitting down as a family and laughing together and this movie never disappoints. In continuing with this season of giving and to honor our fond family tradition, I have created a fun mash-up that is a combination from my last two posts. Get ready for it.............
It's the ELF YOURSELF ARTICULATED DOLL

Click here to get your free PDF.
Not only is it a great way to use up extra class photos but you can have a blast turning even the most serious family member into this fun-loving elf. The facial opening is about .75 inches across and a little over one inch up and down so all you need to do is find a face shot that is close to that size, center it behind the facial opening you cut out, and BAM!!!!! Hilarity ensues. You don't have to stop at family members, though. Get your People Magazine and cut out your favorite celebrity. How about a political figure? I'm chuckling just thinking about it. Turn your teacher into an elf and present it to him or her with their holiday gift. The sillier the pose, the better!
Here are a few tips on how to put one together;

Start by cutting out each piece.

Here are all the pieces cut out and lined up to be attached. (For the upper part of the legs, the rounded part goes under the jacket and the flatter part gets attached to the striped socks.)

Now cut out the face with an exacto knife. You can use scissors but this part is a little delicate (See where the head and neck meet? That area is very thin so you have to be careful when cutting so you do not tear it.) Don't worry, though. This part will be more secure once you add the picture and tape it on.
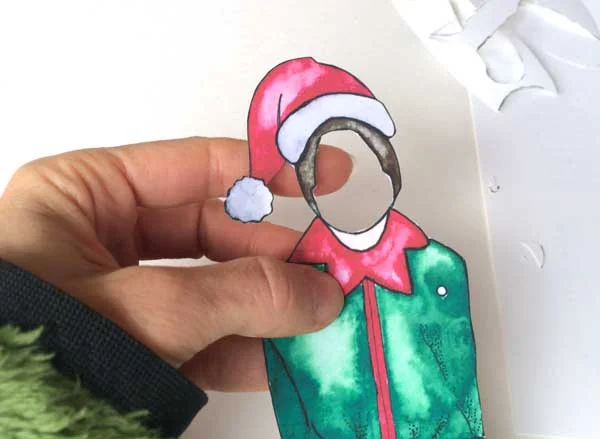
Here is the face all cut out.
O.K., now you will want to find a picture to attach to the back. I designed these for a 2.5 x 3.5 class picture but anything works!! I just used plain old scotch tape but glue or glue sticks would work, as well.

Play around until the picture is centered where you want it to be.

Once you have taped on your picture, finish putting together your elf by attaching the brads where indicated. If you would like a more detailed tutorial on how to attach the brads, you can refer back to the snowman post here.

There you have it! Feel free to add your own touches like beards, bling, yarn hair, a scarf.....you name it! Punch a hole and use them as ornaments, gift tags, bookmarks or whatever your imagination can dream up!
There's only one thing left to do......GO ELF YO SELF!
Warmly,
Pam