I love taking a peek into someone else's life. I especially like taking a peek into someone else's art studio and creative process. The first two weekends in October in Boulder there is an open studio tour which I wrote about here. Local artists open up their studios and show you their process. I love it so much and always walk away inspired. There is even a magazine devoted to studios called Where Women Create. It features all kinds of studio spaces and individual stories about life, art and how their creative journeys formed. All so unique and different like the artists themselves! Since I love seeing other people's spaces so much, I thought you might like to take a peek at mine!

This is my art table where I actually do my drawing and painting. It is set up in my family room so that I can still be part of things and not totally sequester myself. Right off of the family room is the studio:

I have cleaned it within an inch of its life so this is not really what it looks like when I am working (and one day I'll show you the real deal) but for now.....the clean version! I spend a lot of time on the computer in here and also do lots of projects that require spreading out. I like to leave things out when I am working on them so I can just close the doors and return to my mess the next day.

If you turn slightly to the left this is what you see.

Here is the view from my computer. Cold and snowy here in Colorado. The mug of something warm is a permanent fixture.
Now I'll show you my process when making a painting. I like to work with real objects as reference material when possible so if I am painting food I will often buy or bake it. It never goes to waste here! Today I decided to make blueberry muffins to paint.

I pick one that looks visually interesting and bring it to my table.

I start with a mechanical pencil and do a sketch. I love the .5 size because they are great for detail work.

I propped up the plate to get a good eye level profile to work from. Very technical set up here (ha!). I make an initial sketch and then start honing in on the details. I try to sketch lightly so it can be easily erased and not leave an indentation in the paper. Another option is to trace your final sketch using a light box (If you do not have a lightbox, tape it on a bright window and tape your blank sheet over it and trace it. Works great as well!). One additional consideration is the smudging that occurs from your hand over the pencil lines. To prevent this, you could try to work from left to right (if you are right handed.) Another thing you could do, is to simply put a piece of paper under your hand so that it does not touch the paper. Another option is using a spray fixative.

When I am satisfied with the overall shape of the sketch, I ink it in. Again, I like the fine size .005 pen for thin lines and detail. There are other, more fancy pens but these are great for casual use.

Next, I erase the pencil marks under the ink with an eraser.

Now I start adding in the darkest values with pointillism, This is one of my favorite parts! It always gets me in the zone and is a great time to put on a good podcast or music. * A great tip for finding the darkest value is to squint.

It is always good when working to take a step back, or to walk away and come back, for a new perspective. Another good method I was taught (for composition) is to photograph what you are working on. Composition is not a concern here since it is just a single object.
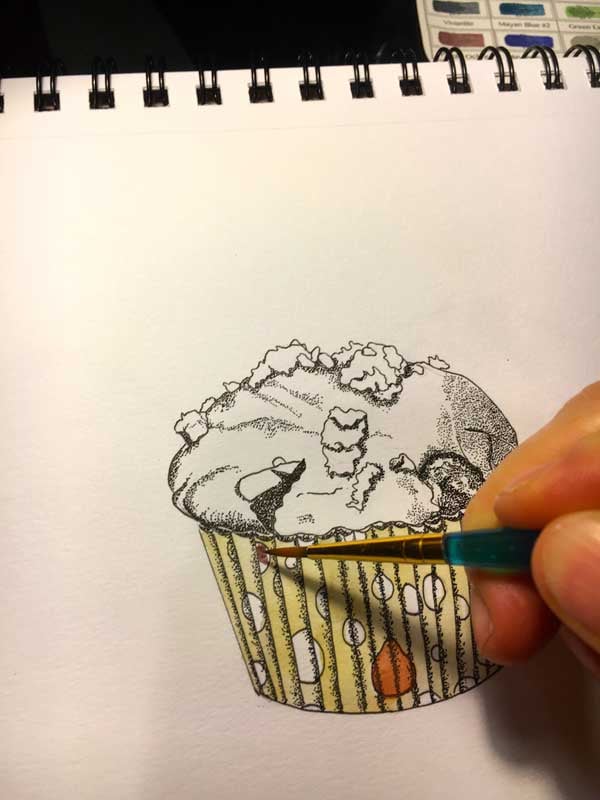
Now to add color!!!. I try to start out with the lightest lights and do a basic wash, then build up the layers of color. I say "try" because sometimes I just go all willy-nilly and jump all over the place depending on my mood and enthusiasm for my subject matter but it generally seems to lead to the same place in the end.

There you have it. The whole enchilada....or in this case...blueberry muffin! If you would like to see for yourself, I decided to offer it to you as a free printable. It would be cute as a gift tag with a whole punched at the top. Great to send in the mail as a little note card or to attach to baked goods for gift giving. I made them in a few sizes for variety.

Click here to get your free PDF and enjoy!

Hope you enjoyed a little sneak peak!
Very Warmly,
Pam