If there is one stitch to learn in embroidery, it would be the backstitch. Not only is it really simple but it can be used in a multitude of ways. It is great for outlining, lettering, and so much more. With the holiday season approaching, I thought it would be really fun to make some monograms. Monograms can turn an ordinary gift into something really special! This simple skill goes such a long way. Let's just dig right in.
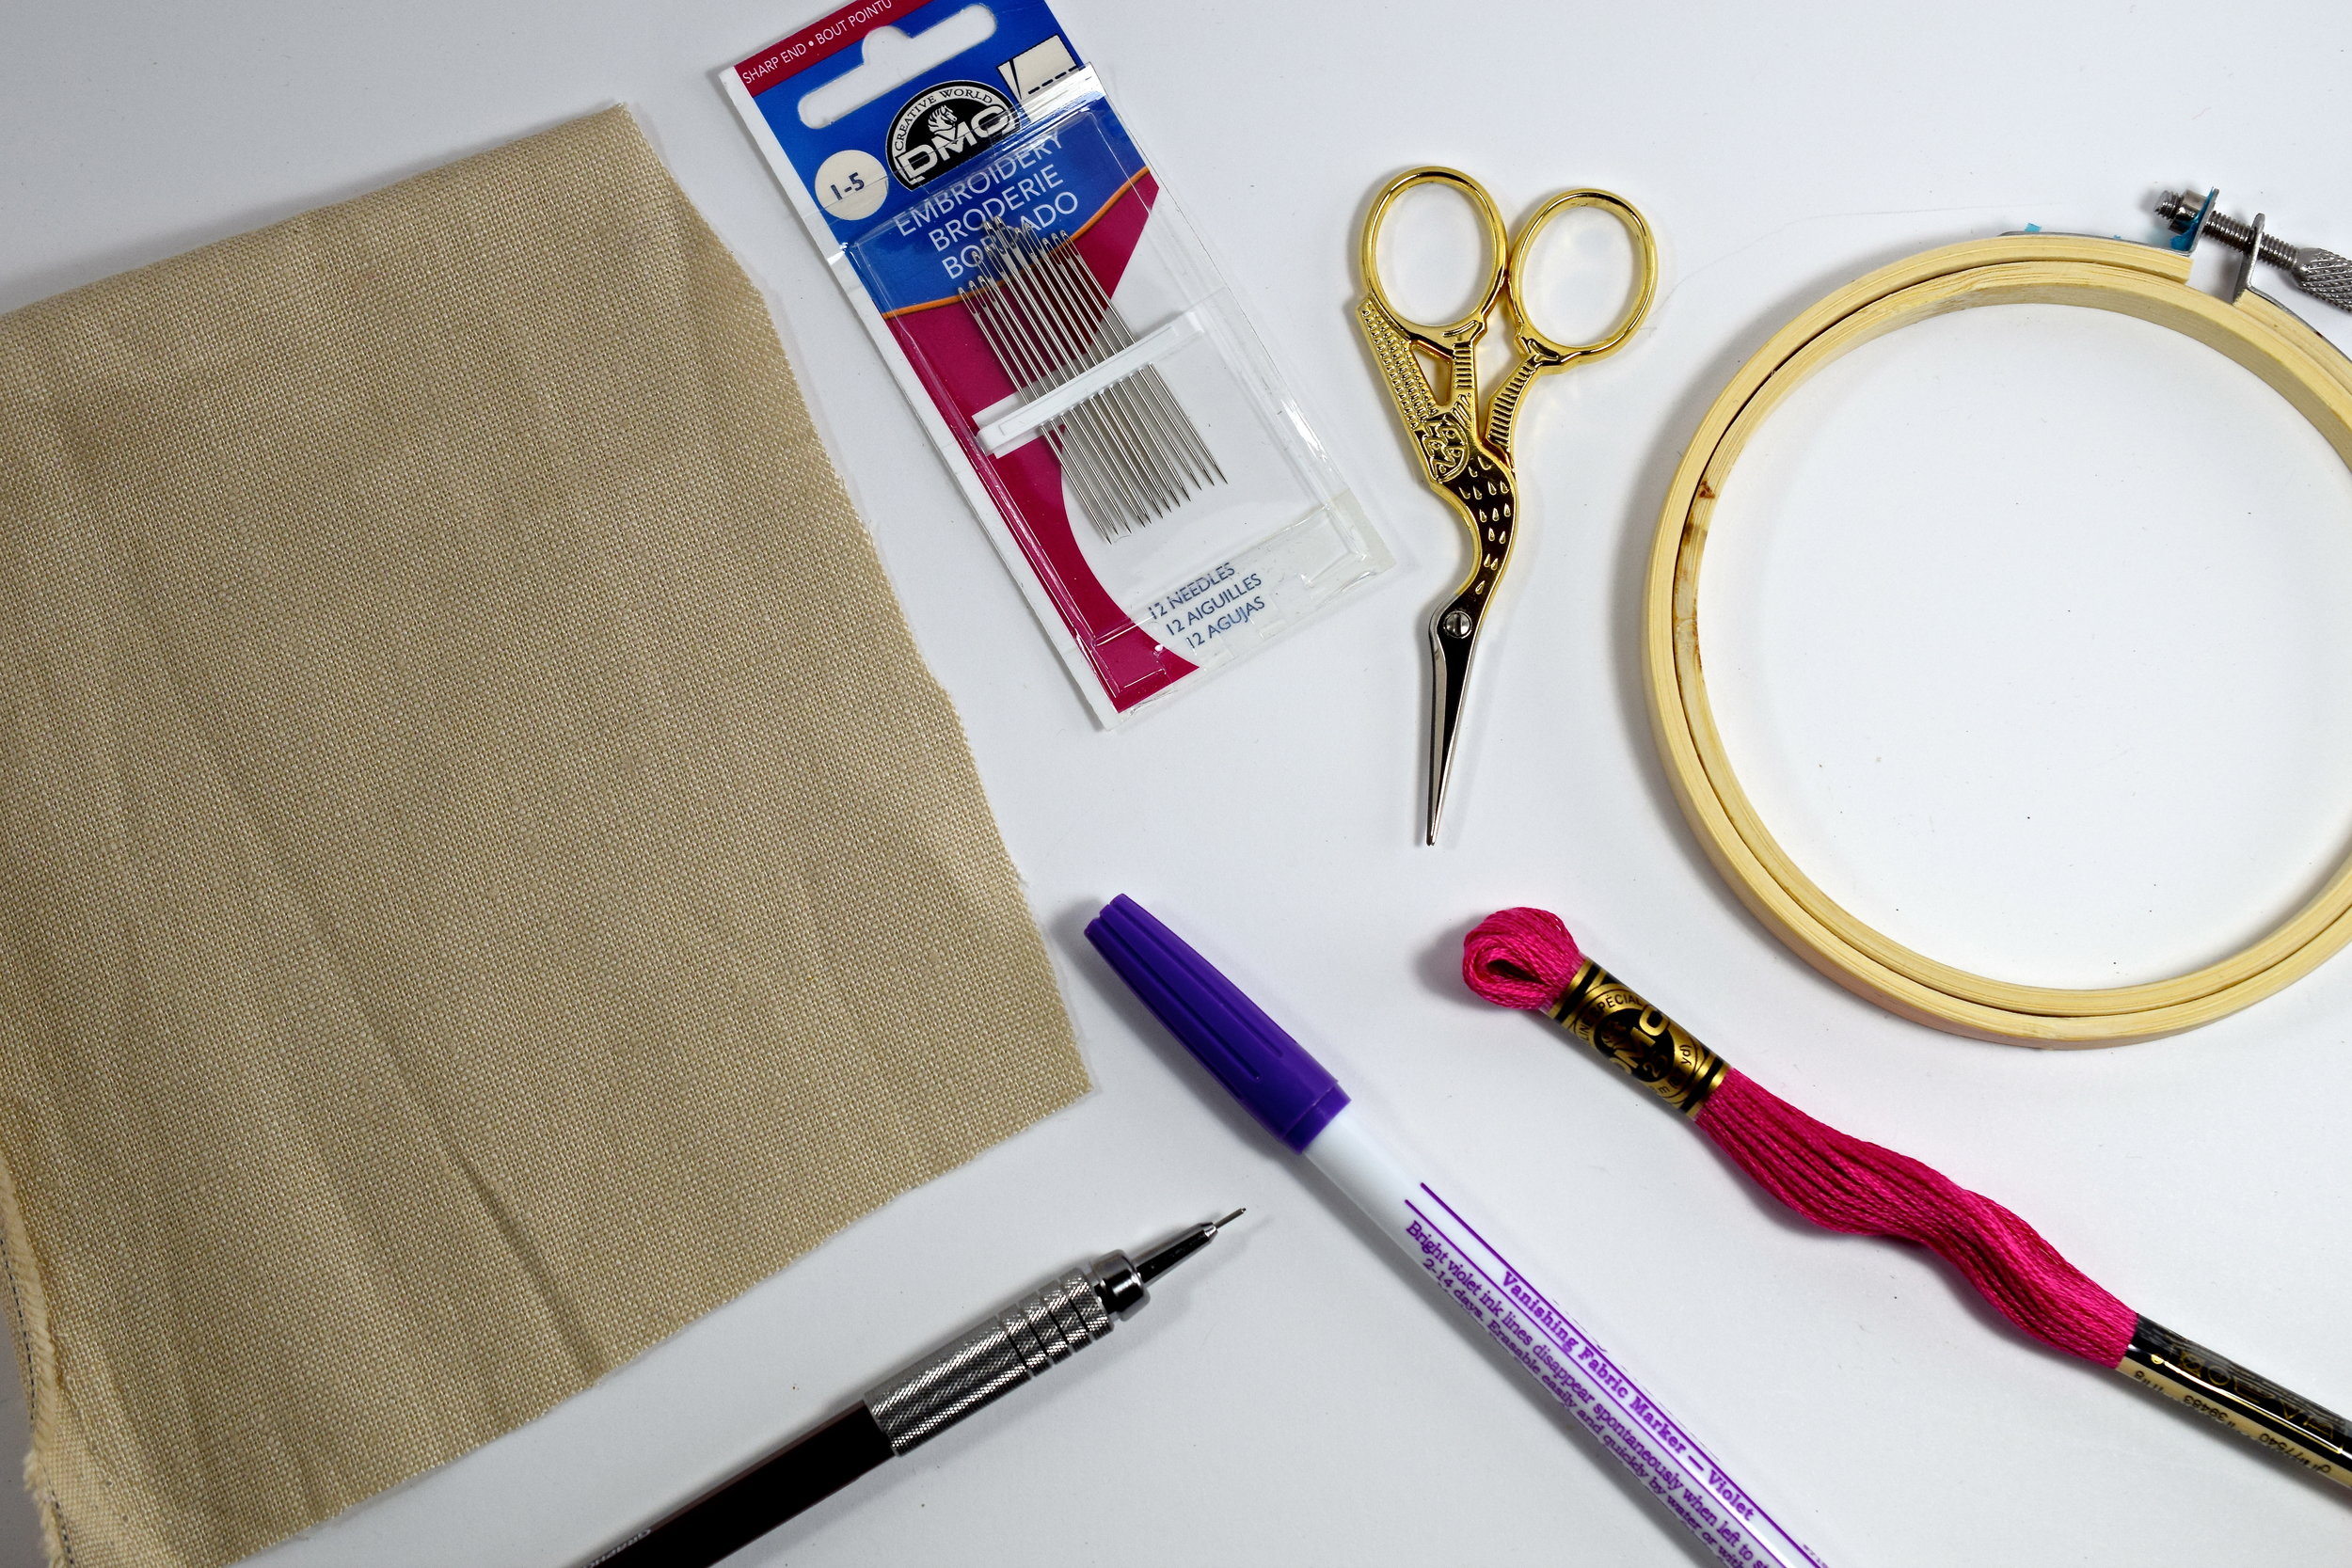
The supplies you need are really simple. You will need:
A BAMBOO HOOP - These are easy to find at any craft store for a couple of dollars. I used a 4 inch hoop which is pretty small but these come in a variety of shapes and sizes.
A PIECE OF FABRIC - You want the fabric to be larger than the hoop you have chosen so that it will overlap the hoop by about 1 1/2 inches. This will hold the fabric in place securely. I used linen but you can use cotton and/or muslin as well.
EMBROIDERY NEEDLES - These are easy to find at any craft store. I like the ones that have a nice sized eye at the top to make them easier to thread. The needles have a size which is labeled on the package. The higher the number, the smaller the needle. You want a sharp tip to pierce the fabric but not so thick that it leaves a big hole. I used a size 5 embroidery needle with a nice sharp end.
SCISSORS - You will need a nice little sharp pair of scissors to cut the thread.
EMBROIDERY THREAD - I saw these at the store for 52 cents each in every possible color you can imagine. I like the DMC brand. I have no affiliation with them but I like their thread. I have gotten cheaper packs of thread and they tend to tangle which can be very frustrating, especially when you are first starting out.
A MARKING UTENSIL - I have a pen that has vanishing ink. It's pretty cool because you can write with it and then it just fades away over time. There are also marking pens that are water soluble. Honestly, you don't have to get fancy especially if you are just practicing. A simple pencil will do just fine. I have even used ball point pens or whatever the closest thing in reach happens to be.
TO GET STARTED:

Start by removing the inner hoop. Place the fabric over the smaller inner hoop you removed being careful to make sure it is centered over it. Next place the larger hoop over the fabric which is covering the smaller hoop.

Now your fabric should be nice and taut and ready to work on.
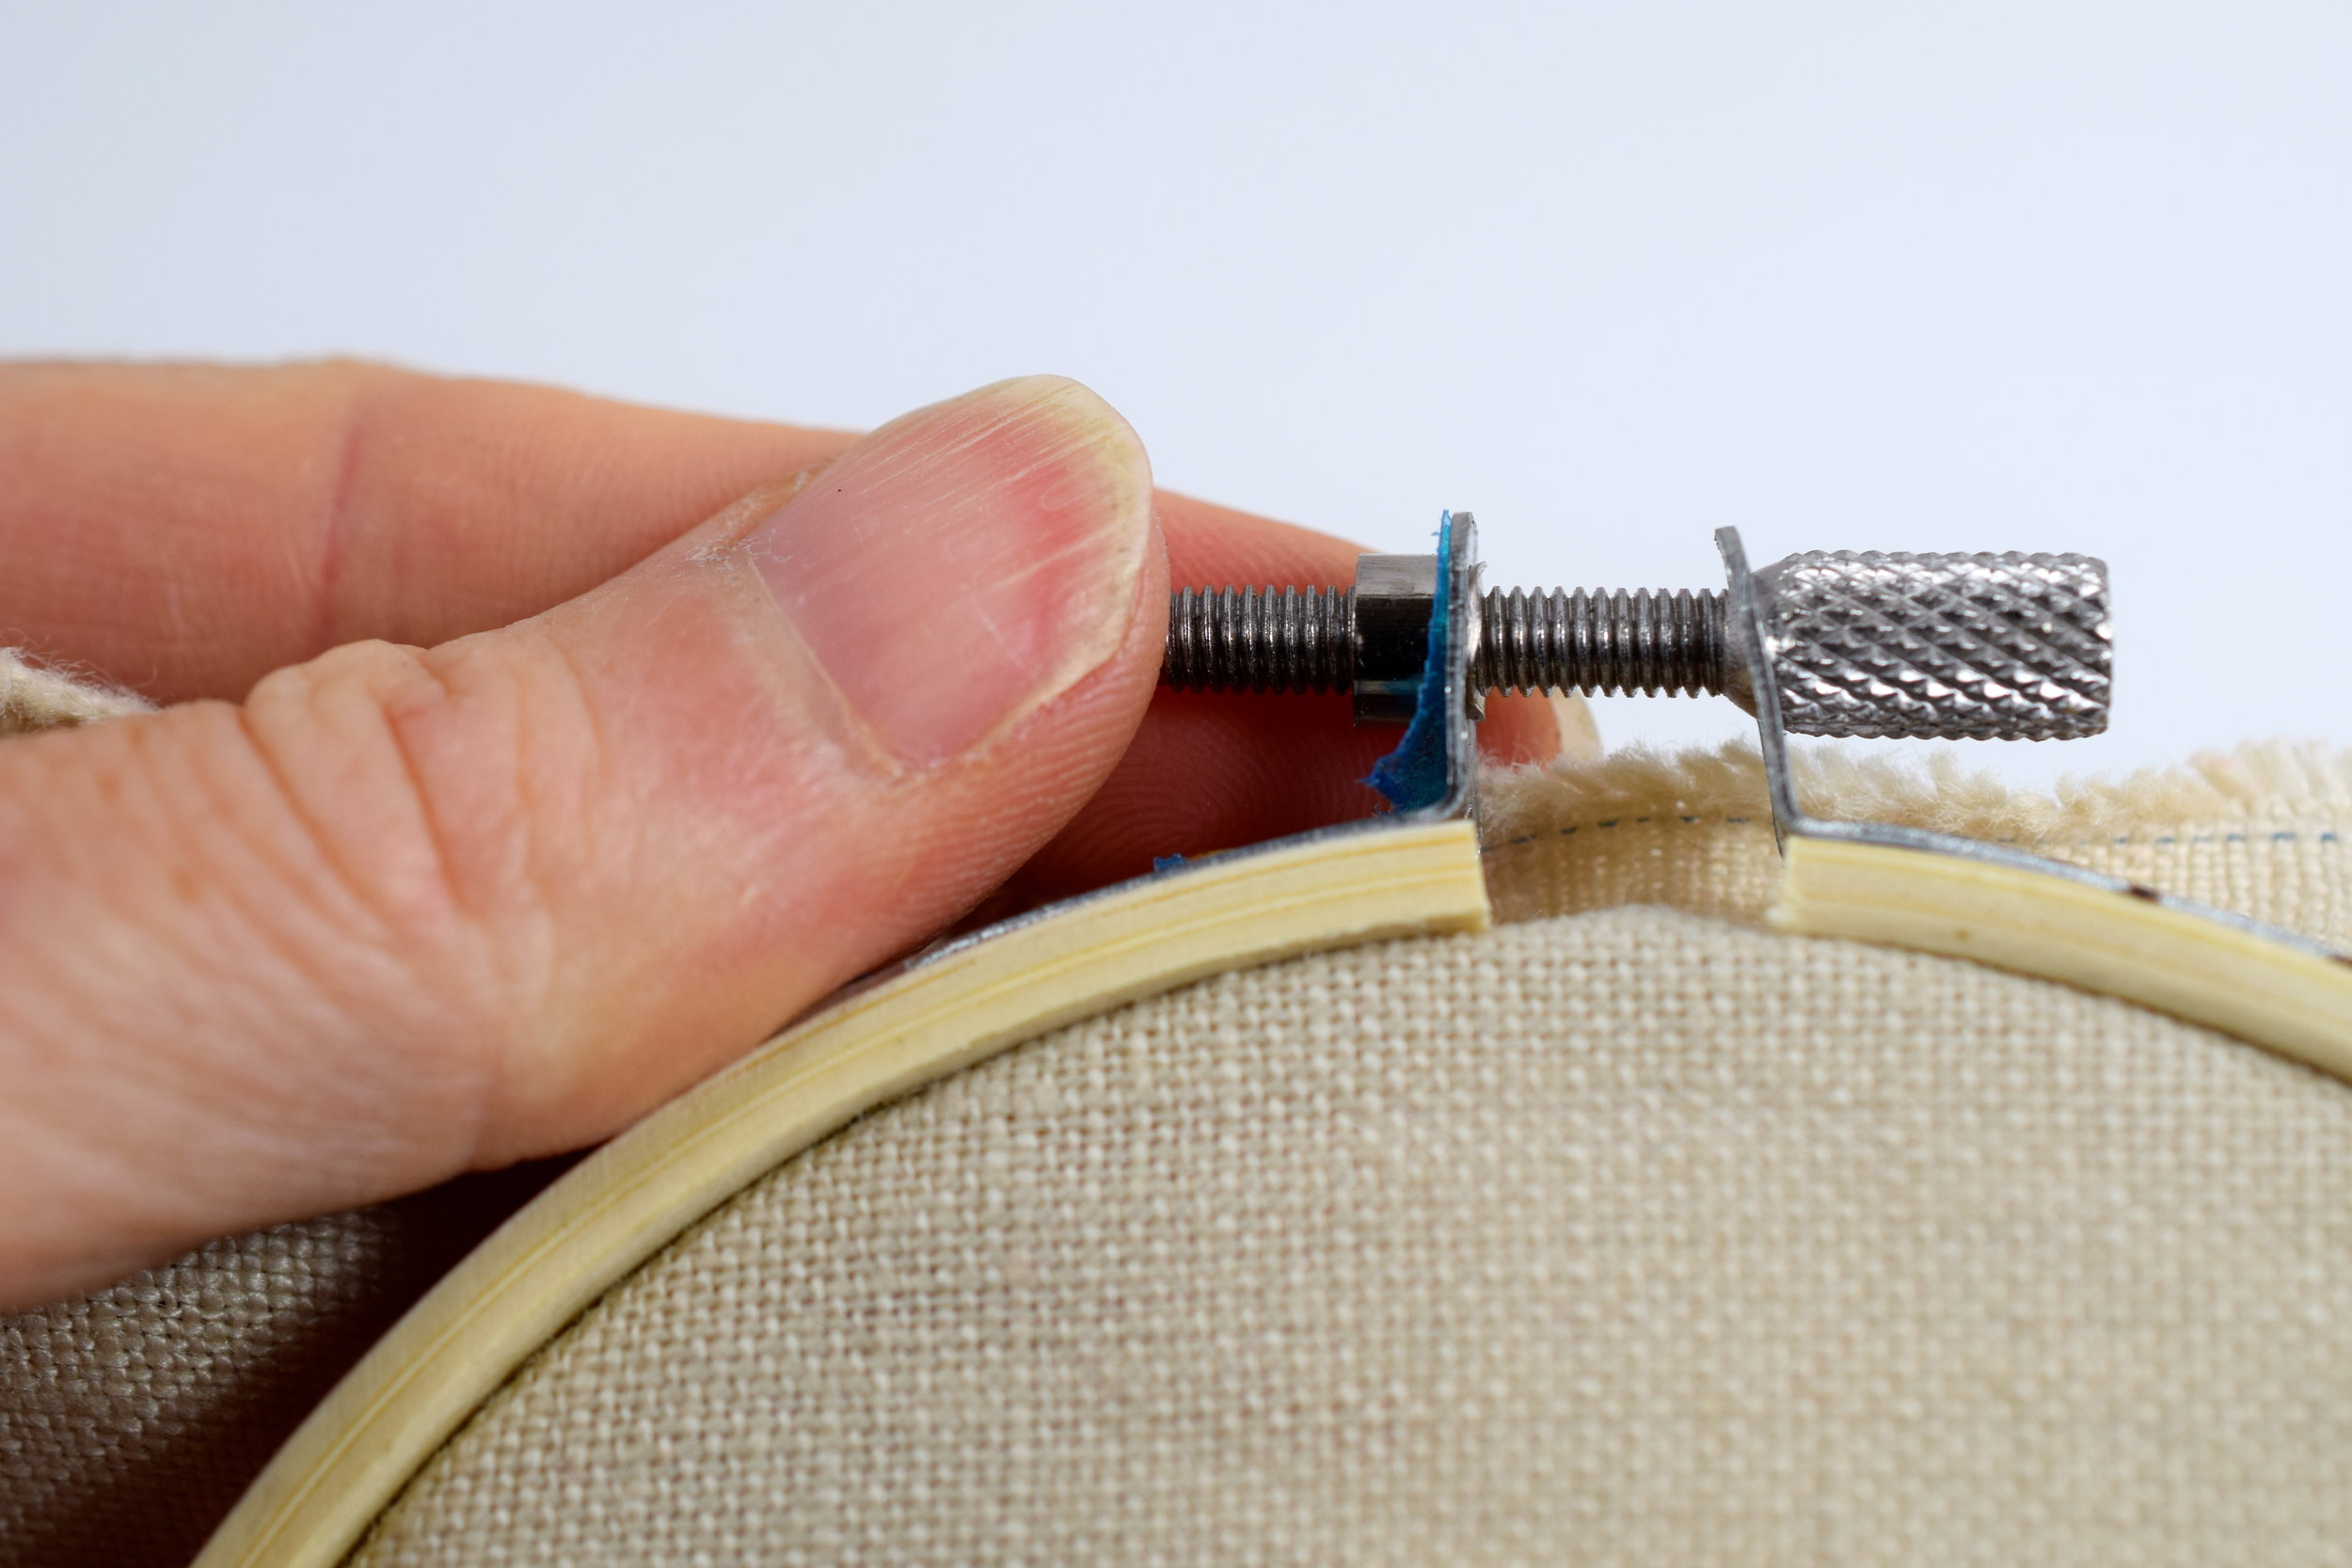
You can stretch the fabric further by tightening the screw at the top of the hoop.

To practice learning the backstitch, just grab your marking utensil and draw a straight line about 4 inches long.

Now, time to thread the needle.

Notice that embroidery thread comes in six strands that are all twirled together into one.

In the picture above, I separated the ends so you could see the six individual strands. What is great about this is that you can change the thickness of your stitches by using more or less thread. I chose to use all six so you could get a bold look at the backstitch but feel free to experiment. Often, I like to use three threads and just divide the strand in half. For fine details, use only one thread.
When you are cutting your first piece of thread, you may be tempted to cut a HUGE piece so you don't run out. What happens is that the thread ends up getting knotted and tangled if it is too long so keep the piece that you cut to about 16-18 inches.

Thread the strands through the eye of the needle. You can wet the end if you are having a hard time getting it through. There are really inexpensive needle threaders you can buy and there is even a wax you can apply to your thread to make it easier to sew with. I would recommend to start by getting a needle with a big eye.
Once you have pulled the thread though the eye, leave a little tail of thread. Put down the side you just threaded and pick up the bottom of the thread.

On the bottom part of the thread make a knot. This knot will act as an anchor to hold the thread in the back of the fabric. If you are using less than six strands, you may need to make a double knot.


O.K., take your needle and bring it up from the back of the hoop about 1/4 inch from where your line started.

Pull your needle all the way through. Now put your needle back to the very beginning of the line you made. (THE BACK STITCH...SEE?????). Pull the needle all the way through to the back now.

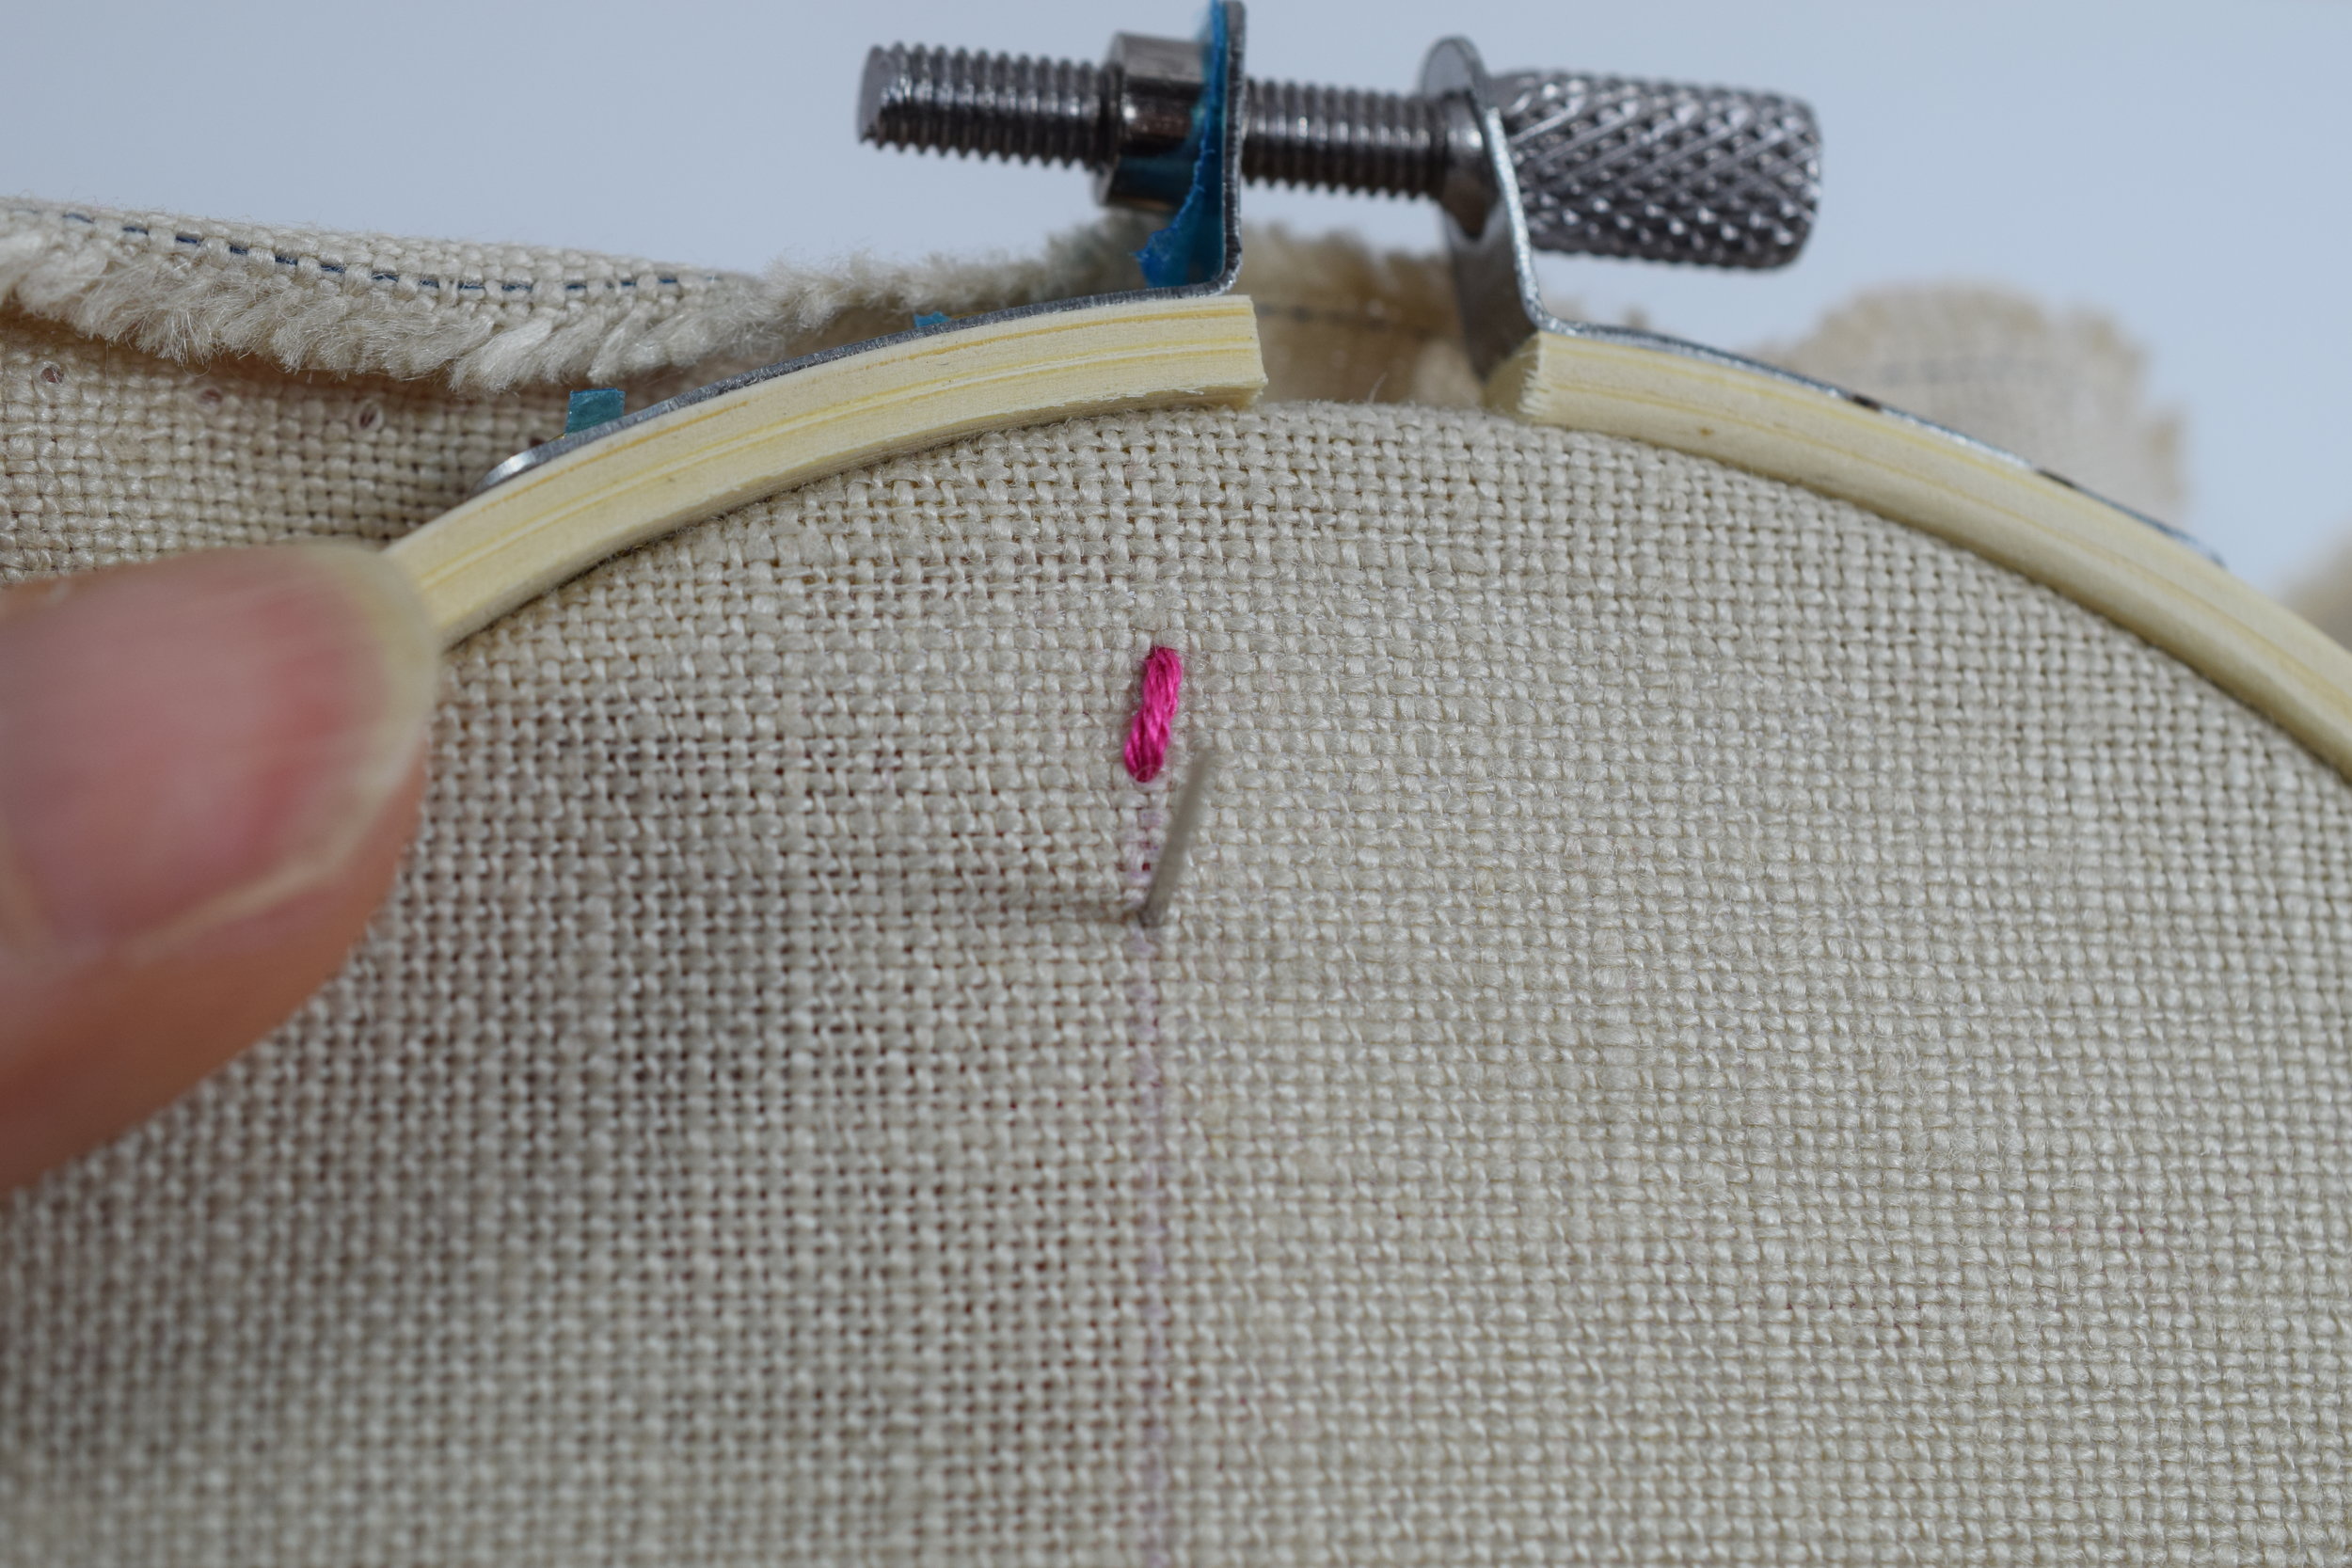
The next step is to bring the needle back up about 1/4 inch in front the the back stitch you just made (congratulations on that, by the way!). You will get used to eyeballing the spacing of the stitches over time. Just try to make them all similarly sized for consistency.

Now bring the needle back down in the hole you made in the first stitch. See in the picture above? Pull the needle all the way to the back like you did before.

Keep repeating that process of pulling the needle up from the back about 1/4 inch from where you made the last stitch and putting the needle down into the hole in front of the last stitch until you reach the end of the line you marked. IT'S THAT EASY!

Ok, now that you are finished, you need to secure your thread in the back so that your stitches don't come loose. Your needle should end in the back.

Turn the hoop over to the back.

Thread your needle under one of the stitches you just made. Don't pull it ALL the way through yet.

After you pull your needle part of the way through there is a little loop that has formed. Put your needle in the through the loop and pull it taut.

Keep pulling until a knot forms. For extra security you can add another knot if you like.

Use your little scissors to trim the end and your are done!

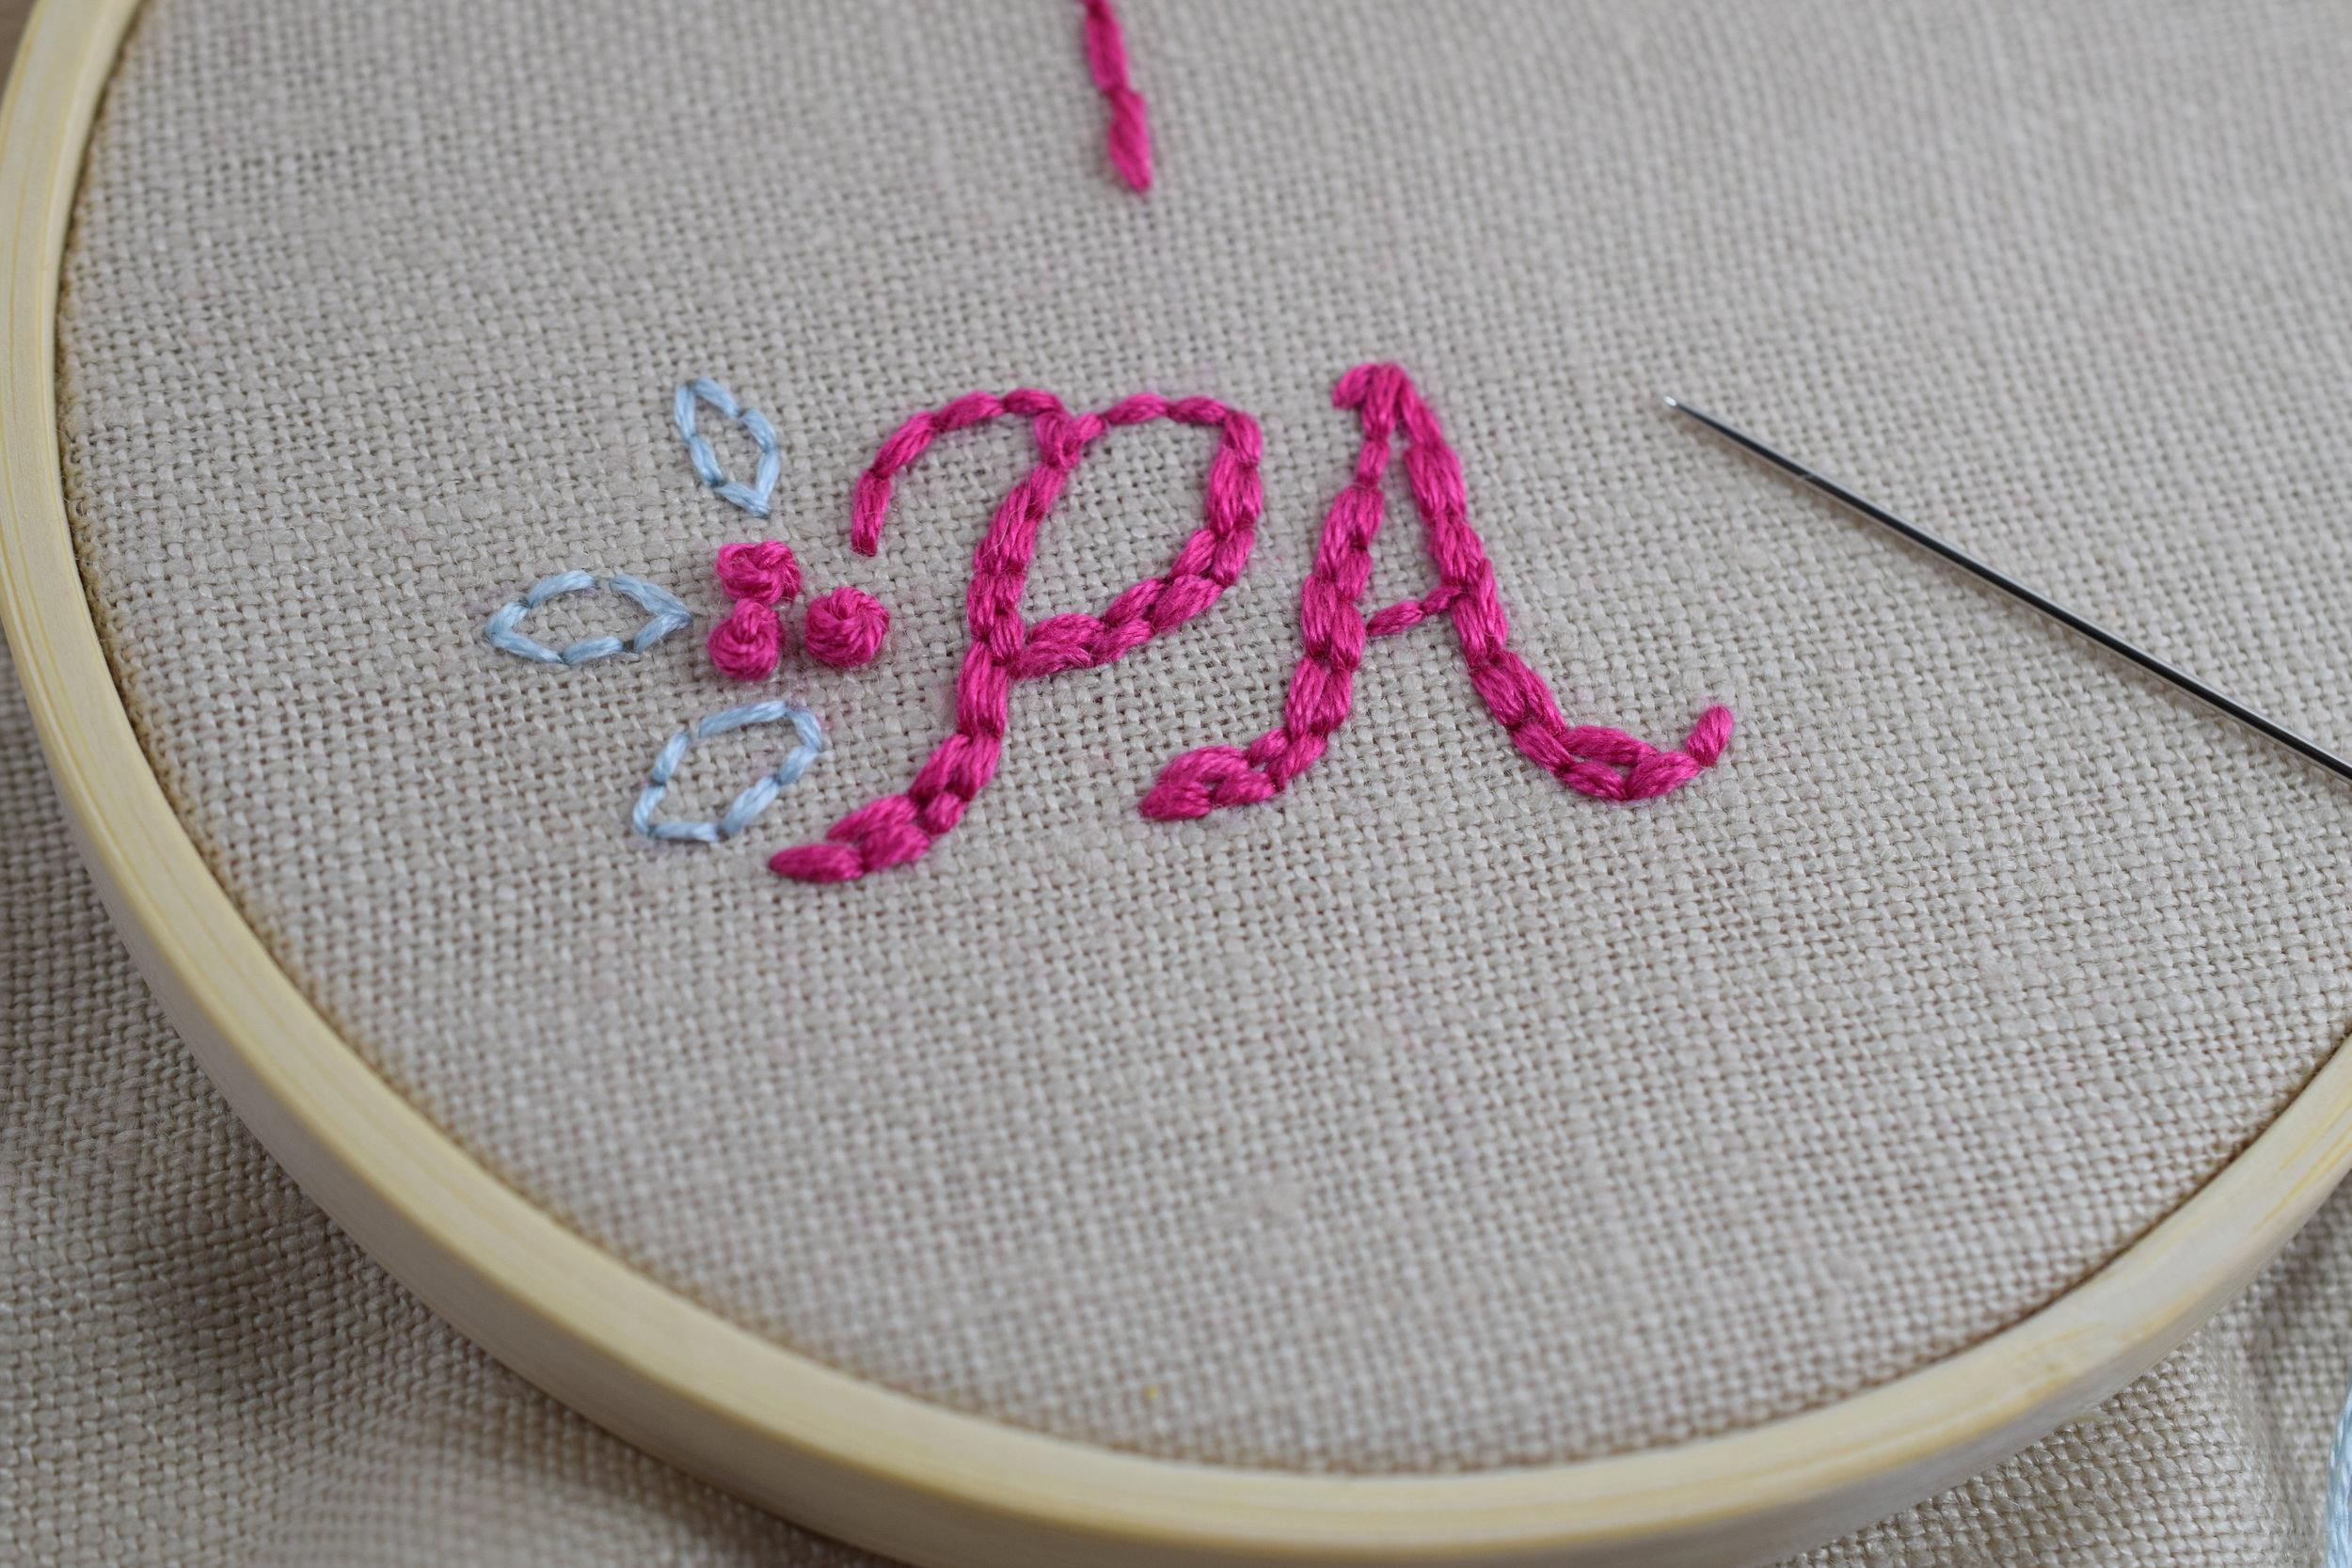
Now that you have learned the backstitch, let's put it to use! A great way to personalize a gift is to make a monogram. I simply draw the the letters right on the fabric. If you are not comfortable using your handwriting, use a stencil. There are no rules here! Another option would be to print a letter sampler (there are tons of free ones online) and put it on a window with your fabric taped over it and trace it. Seriously though, I love the look of people's handwriting. It's so personal and I'll bet whoever is the recipient of your handiwork will feel the same way. Go ahead, give it a try!

O.K, so let's put your skills to the test. Thread your needle and knot the other end. Now pull your needle up through the fabric 1/4 of an inch from the beginning of your monogram. (PICTURED ABOVE) Once you have pulled the needle all the way through, put the needle back down at the very beginning of the monogram.

Then pull your needle back up from the back 1/4 inch in front of the last stitch you made and back down through the hole you made in the first stitch.

Keep going and trace along the monogram using your backstitch technique. Sometimes you may find your needle a long way from the next stitch. You may decide to cut and knot the thread and begin again. For example, in the picture above I got to the bottom of the "P" and the next stitch starts in the middle of the "P". I decided to cut the thread and start again at the middle of the "P'. You can make that stretch but there will be a lot of thread in the back which can sometimes tangle. Really not a big deal though.

Keep going, you got this!

BAM!! That's it! Now if you can't get enough and want it take it one step further, you can easily embellish a little.

Make some faux calligraphy by thickening the down strokes of your letters. You can do this by adding some backstitch to the downstroke of your letter, right next to the stitches you already made.

Add some french knots. If you want to learn how to make french knots you can click HERE. There is a free printable included for you to practice on, as well. Add some leaves! Just make an simple leaf shape and practice your backstitch on that.
Play with different colors and different thicknesses of thread. Play, play play! The more you do it the easier it gets!!!


Hope you have lots of fun playing with your new skill!! Don't hesitate ask me questions in the comment section.
Thanks for stopping by!
Warmly,
Pam