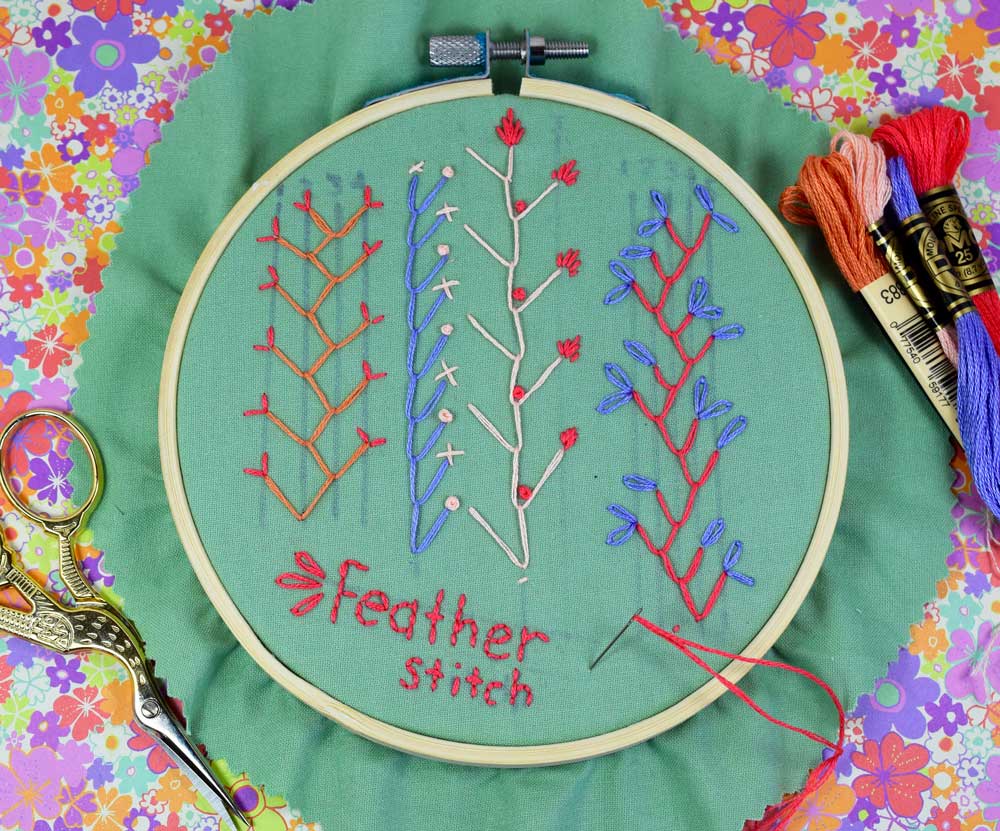
If you want to learn a really fun, decorative stitch then the feather stitch might be just the thing. Since you learned the CHAIN STITCH, the feather stitch will not be that big of a leap for you since it is quite similar. There are quite a few variations of the feather stitch so let's just dive right in.

Gather up a few simple supplies:
1. FABRIC: A piece of cotton or linen fabric that is large enough to overlap the wooden embroidery hoop by about 1.5-2 inches.
2. WOOD EMBROIDERY HOOP: I used a 5 inch hoop. Make sure your fabric fits nice and tightly into your hoop and that there is 1.5-2 inches overlap.
3. MARKING UTENSIL: I like using a fabric marker with vanishing ink for practicing stitches but a sharp lead pencil will work just fine.
4. THREAD: My favorite thread to use is six stranded DMC cotton thread.
5. NEEDLE: An embroidery/crewel needle that is size 8 or above.
6. SCISSORS: A small sharp pair of scissors.
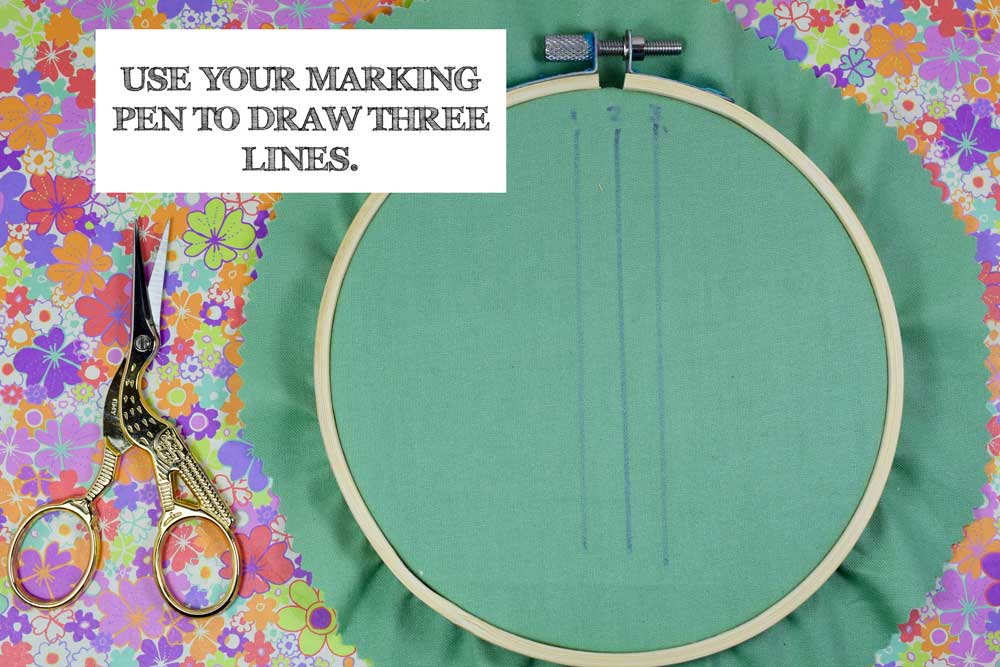
Use your marking pen to draw three vertical lines spaced evenly apart. I Labeled them "1", "2", and "3".

Thread your needle. I like to divide my six stranded thread into three strands. Take one end and thread it through the eye of the needle and knot the other end. Bring your needle up from the back of the hoop at the top of the middle line, in this case line "2".
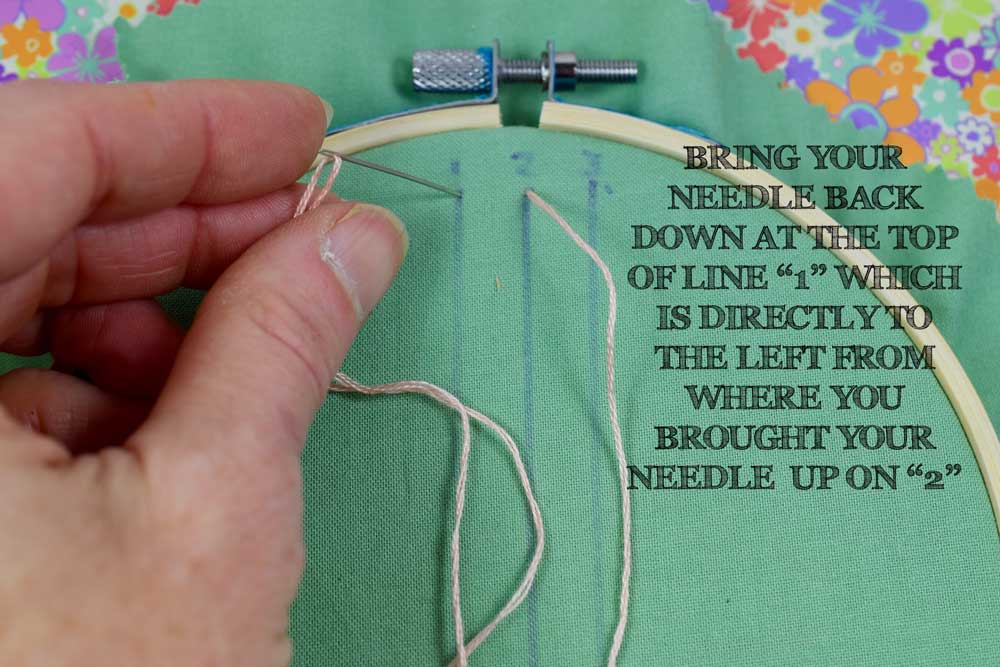
Bring your needle back down at the top of line "1" which is directly to the left from where you brought the needle up at line 2. Just like with the CHAIN STITCH, do not pull the needle all the way through, leaving a little loop.


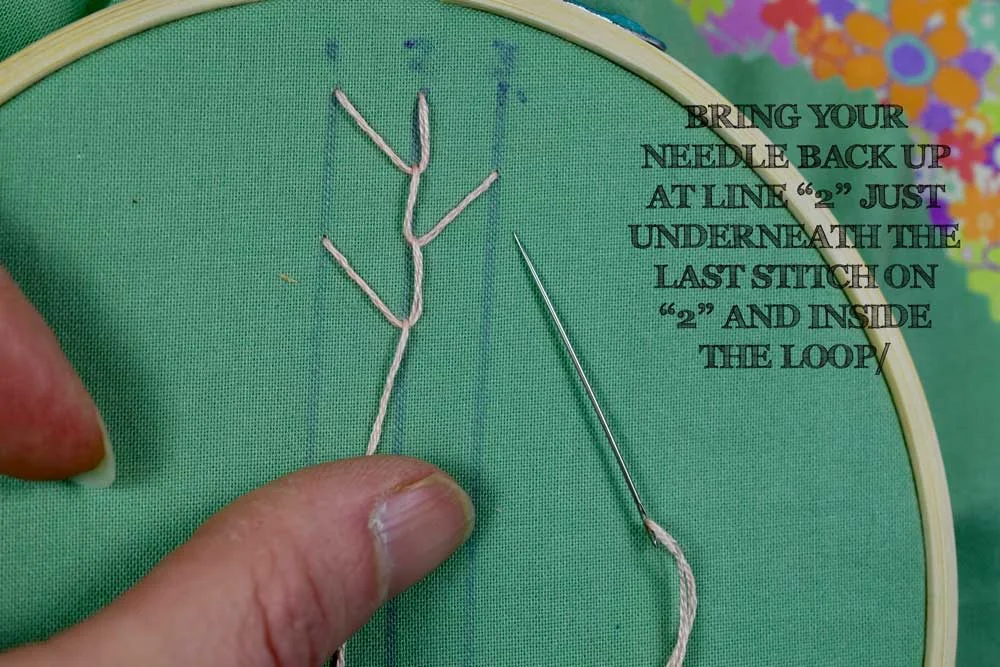
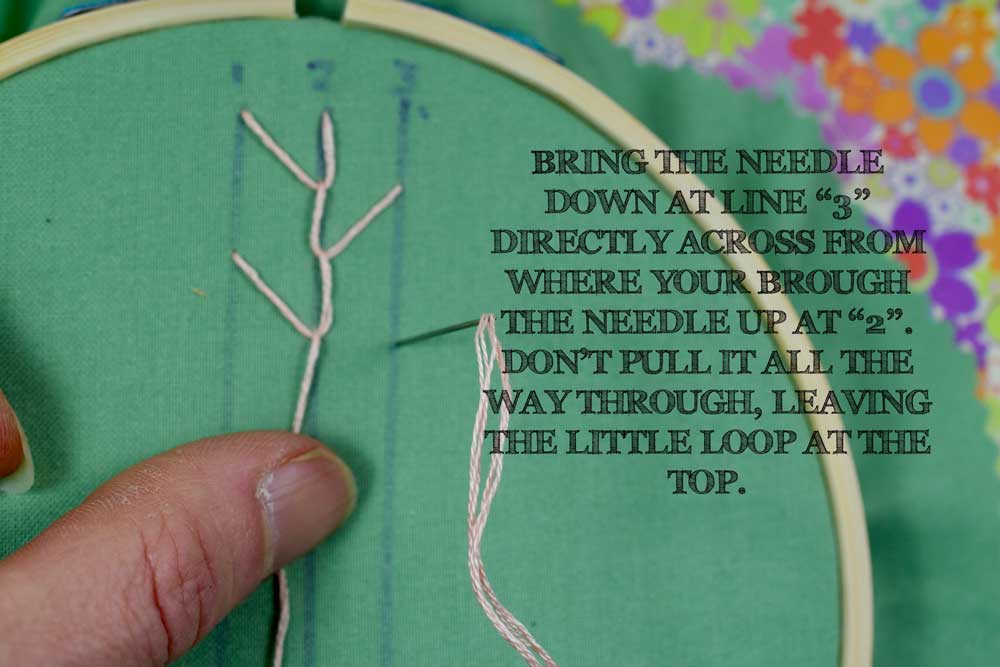
If you have been stitching along, I'll bet your fingers can already tell where the next stitch should go. Once you get going it gets easier.

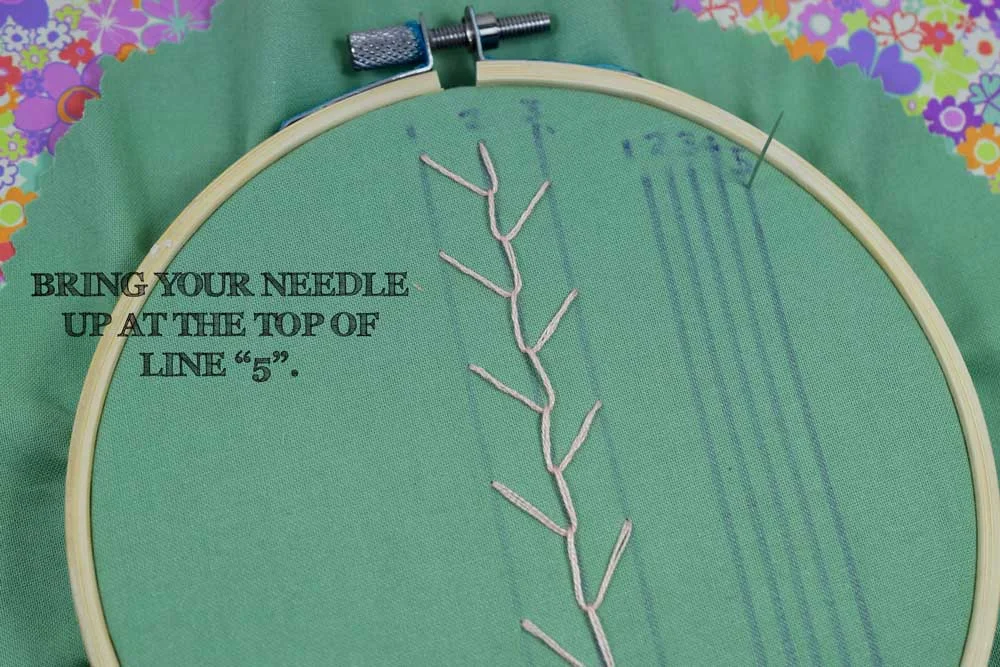
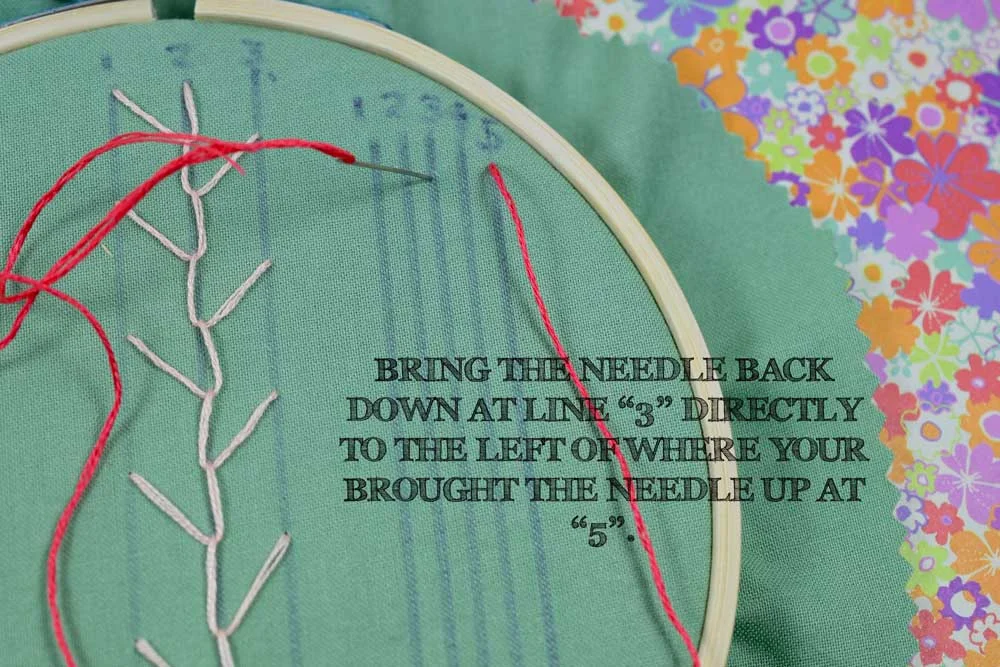
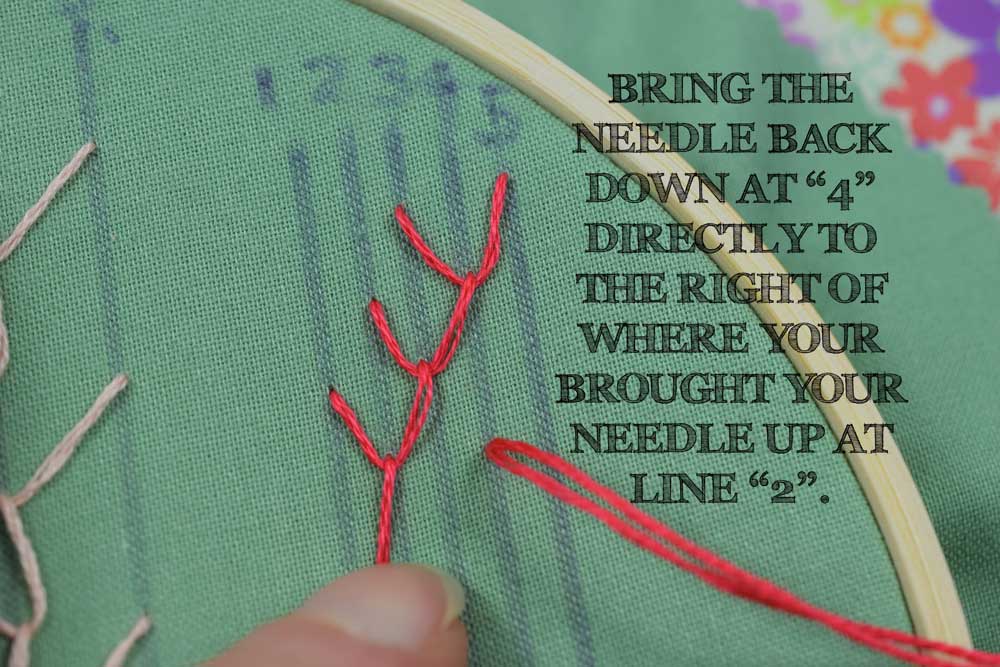
There are a lot of variations of the feather stitch. When you start to feel comfortable with this first version, maybe you would like to try your hand at the double feather stitch. It is quite similar to the single feather stitch but you move the stitch back and forth across five lines instead of three.


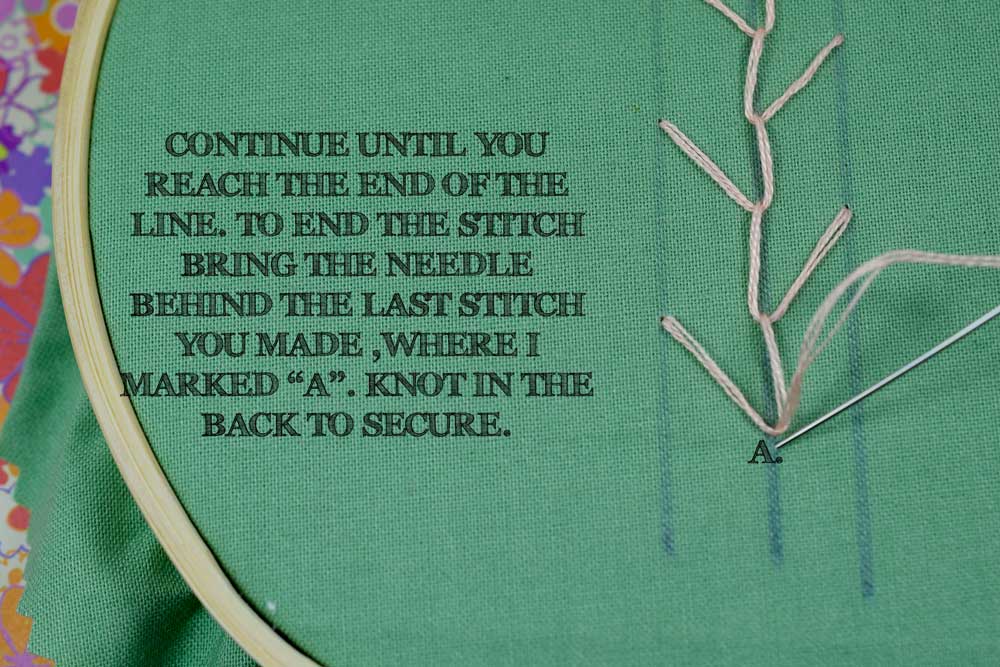
Now you will be moving your stitches back over the the right in the same way.


Like with most stitching, you only realize how simple it is by actually doing it. Once you practice it a couple of times your fingers just start realizing the pattern and making the connection with your brain. I have two more variations to show you which I will post next week. in the meantime, I have added a new pattern to my shop incorporating the feather stitch. This pattern has lots of detail but all the stitches are quite easy beginner stitches.
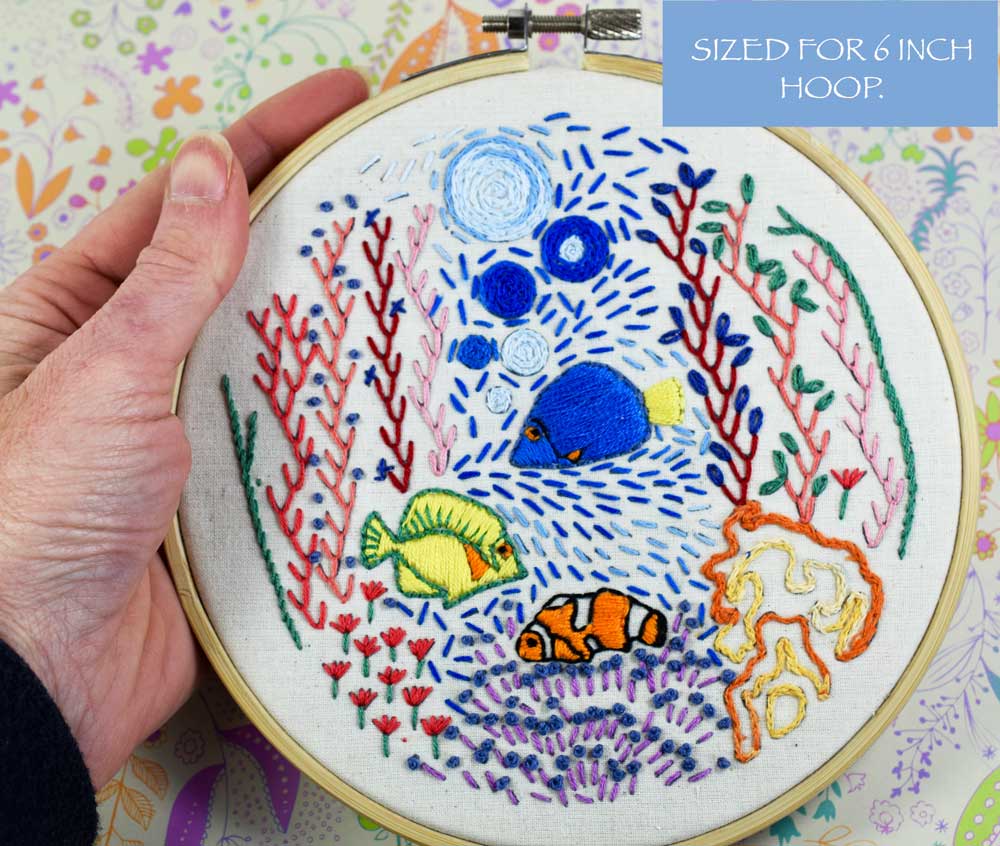
HERE is the listing for this pattern if you are looking for more feather stitch practice!
Thanks so much for stopping by!
Hope to see you next time where I will show you two more feather stitch variations and some embellishments to add to this very sweet stitch.
Warmly,
Pam