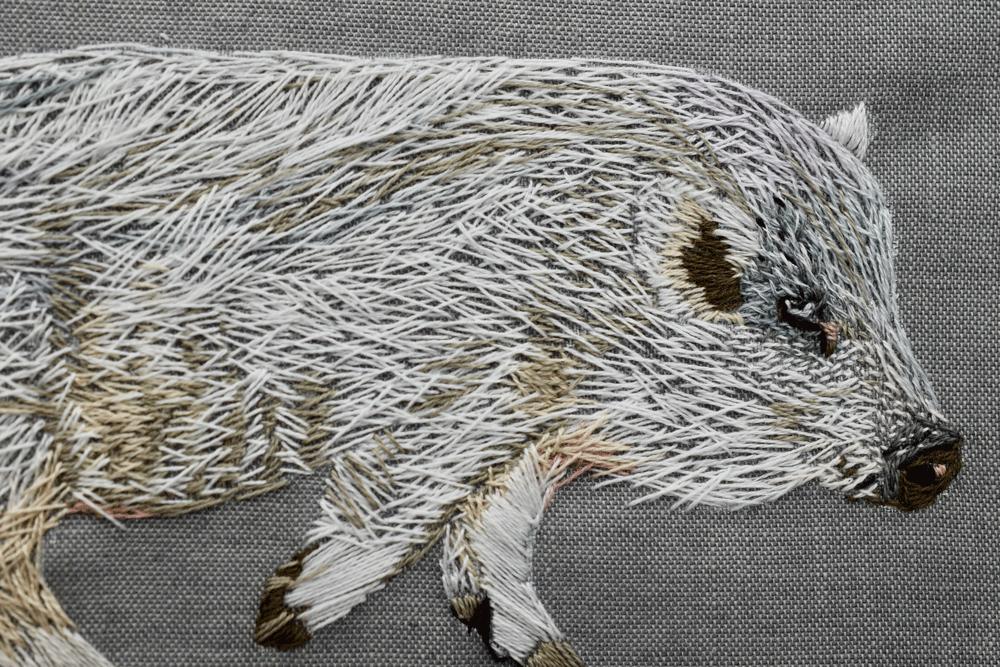
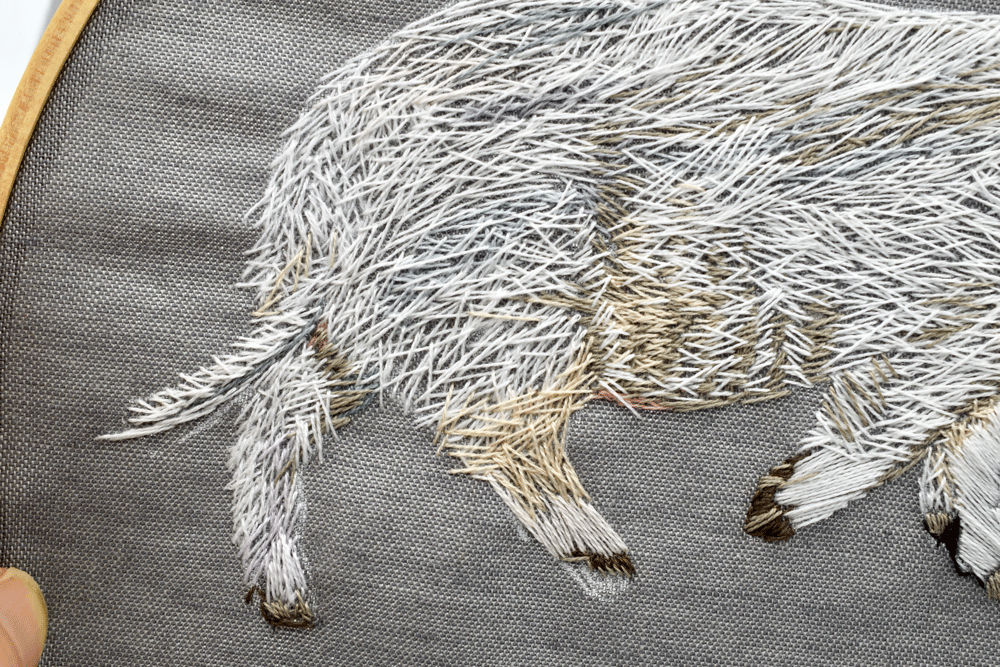
I have really wanted to try embroidering an animal and I found the perfect subject. There is an adorable pig that lives in the neighborhood. His name is Winston and he captures the heart of everyone that passes the corner intersection on which he lives. He can be found in his yard on most warm days and will respond when you call him by name. Since our neighborhood is a very popular with bikers, they always stop to say “Hello” too. Winston’s owners posted a sign on the fence, “Hello, my name is Winston” to accommodate all the people who want to stop and greet this very charismatic animal who just has a way of drawing people to him. If you ask anyone local about this, they all know and love Winston. He even has his own facebook page. I was told by a neighbor friend that he is a Vietnamese potbelly pig. He tends to prefer warmer weather and he also has a light coating of fur. This was a great way to experiment with embroidering animal fur, especially since it is the year of the pig! I learned a lot in the process of making this and wanted to share a few tips.
The first thing to consider is the color of the fabric you will be working on.
I love a nice white cotton fabric to make colors pop. I thought if the fur was going to be very light shades of pinks that it would really pop on the white fabric.
In the reference photo I was using, there were lots of shades of different colors; creams, light blues, light pinks, gray etc.
I started viewing this project more like a painting. The fabric color is to the embroidery what an underpainting is to a painting. For those of you that are unfamiliar with an underpainting, it is a coat of paint that is laid down on a canvas as a foundation to add tone and build contrast from. So what I learned from this project was how important the color choice of the fabric was in creating an overall impact of the embroidered subject.
I observed that the skin underneath the fur had some grayish tones. I thought this gray linen would be perfect so that whatever fabric was exposed underneath the “fur” would look like the skin. I also think black is a cool choice for very light thread colors. I love to see light colors on a black background; it’s really dramatic.
Similarly to my approach to watercolor painting, I starting by adding the lightest colors first with the intention of building layers of colors on top of that. The stitches are facing the same direction but cross over each other, much like hairs would.
Pay close attention to the stitch length. In curved areas, the stitches look shorter and across the back the stitches are long and straight. The stitch length can help add dimension, shape, and movement.
Note the subtle color shifts. By adding color changes and shading, you can create more dimension, as well.
The stitch length can make a big impact. Note the tiny stitches by the nose; a totally different effect from the longer stitches on the back. Stitch direction is also of utmost importance. Notice the stitches on the underbelly, By shifting the direction, it creates a rippling. On the top part of the pig’s back, you can see the stitches going down. The direction can help shape the body. The shading makes the pig look less flat on the fabric. The most fun part was adding the really dark colors because they made such an impact in creating contrast.
I like how the gray looks underneath the fur.
You wouldn’t know it by looking but there are at least 11 different colors of thread used. His tiny eyeball is my favorite part of the whole thing.
A close-up of the hind quarters. You can see the color variation better up close.
The main body.
I added a little banner with his name on it . In my ‘more is more’ approach, I can not decide if I am finished. He loves apples and carrots so I might add some tiny red apples and orange carrots just for a some tiny pops of color. It’s always hard to know when to be done. The good new is that with stitching, it can always be undone! I love it’s forgiving nature:)
Thanks, as always for stopping by and I hope this gave you some tips for getting started painting animal fur.
Warmly,
Pam


