
I absolutely love making salt dough ornaments. You probably have all the ingredients in your kitchen right now to whip up a batch. All you really need is flour, salt and water. In the recipe above, I added a couple of 'bells and whistles' to the recipe to make a smoother dough but the oil and glycerin are optional. These ornaments last for years. They are fun, easy, and inexpensive to make. You can even add scent, colors, glitter, paint, and beads if you like.

Gather up some simple supplies. You will need:
1. Fine Grain Salt
2. All Purpose Flour
3. Warm Water
4. *Optional - Glycerin
5. Cookie Cutter Shapes
6. Rolling Pin
7. Wax Paper
8 *Optional Essential oil of your choice to give your ornament a scent.
9. *Optional- Vegetable Oil
10. *Optional- Food Coloring
11. *Optional- implements for decorating (such as toothpicks, stamps, a straw, paints, glitter, glue, and beads

Mix all your ingredients together in a bowl until evenly blended. I used a mixer for this process to make it a little easier. If you want to make scented ornaments, add some essential oil to your dough. I added 5 drops of Lavender oil. You may want to use gloves if you are mixing with your hands since some oils can be irritating to the skin, if undiluted. *Note, if you add scents, you will want to air-dry the dough to retain the scent which takes longer (overnight.) Once your dough is evenly blended, place it on a piece of wax paper and roll it out with a rolling pin until it is approximately 1/4 inch thick. Try to be as accurate and consistent as possible in making sure the dough is evenly rolled out. If the dough is too thick, it will not dry out properly and if it is too thin it will curl up around the edges when it is baking.

Once your dough is evenly rolled out, use some cookie cutters to cut the dough into shapes. When there is no more space to cut the dough, squish it up into a ball and roll it out again. If you don't have cookie cutters, you can use a jar lid to make circle shapes. If you are not working with your dough, place it under a dish towel to keep it moist.

You can add food coloring to the dough for some variation.

A toothpick is fantastic for adding some details.

Use a straw to poke a hole at the top for hanging.

Stamps are also wonderful. You can use letter stamps to print out a name or initials.

A garlic press is fun for making hair if you plan on sculpting your dough into people shapes

Make a letter to Santa. Simply make a rectangle then use your toothpick to trace an envelope shape.

Once you are satisfied with your shapes, it is time to dry them. If you have added scents, you can let the dough air dry on a cooling rack overnight. Air drying will retain the scent. If you have not added scent to your dough and want to get the job done a little faster, bake them in a 170°F (77°C) oven on the middle rack for about an hour or until dried out.


Did your dough puff up? This is what happens when the heat is too high. You will get a puffy air bubble in the back. If the dough is too thin (less than 1/4 inch) the dough will curl all around the edges.
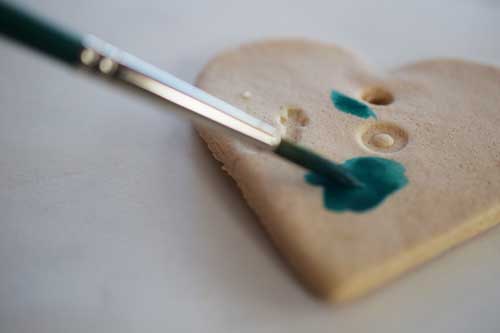
Once you dough is completely dried out the fun begins! If there are any rough parts on your dough you can use sandpaper or a nail file to smooth them out. Watercolor paint is terrific on this dried dough since it is somewhat absorbent. If you want a more transparent wash just add one or two layers and let it dry. If you want a darker look just keep adding layers.

Pictured above is an ornament with several layers of watercolor paint.
You can also use acrylic craft paint as well

This craft paint comes in tubes of every different color you can imagine. Here is an example of one I found in a quick google search. They are really inexpensive and can be found in most craft stores, fabric stores and online. The white is a great to have for adding little details to your painted ornaments and works well as a primer too.
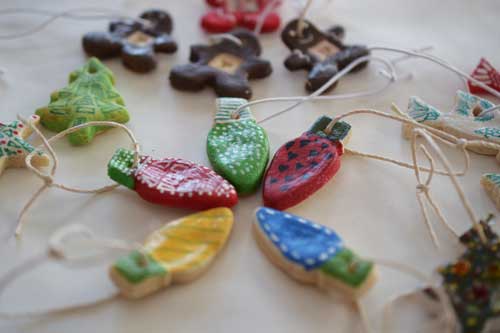
These ornaments pictured above have been painted with acrylic paint. I used the white to add some detail work.

Don't want to mess with paints? Sharpies work great too! These are the fine line kind for details.
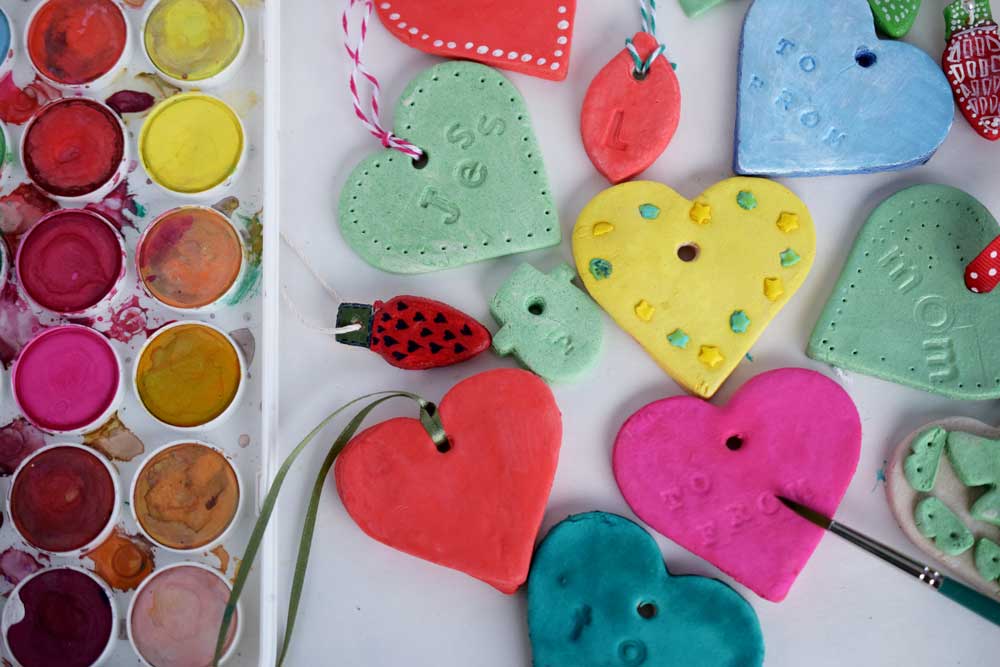
Make a bright collection to sass-ify your tree. You can glue on beads, add names and initals, add brightly colored ribbon or whatever else you can dream up! You may choose to finish them by adding a coat of sealer. I used this mod podge as an example, to give them a gloss finish and preserve them. The scent from the oils is mild and pleasing. For more scent options, these cinnamon ornaments have a much stronger scent. If you really want to make your whole house smell great, try some amazing stovetop potpourri!

Thanks for stopping by!
Warmly,
Pam