
To share my gratitude, I am pleased to offer this free printable embroidery pattern. It is a great way to learn and/or practice your stitches. I will take you step-by-step through the process of making it and in the end you will have a little holiday keepsake. Make as many as you like. This pattern is cute for hoop art but it would also look great on a tea towel in the kitchen or bathroom. How about on a shirt pocket or a napkin?
Well let's get started! Gather up a few supplies:
1. A 4 inch embroidery hoop: The pattern is sized perfectly to fit into a 4 inch embroidery hoop.
2. An embroidery needle: A sharp but thin embroidery needle with a medium sized eye.
3. Embroidery thread : I use DMC six stranded thread. I originally planned on using multiple colors but ended up liking the monochromatic look so I stuck with a rich red.
4. Fabric to trace your pattern onto: I used a cotton unbleached muslin. Light colored cotton is great for this project since it is transparent which makes it good for tracing. I use a piece that is about 7 x 7 inches. You will want to have extra overhanging fabric around the embroidery hoop so that you can pull it nice and taut in the embroidery hoop but also to finish it at the end.
5. A sharp little pair of embroidery scissors.
6. A printed copy of your free pattern.
7. A mechanical pencil or pencil with a fine sharp tip.
8. *Optional Interfacing - Interfacing is a thin fabric which can be adhered to the back of your fabric after you have traced your pattern onto it. It will stabilize the fabric a bit and make it less see through so you can't see the messy stitches in the back.
Start by printing your free pattern:

Click HERE to get your printable.
HOW TO TRANSFER YOUR PATTERN:
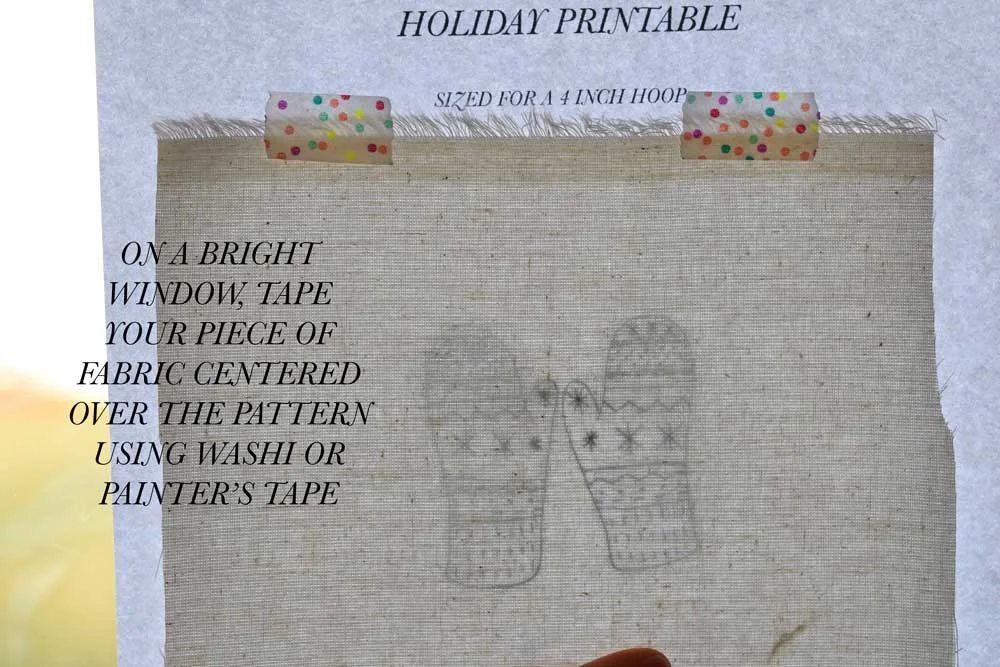
Once you have printed your pattern, tape it to a bright window. (If you happen to have a light box that is also a great option.) Tape the piece of cotton fabric centered over the pattern using an easily remove-able tape such as washi or painter's tape. You should be able to see the pattern well enough to trace it.

Carefully trace the pattern using a mechanical pencil or a pencil sharpened to a fine point.


Once you have finished tracing the pattern, it is time to place it in your hoop. Your hoop come in two pieces. There is a big outer ring and a smaller inner ring. Take the two rings apart. Place your fabric over the smaller hoop. Use a bright window to help center the pattern in the middle. Now place the larger hoop over the smaller hoop and tighten the fabric by gently pulling around the edges and tightening the screw at the top. Now you are ready to begin sewing!

Pick the thread you would like to use. I chose to do mine all in one color but I think it would look great to mix and match colors, too. Thread your needle. I used three threads for the entire project but you can use more or less for variation. Once you have threaded your needle, make a knot at the other end and begin to stitch.

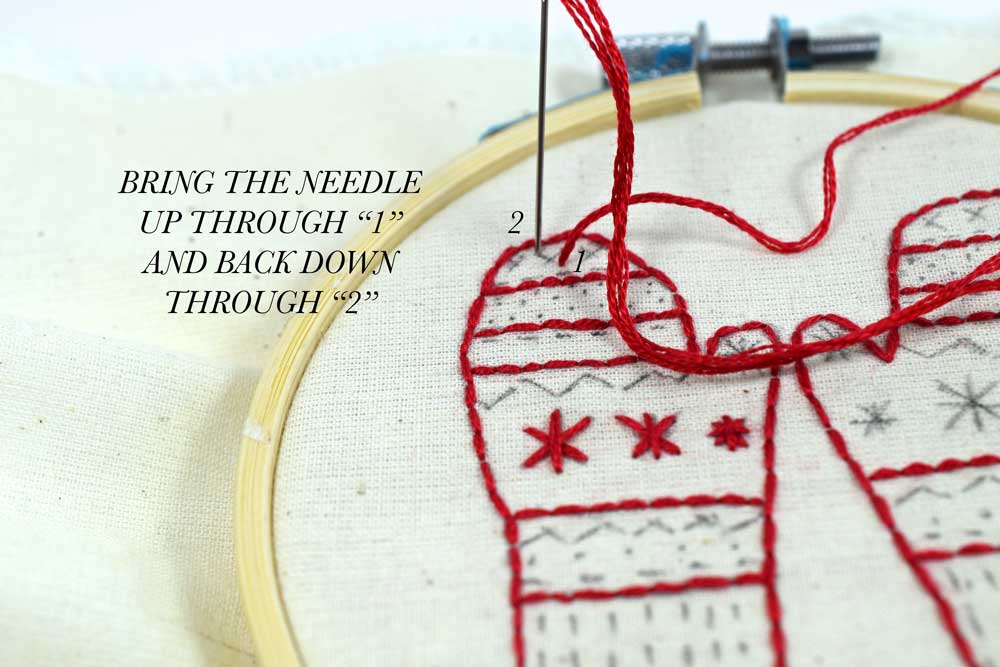
Now I will take you step-by-step through the stitches I made. This is just a reference guide. Please feel free to use any stitch you like! For the mitten outline and any straight solid line in the pattern I used the BACKSTITCH.


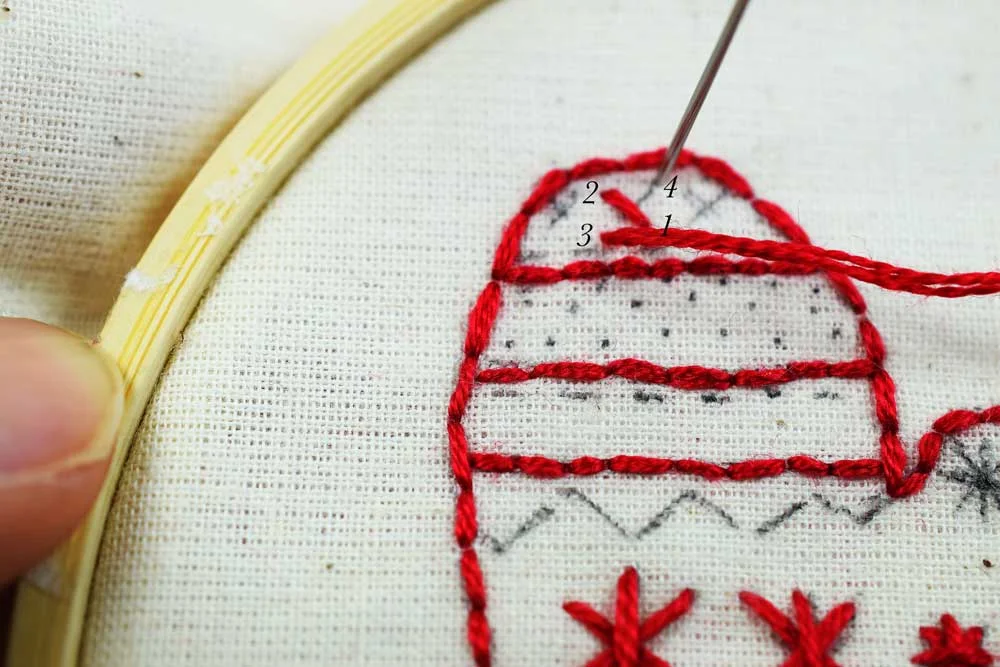
Now to make the star stitch:


Fill in the diagonal stitches using a straight stitch. You can use the numbers as a guide for the stitch order. When you have finished the diagonal lines, complete the star by finishing the straight stitch. See where the needle is coming up in the above picture?


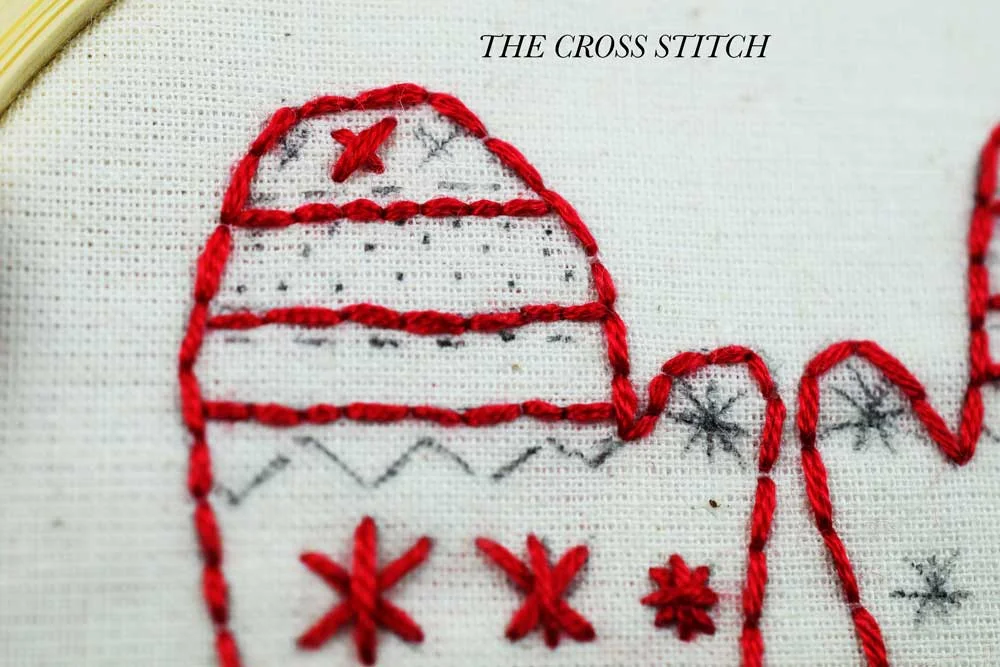

I used the FRENCH KNOT to make the dots. I used three strands of thread for this entire project. If you would like knots that are a little further apart, use one or two threads to make them a little smaller. Also, when making these knots, rather than wrap the thread three times around the needle I wrapped it two times to make the knot a little more compact.


I finished up the bottom of the gloves, as well as some of the dashed lines on the glove using the RUNNING STITCH. You can customize the design by adding a date. I put a little bow at the top, as well.
Now that you have warmed up your skills, you can tackle some bigger projects. I will be adding patterns to my shop LOVESTITCHERY for instant download. The download includes both the pattern and detailed, illustrated instructions.
Wishing you all a lovely holiday season!
Happy Stitching!
Warmly,
Pam