
I have a thing for zipper pouches. I think they are great to keep in your bag for all your little sundries. I thought after my kids got older, my bag size would pair down a little now that it is no longer necessary to have diapers, toys, and snacks etc but instead, my bags keep getting bigger. I love having little pouches to organize it all! What I love about this pouch is that instead of having to make a separate liner, you can just use a piece of felt and quilt your fabric to make it more sturdy which makes it so easy to sew! The other thing I like is that you can make different sizes and shapes to accommodate what you are carrying.
This first example is a long rectangle, great for carrying pens and pencils or maybe even a pair of sunglasses.

You will need two rectangles of cotton fabric. These measure 4.25 Wide X 11 inches long, a 9 inch zipper, and a piece of felt. I chose white felt since I had a light colored fabric. The piece of felt should be slightly larger than the rectangle.

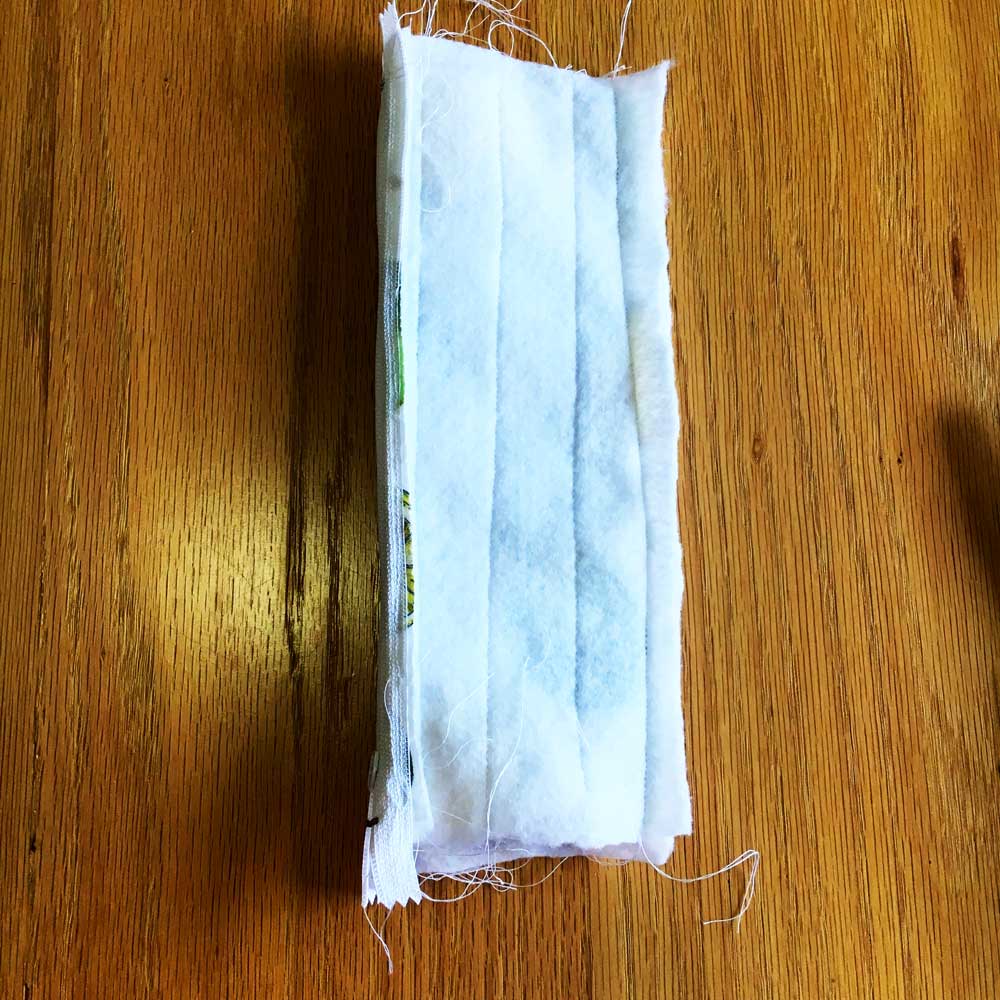
The first step is to sew some straight lines in order to quilt the fabric. If you want an easy way to measure, fold the fabric in half lengthwise and use the crease as your guide. I like to start in the middle and work my way out. Use a coordinating thread or a contrasting one to accent. Once you have sewn three lines, trim the excess felt around the edges using a rotary cutter.
Place your zipper face down onto the right side of one of the rectangles as shown in the picture above.

I like to pin the zipper in place to keep it from sliding around. Using the zipper foot on your sewing machine sew close to the zipper all the way across.

Flip over what you just sewed and press with an iron. Topstitch close to the edge. The topstitching is optional but really helps to keep the zipper from getting stuck.

Do the same same thing on the other side making sure to line up the edges of the fabric so they are even, press and topstitch.
Next fold the pouch so that the 'right' sides are facing each other and match up the edges of the fabric then sew the long end.

After you have sewn the long end, center the zipper on top of the seam you have just sewn and hand press or press with an iron. Now sew the short ends with 1/4 inch seam allowance. When you are finished sewing, trim some of the bulky part and turn it inside out.


In this example I used the same method except with the zipper at the top. I simply cut a sheet of 8.5 x 11 fabric in half width-wise for the pieces of fabric. I attached the zipper using the method described above and then folded the piece right sides together with the zipper at the top and sewed around the perimeter. If you try this, make sure to leave the zipper open a couple of inches so you can turn it inside out when you are done.

I find that it really helps to use chopsticks to poke out the corners. That's it! You are done! They are so easy to make. This is a great project to use up your scrap fabric and you can sew a few of these in an afternoon. Great for a teacher gift, back to school, or for yourself to organize your big Mary Poppins bag (Wait, that's me....).
If you enjoyed this project and would like some more simple sewing ideas you may like these EASY COASTERS, TISSUE COVERS, FANCY GLOVES, or these EASY DISH TOWELS.
If you like any of the fabrics pictured above (sleepover, lemon/lime, and Welcome to Boulder, they are available for purchase at my Spoonflower shop HERE.
Thanks for stopping by,
Warmly
Pam