Now that we have gone over the ESSENTIAL STARTER KIT for a beginner embroiderer, I thought it would be great to review a list of 11 great beginner embroidery stitches. Everyone has their own personal favorites but I tried to include stitches that I thought would be practical, decorative, and easy to make. Once these are mastered it is easy to build on these and keep adding to your stitch knowledge. I have included links to a more detailed, step-by-step tutorial of each of these stitches and several include free printables.
1. BACKSTITCH: When I think of learning embroidery, this is the stitch I think is one of the most useful. You really could use this stitch to make just about anything. It is great as an outline, to make monograms, for simple line designs and more. It is really easy to learn and is a great confidence builder to start with. It looks like a continuous line of stitches but you actually take the needle backwards to make this stitch, thus the name. This stitch is made by bringing your needle up at about 1/4 inch on your practice line then take a stitch backwards. Next bring the needle up 1/4 inch ahead of the last stitch you made and back again just next to the last stitch you made.

Click HERE for a more detailed BACKSTITCH tutorial.
2. STRAIGHT STITCH: Much like the backstitch, this stitch is a one of the foundation stitches of basic embroidery and the easiest to make. It is a single stitch that can be turned into stars, flowers and more and can be made in any direction. To make a straight stitch, bring the needle up from the back of the fabric and back down 1/4 from where you brought the needle up. That's it! A simple straight stitch. A series of straight stitches in a row is called the running stitch. For a more detailed STRAIGHT STITCH tutorial and a FREE PRINTABLE click HERE.
3. SEED STITCH: The seed stitch is a whole bunch of isolated backstitches (or straight stitches) made in random directions and spaced according to the look you are trying to achieve. The seed stitch is a great filler for large areas of fabric. It can be used for fur, grassy areas, sprinkles, and more. It can be used to make areas darker by adding lots of stitches closer together or lighter by making small stitches spaced further apart.

For a more detailed tutorial on how to make the SEED STITCH and a FREE PRINTABLE click HERE.
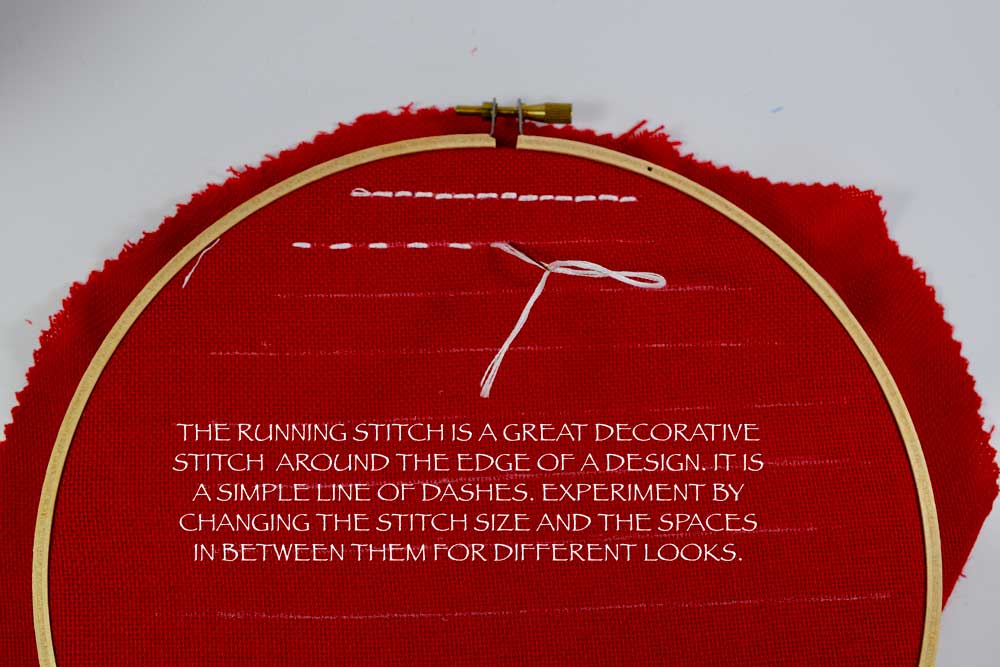
4. RUNNING STITCH: This stitch resembles a dashed line. It looks really sweet as a decorative border. and it is also a great stitch to use as a foundation to add other stitches onto. This stitch is made by moving your needle in and out of the fabric making stitches of equal length, equally spaced apart. You can change the look by making the spaces between the stitches bigger or smaller.
5. LAZY DAISY: (Also known as the detached chain stitch.) This is a great stitch to learn because it is leaf /petal shaped which lends itself to all types of fun designs, especially ones of a botanical and floral nature. Bring your needle up then down right next the where you brought the needle up. Don't pull it all the way through leaving a little loop. Bring the needle up at the top and just underneath the loop and bring it down over the loop securing it to make a leaf shape. Make a series of these around a circle or french knot to create a simple flower.

For a more detailed tutorial on how to make the LAZY DAISY stitch, click HERE.
6. CHAIN STITCH: This is a wonderful stitch for filling large areas, makes a pretty outline and can be used as a padding for other stitches, such as satin stitch. This is the lazy daisy stitch except instead of it being single it is a series of them linked together to form a chain. Make the same loop as you did when making the lazy daisy (above). Bring the needle up and then back down in the same hole.

For a more detailed tutorial on how to make the CHAIN STITCH, click HERE.
7. SPLIT STITCH: This is a lovely stitch. It kind of resembles a fine chain stitch so it makes a pretty and decorative outline stitch. It is actually based on the backstitch. It could be used as a filler but would be time-consuming. Great if you consider that meditative for you! Thread the needle with an even amount of threads. To make the split stitch, start about 1/4 inch in on a pre-marked line from left to right. Bring the needle up and then back down at the very beginning of the line. Next bring the needle up at the last 3/4 of the stitch you just made ,splitting the stitch in half bring the needle back down a stitch length from when end of the first stitch and repeat.

For a more detailed tutorial on how to make the SPLIT STITCH click HERE.
8. SATIN: This is truly a great stitch and one that you will find yourself using very frequently. It is mainly used as a filler stitch to fill in shapes and borders. It is just a series of straight stitches that lie very closely to one another. I found, personally, that with a lot of practice this one gets neater and neater over time. It is just a matter of muscle memory. When you use shiny mercerized thread the stitch looks like silk as the name implies. An important factor when making this stitch is to make sure you are using a fabric that is taut so that the stitches don't pucker. It also helps to apply a medium even tension to the stitches when pulling them. You may be wondering how long you can make these stitches and I will admit to pushing the limits in this one! If your stitches are getting too long you can break them up using the long and short stitch. You can be a little more daring with things that are less likely to get more use (think wall hanging vs. kids clothing item for example.)

For a more detailed tutorial on how to make the SATIN STITCH click HERE.
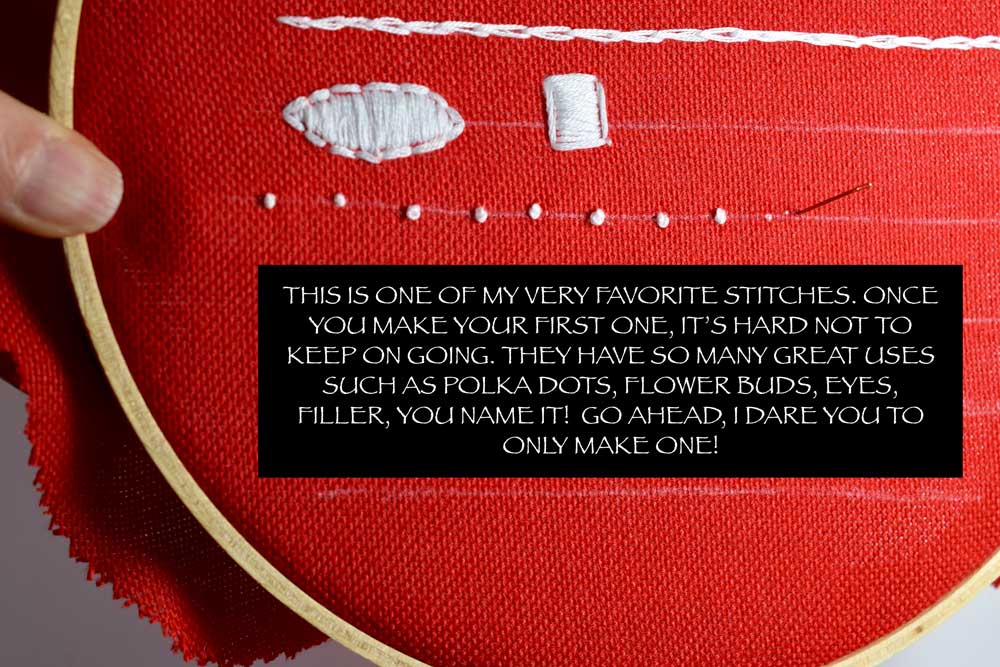
9. FRENCH KNOT: This stitch can be confusing to learn at first but once you make the first one or two, you'll be hooked! Honestly this is one of my favorite stitches because of its versatility but it took me a few tries to get the hang of it. It is worth the effort to learn because it has endless applications! It is so great for floral and botanical designs, like the at the center of a flower or tiny buds on a plant. They are great for making eyes, sprinkles and polka dots Grouped together as a filler, they are stunning. Bring the needle up from the back of the fabric. Hold the needle with the dominant hand and the thread with the other. Wind the thread twice around the needle and hold it tight while at the same time plunging it down right next to where you originally brought the needle up making a tiny knot that sits on the surface of the fabric.
For a more detailed tutorial on how to make the FRENCH KNOT and a FREE PRINTABLE click HERE.
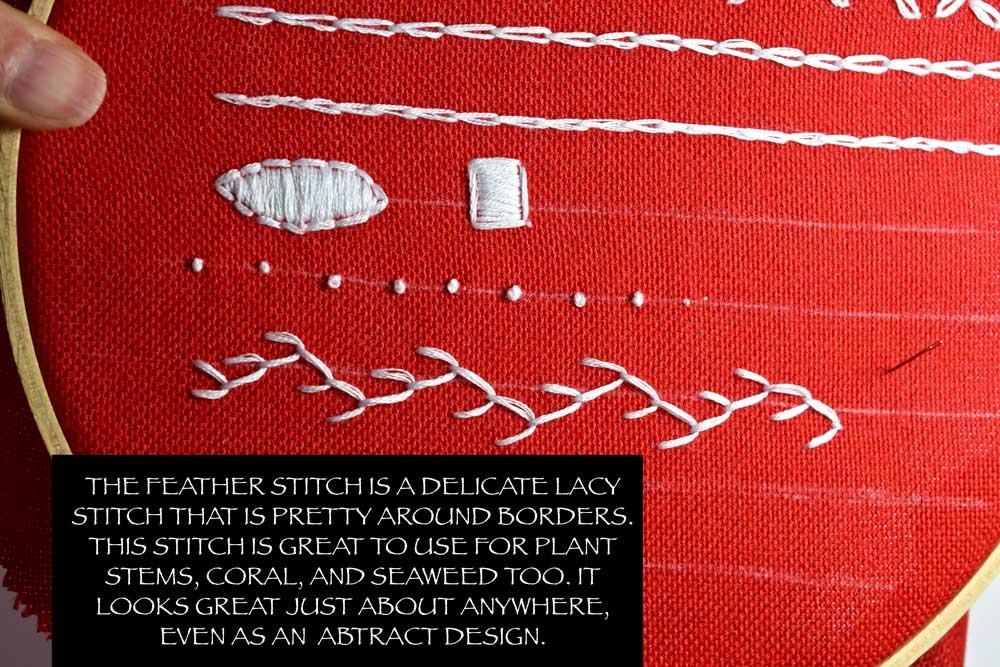
10. FEATHER STITCH: This stitch is lovely decorative stitch that is lacy and delicate. It make a pretty border and looks beautiful paired with other stitches such as french knots and lazy daisy stitches for a pretty botanical look. It is also great to render seaweed and coral and is pretty layered on top of each other. Variegated thread is stunning paired with this stitch.
For a more detailed tutorial on how to make a FEATHER STITCH click HERE.
11. BLANKET STITCH : This is a useful stitch for hand sewing. It is used for finishing edges, such as blankets or appliqué (sewing one piece of fabric onto another.) When used for surface embroidery, it is a pretty decorative stitch that has lots of variations and fun uses!

For a more detailed tutorial on how to make a BLANKET STITCH click HERE.


Feel free to use your creative impulses to add some random stitches and make it your own!


So there you have it! Eleven great stitches to build a wonderful foundation for beginning your embroidery journey! To practice these stitches, I have created a printable PDF embroidery pattern available at my shop! You can practice all the stitches you see here.

The pattern was designed for a dish towel which you can hang. If you are not ready to start hunting down fabrics, this makes it so easy! Alternatively, if you would rather use fabric, this design fits nicely in a 10 inch hoop. Each stitch is labelled so you can have it readily available as a visual reference.
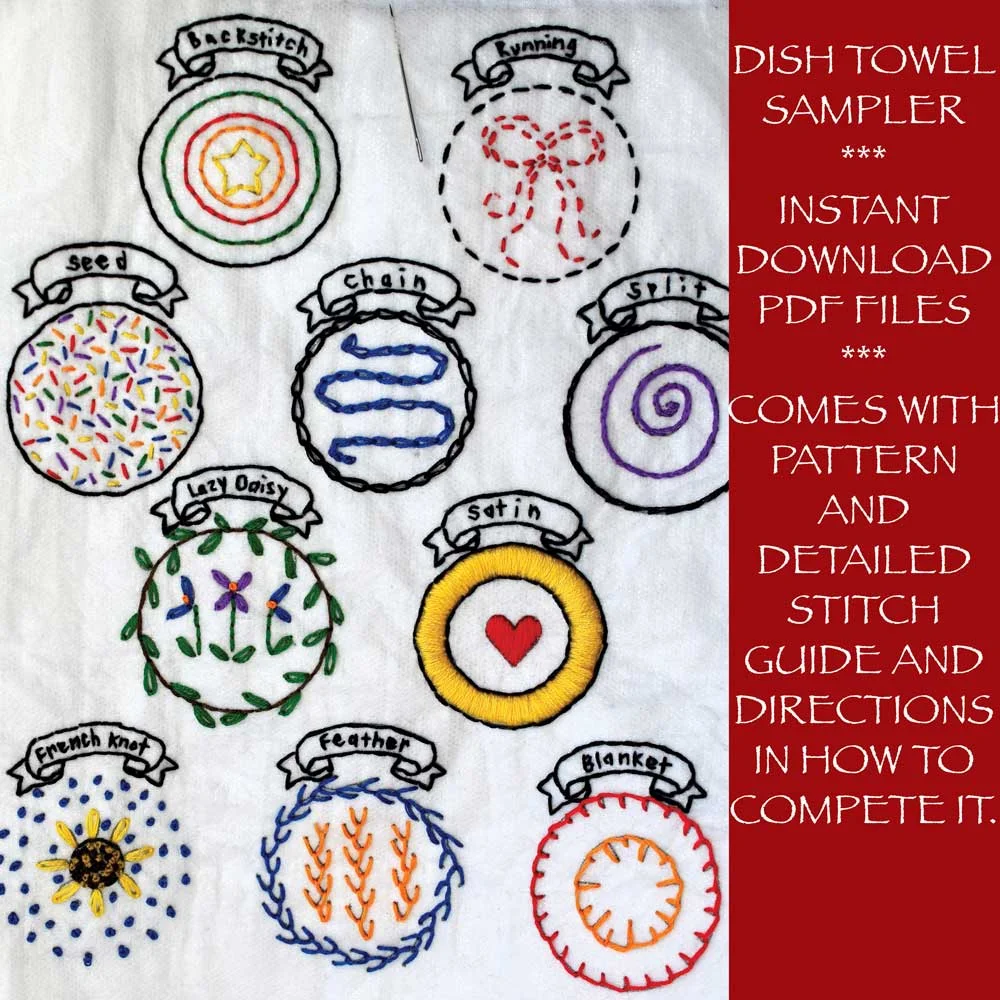
Click HERE to get to this listing at my LOVESTITCHERY shop on ETSY.
Thanks so much for stopping by,
Warmly,
Pam