I don't know about you but I find framing a picture very expensive these days. I have a stacks of artwork laying around and lately I've been wanting to do something with it. In my earlier days I used inexpensive paper to paint on that would not justify the cost of an expensive framing job. Maybe you have a special drawing your child made that you want to frame. Here is a fun easy thing to do! Use these inexpensive canvas frames and embroidery a simple border and VOILA! Ready-to-hang artwork.
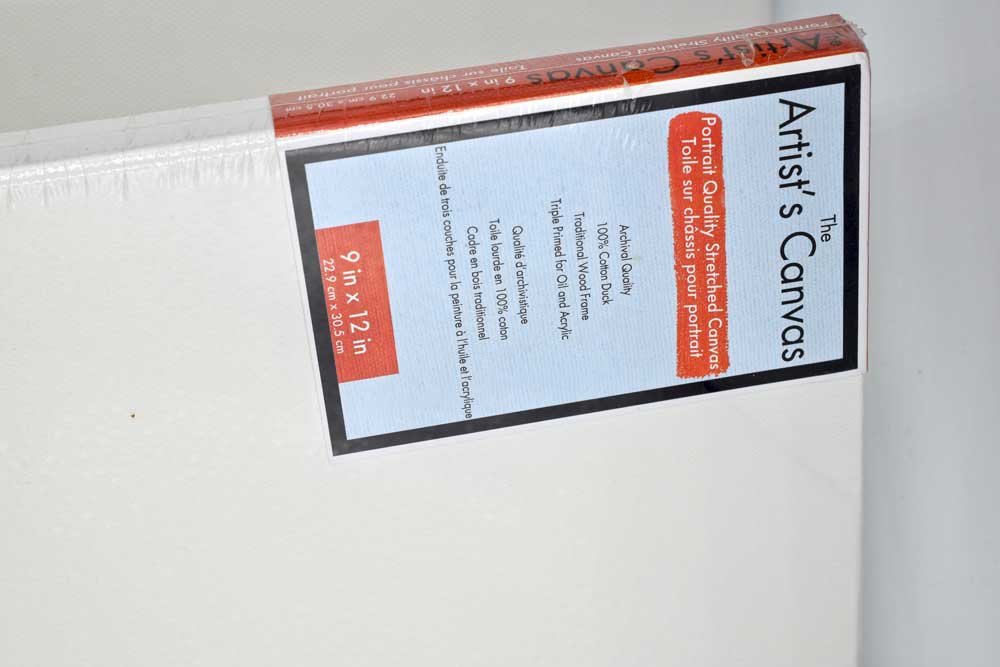
I don't know if you are familiar with this but pictured above is cotton canvas stretched over a wood frame. These are available in a multitude of different sizes at the craft store.

I am not sure if they sell these individually online but they are generally inexpensive. Keep in mind when you are choosing a size to go a several inches larger. There is a wood frame that the canvas is stapled to and it takes up several inches around the border that you will not be able to sew through.

SUPPLIES:
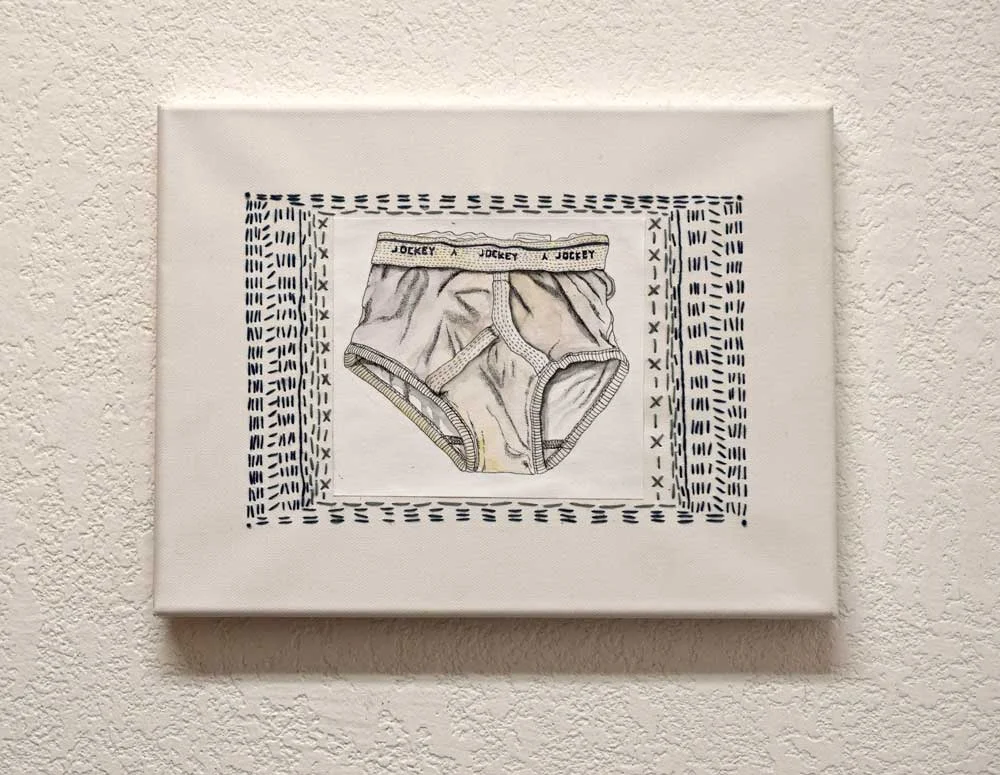
PAINTING OR PICTURE TO BE FRAMED - I know I'm a weirdo but I think tiny briefs are adorable. I thought this picture would be a fun laundry room addition.
NEEDLE - For embroidering canvas. The canvas is pretty tough so a sharp needle with a thicker base would be great, such as a size 5. It is always tricky to recommend the perfect needle since I Just grab an unmarked one from my messy stash. Experiment until you find one that pushes through with relative ease and does not leave a huge hole in the canvas.
SCISSORS - For cutting thread.
GLUE - I used mod podge to glue my painting to the canvas. Be sure that you are using a matte that dries clear. I used the glossy and it was a little messy looking unless you do the entire surface. I didn't want to do that since I thought the watercolor would smear.
FOAM BRUSH TO APPLY GLUE - This is optional, really, but I do like it for evenly applying glue. You could use an old paintbrush. I've even used my fingers sometimes in a pinch.
EMBROIDERY THREAD - I like to use the six stranded cotton embroidery thread. Choose colors that complement your painting.

Turn over your canvas and note the wood frame. This is several inches of border that can not be embroidered on. Center your picture on the front so you can estimate how much space you have to embroider on.

Place the painting on the front of the canvas to get an idea of how much space you will have to embroider. You could glue your painting on at this point but I work kind of intuitively and just couldn't wait to dive right in so I threaded my needle and just began by outlining the edge closest to the wood with the RUNNING STITCH.

Here is what the front looked like.
I used my needle to prepunch the holes before sewing. I found this to be very helpful. Once I made a border of stitches, I used my foam brush to add a generous amount of glue to the back of the painting and then centered it on the canvas and smoothed it flat. I got so into what I was doing that I did not take pictures of the gluing part. One thing to note is that you want a good amount of glue but applied evenly, If there is too much, the glue will ooze out the sides. If you have a little too much wipe it up with a paper towel.

Once the glue dried, I added some random stitches to mimic the seams in the painting and sewed right up to the border of the painting using running stitch, BACKSTITCH and cross stitch. Now the canvas is hanging on my laundry room wall instead of in a drawer.
The canvas is meant to be painted on so you can paint a coordinating color which almost acts as a matte border. In the below example I used a cheap acrylic paint, leaving visible brush marks. I added a simple design of a few french knots, beads, and straight stitch on either side to mimic the sprinkles on the cake. I found this gold frame that the canvas fit perfectly into. If you want to know more about how to add beading to your embroidery click HERE.

*This post may contain affiliate links.
So there you have it. An easy and cheap way to hang a picture and practice your embroidery!
Thanks for visiting!
Pam