Have you ever wondered what else you could do with your embroidery besides use it as hoop art? Well, today I have a fun little project that is really easy to make and fun to wear. Today I will show you how to make a pin using your embroidery.
What is cool about this project is that you can use it in so many different ways. It can be a cute wardrobe accessory for a shirt, jacket, purse, backpack, scarf, or whatever else you can think of!
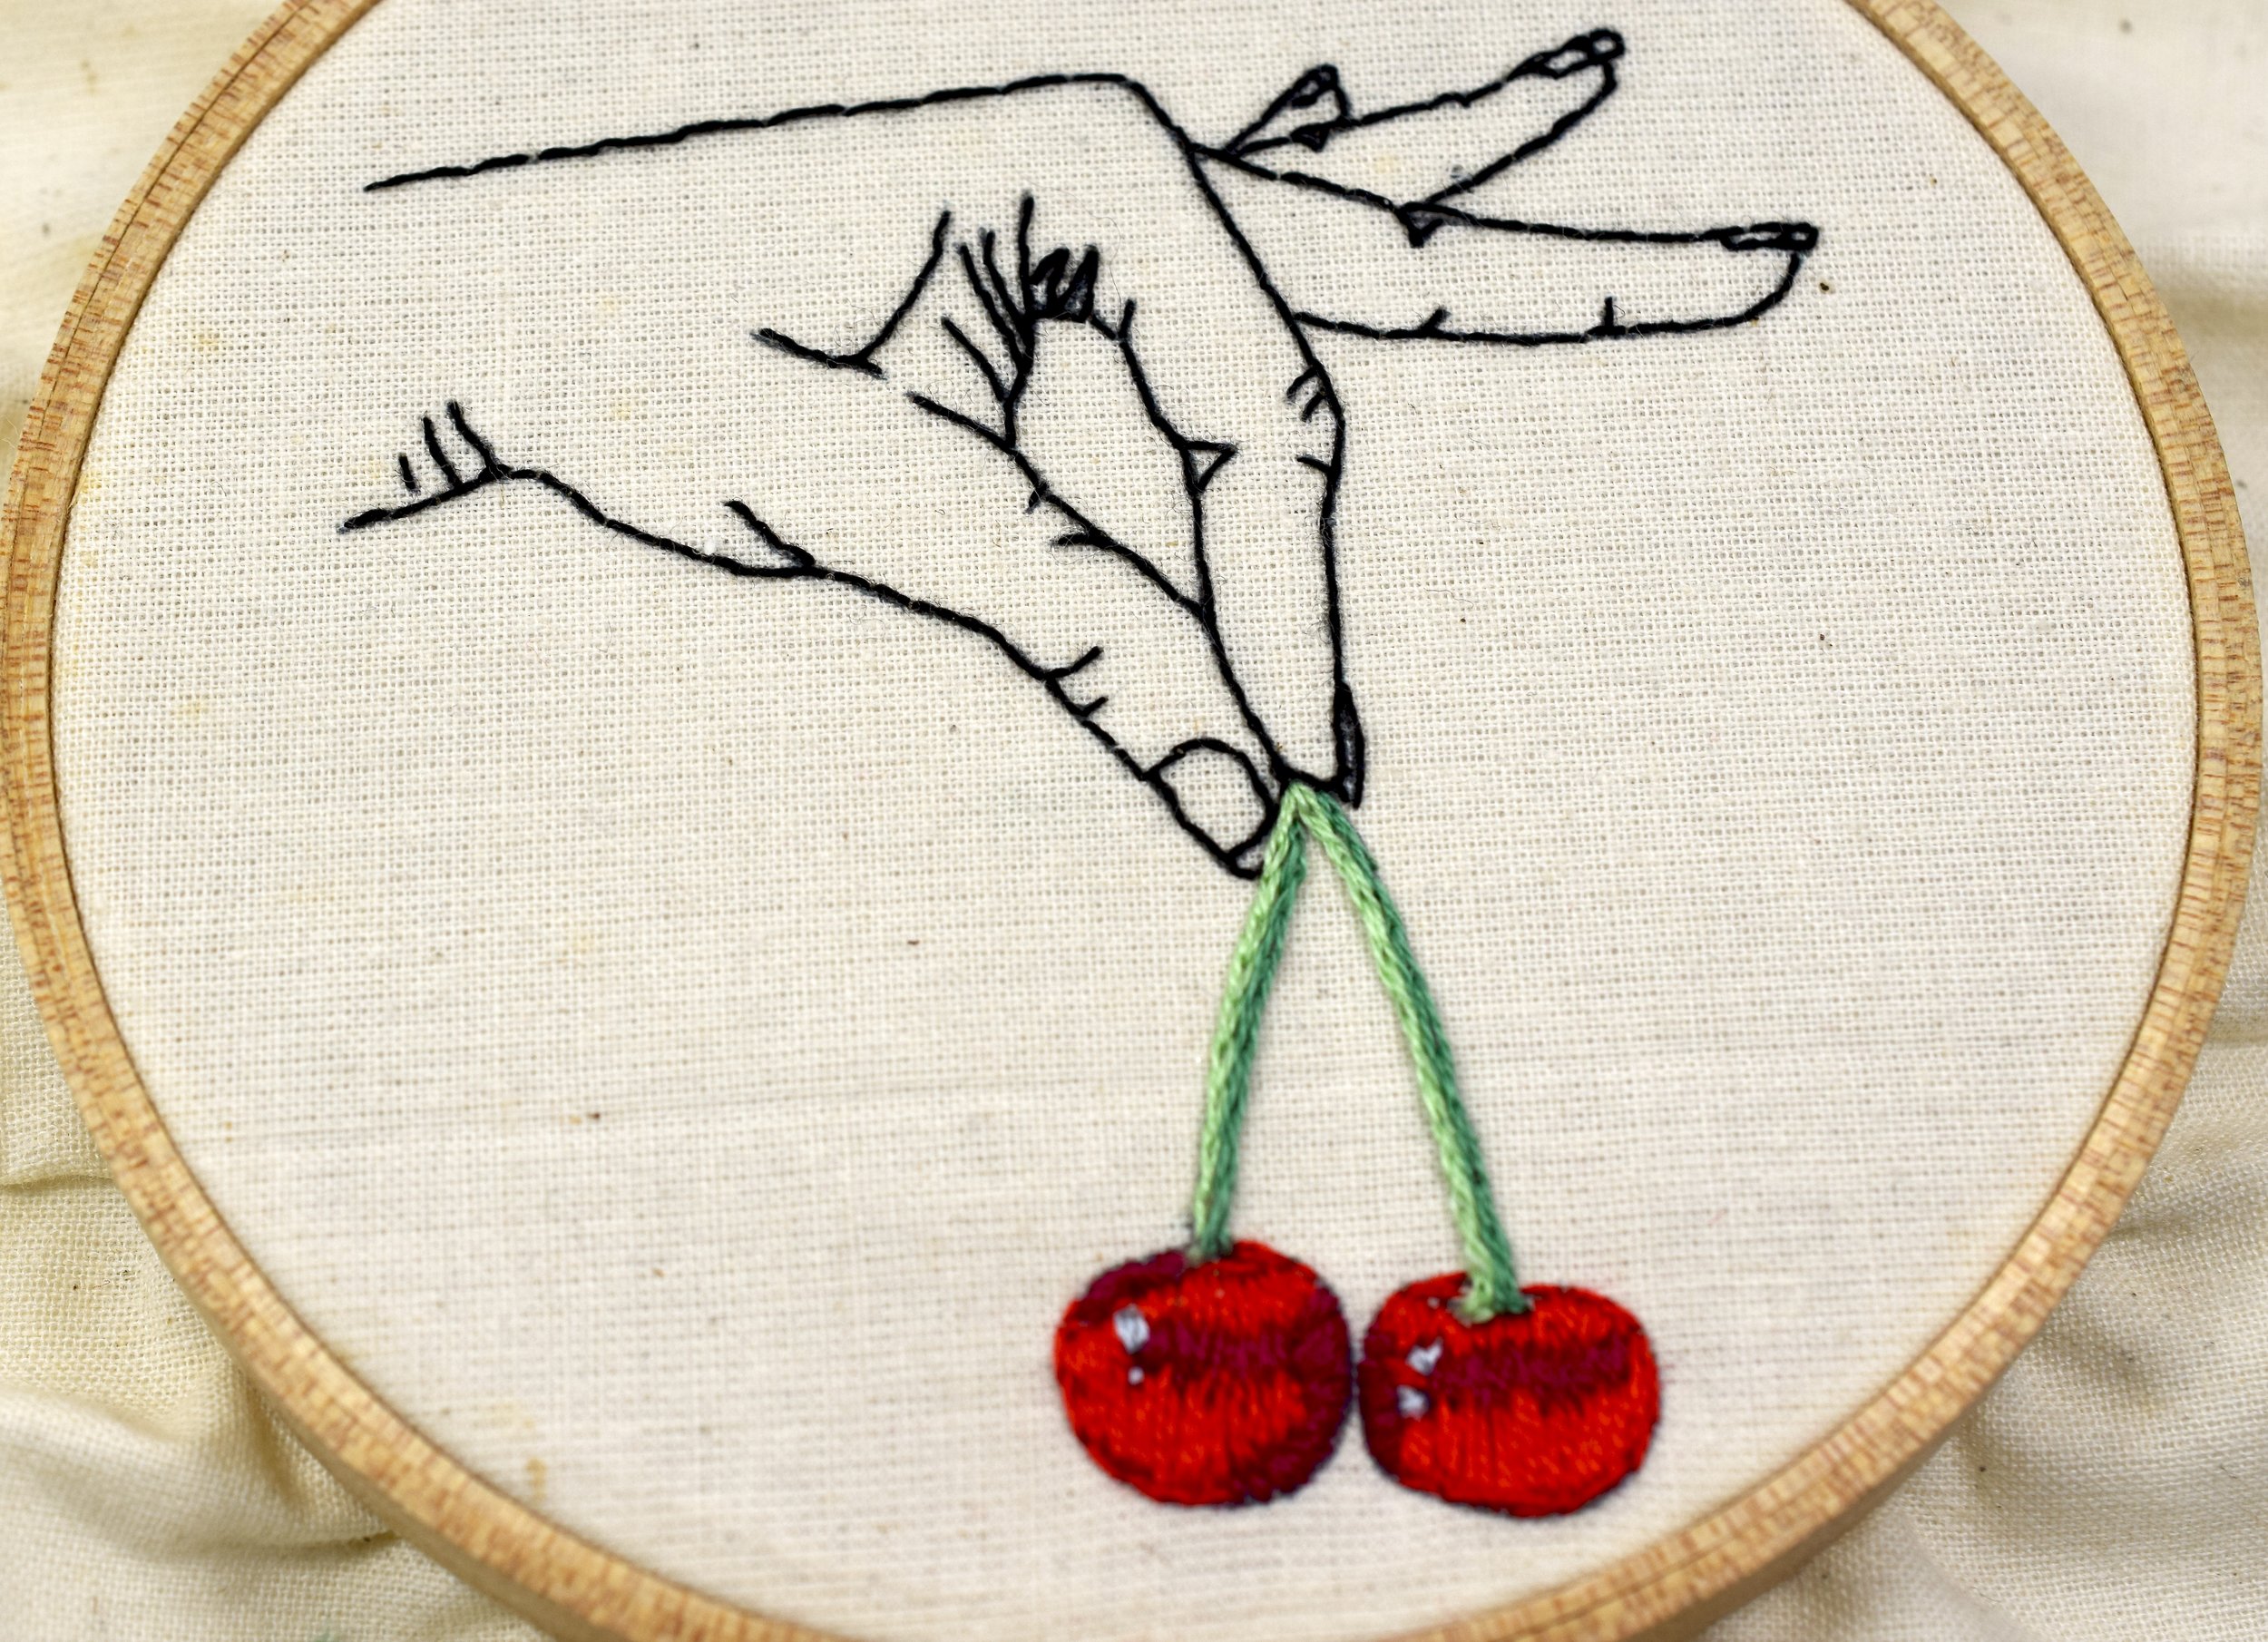
For this project I used the cherries from my CHERRY PICKIN' pattern. I chose this design for it's bright colors, simplicity to make, and perfect pin size. Try to choose a small, simple design that works with your wardrobe. So, let's get started. Here is what you will need:

PIN CLASPS - You will need a pin to sew onto your felt backing. The pin backing has a flat part with holes that you can sew onto the the back of your pin. You can find these in any jewelry making section of your local craft store or online.
FABRIC WITH PATTERN TRANSFERRED ONTO IT - Once you have chosen your pattern, transfer it onto a piece of cotton fabric. I like to have plenty of extra fabric around the edges so that I can put the fabric into a wooden embroidery hoop. This makes the fabric really taut which makes it so much easier to stitch on. I like to leave 1 1/2 to 2 inches of overlap around the hoop. For this design, I used a 3 inch hoop so a 5 x 5 inch square of fabric was just right.
**OPTIONAL WOOD EMBROIDERY HOOP - The hoop is not required to make the project but it makes it a LOT easier, especially if you are new to embroidery.
FELT PIECES - You will be cutting felt shapes to use as your pin backing. I like the felt since it gives the pin some structure. I used two different colors of felt, graduating in size but it only really needs one piece of felt.
EMBROIDERY NEEDLE - I like to use an embroidery needle that is at least size 8 or up for surface embroidery. It is thinner and can fit multiple threads in the eye so it moves through the fabric easily.
THREAD - My favorite thread is DMC six stranded cotton embroidery thread. I usually divide the thread in half and use three strands at a time. For these cherries in this example I used two threads since the design is a little more detailed. **TIP - for fine detail work, use one to two threads. For bigger broader designs use 3-6 threads. Experiment with different amounts of threads to see what kind of effects you get.
SCISSORS - You will need your thread cutting scissors for the embroidery part but also a pair of scissors to cut the felt. I used fabric scissors then I used scalloped scissors to make a decorative edge on the felt.
***OPTIONAL STENCIL- This is nice to have to make a template for your pin. A circle is a really easy shape to make and you could even use a jar lid as your template to trace around.
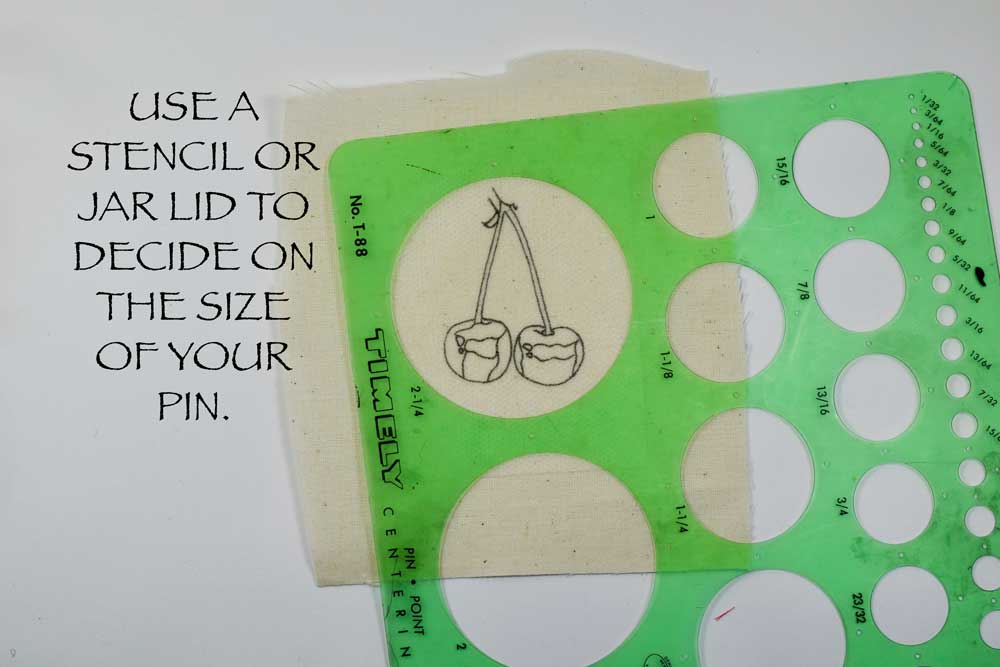
Measure around your design to decide how big you want your pin to be. I decided to use a circle but you could go with a square, diamond, oval or whatever you like. The goal is to figure out how big your cotton fabric piece will be so that you can cut a piece of felt that is about 1/4 to 1/2 inch bigger to be your pin backing. If you are using more than one piece of felt make each piece 1/4 to 1/2 bigger than the first piece and so on, so you can see each border of felt.
Once you have measured, you may now cut the pieces of felt. Put your fabric piece in the wooden hoop and embroider your design.
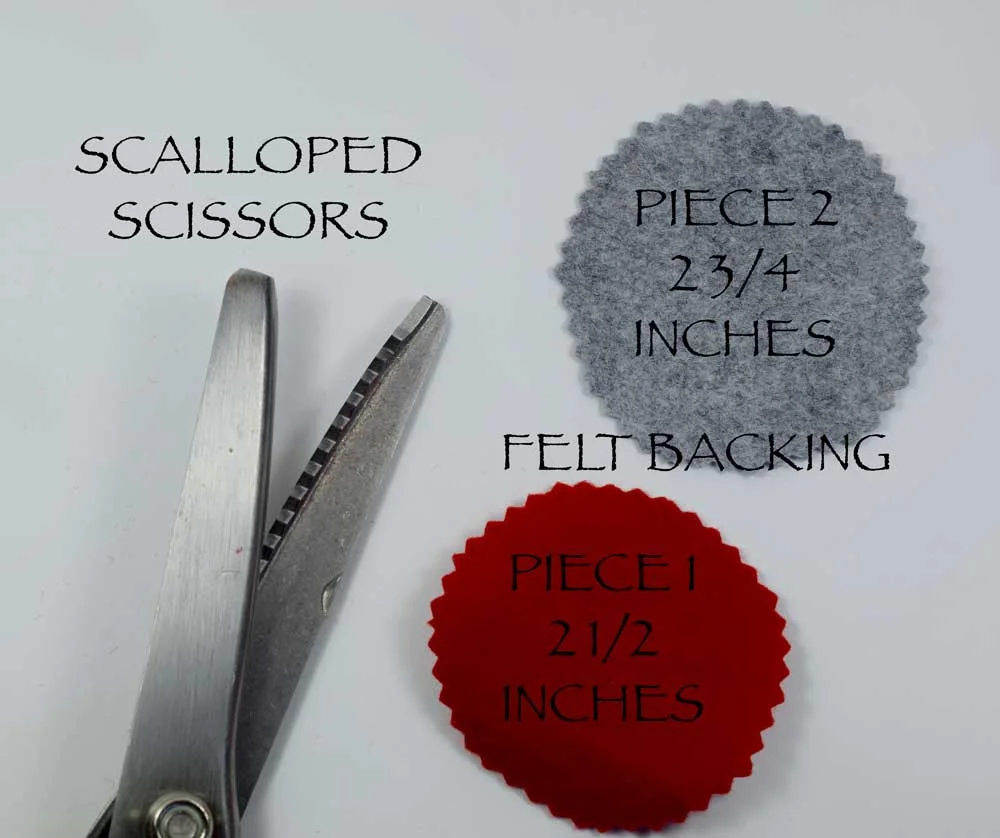
My original design was 2 1/4 inches so I cut out one piece of felt that was 2 1/2 inches and the next piece of felt was 2 3/4 inches (each piece was 1/4 inches bigger than the last.)

Once you finish embroidering your design, cut it out to your measurements. Now you have your piece plus two backings graduating in size.

Here is what the pieces look like stacked on top of each other.
Next step, attach the pin backing to the biggest piece of felt that will be the back of your pin.
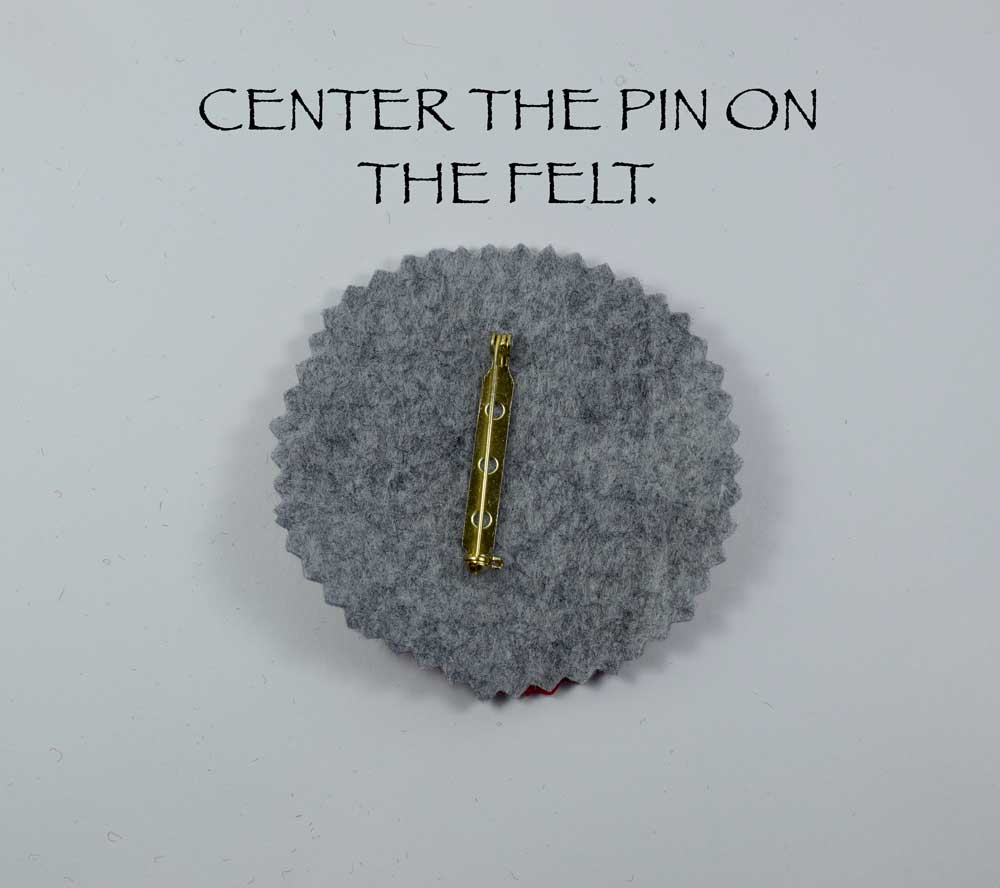
Center your pin on the back if the piece of felt backing. Place the bar with the holes face down on the felt. You will be bringing the needle up from the back of the felt, through the hole and then back down into the felt to the left of the hole. Then you will bring the needle back up through the hole and then down to the right of the hole. Do this several times on each side. Repeat with the other two holes. The other side does not have to be neat since it will be covered with another felt piece or the embroidered piece.


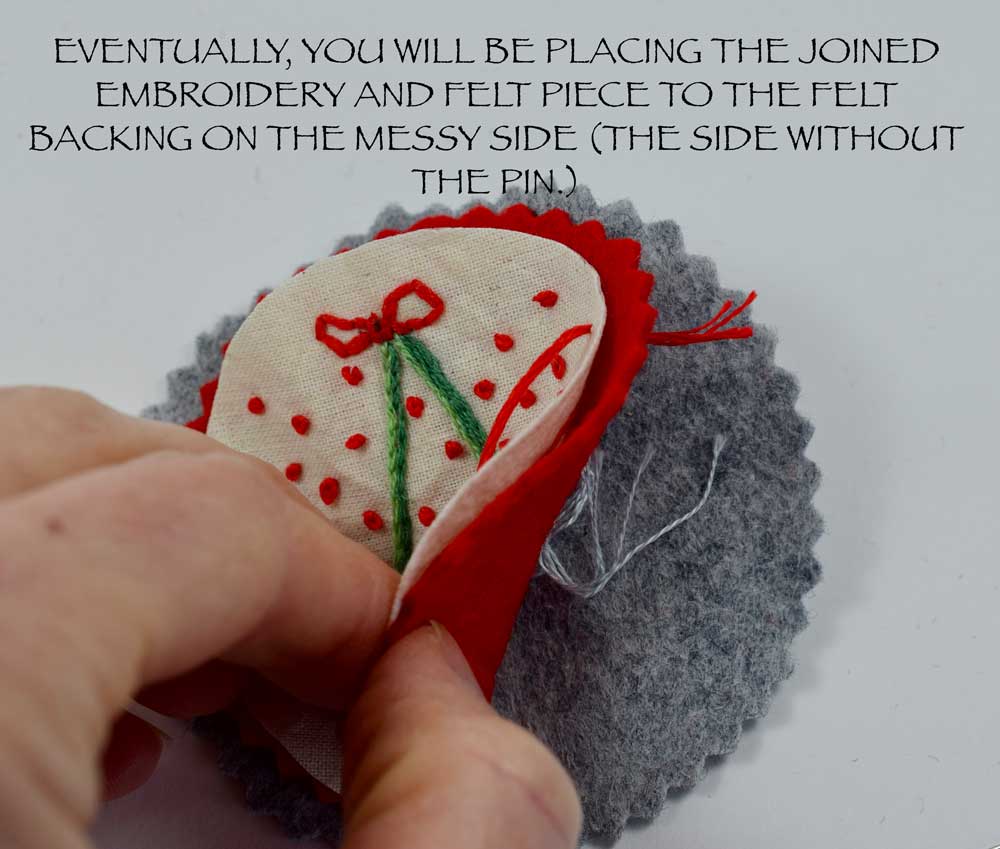

The WHIP STITCH is a great stitch to use for attaching one piece of fabric to another. It prevents fraying of the edges. If you would like to learn the WHIP STITCH click HERE. The blanket stitch is another great stitch to use.
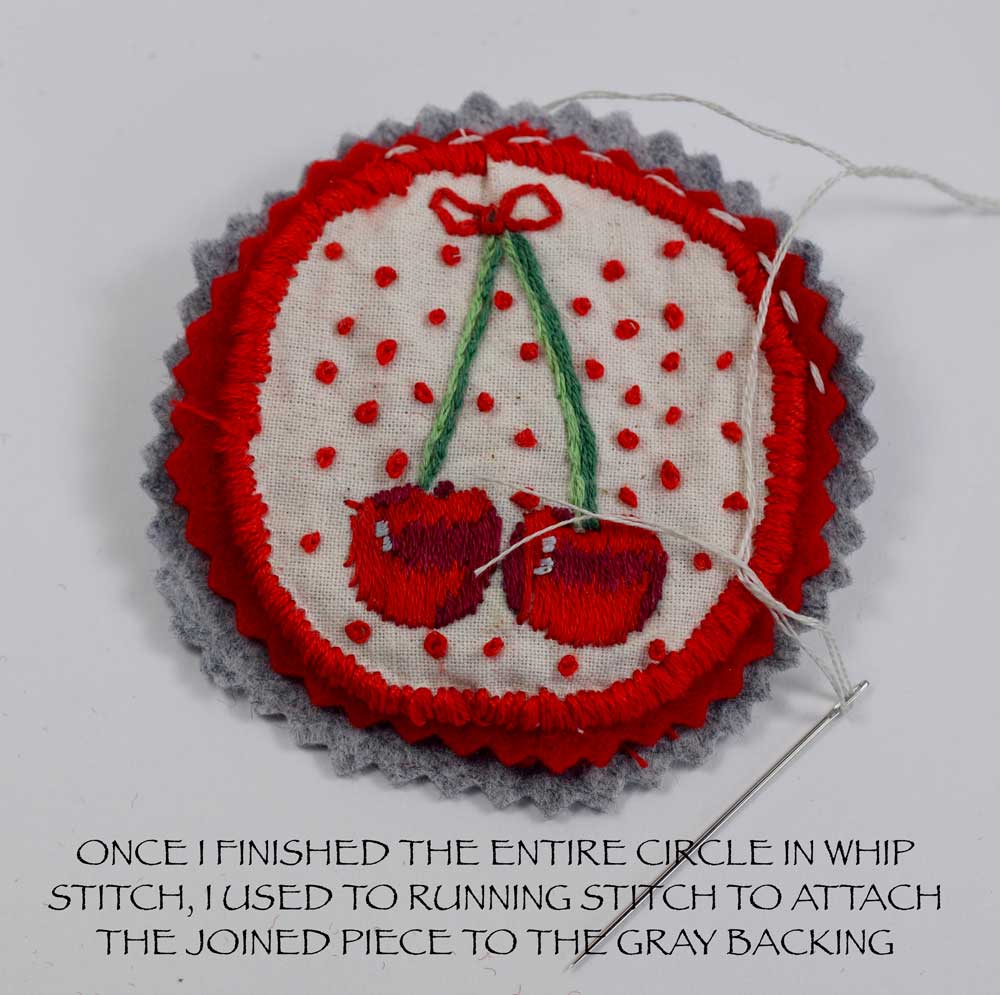
To attach the joined piece of embroidery and felt to the final felt backing, I used a simple RUNNING STITCH. If you would like to learn the RUNNING STITCH click HERE. I started the first stitch from behind the red piece of felt so that I could hide the knot. I brought the needle up through the red felt and back down through both the red and gray felt and continued all the way around. When I reached the end, I made a knot in between the red and gray felt.

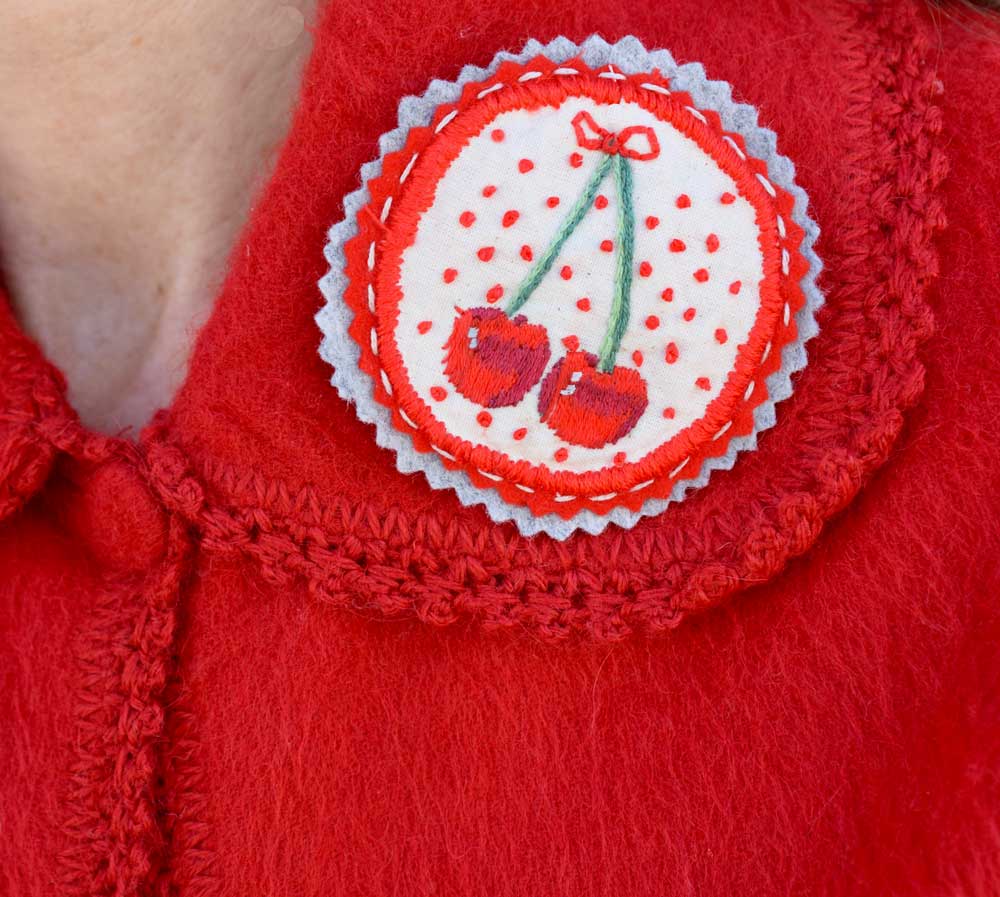
Here is the finished piece!
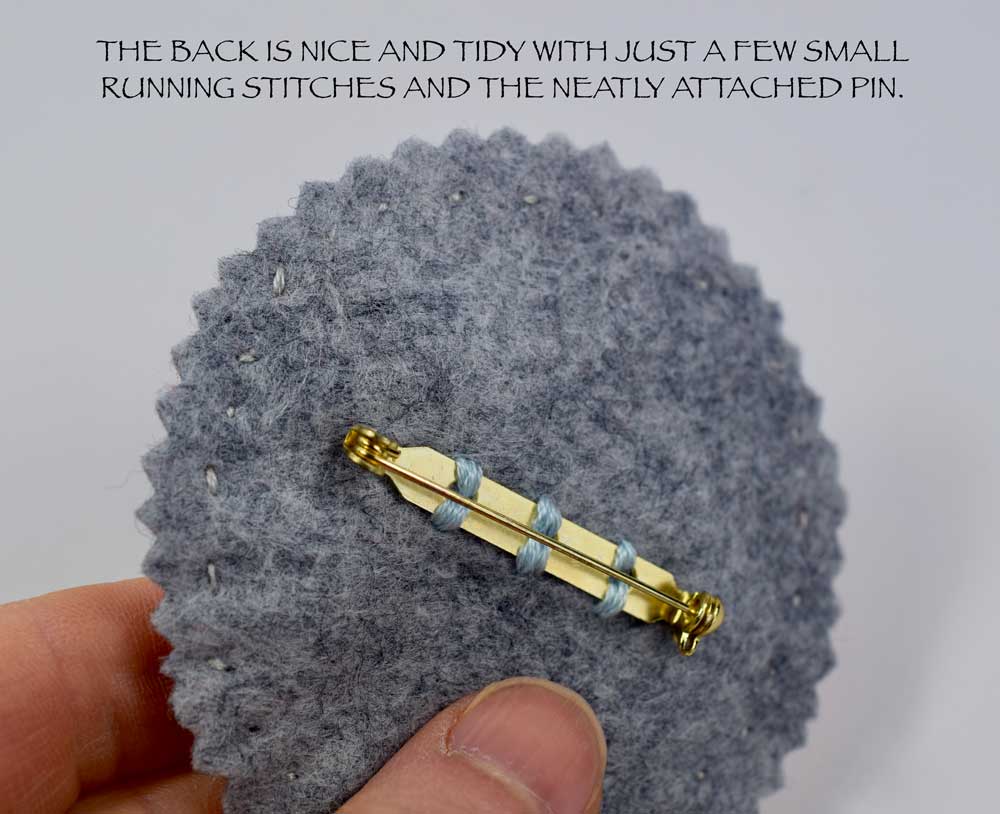
Here is the back. All the messy stitches are hidden in the felt layers. Honestly, you won't even see this part so it doesn't have to be perfect :)
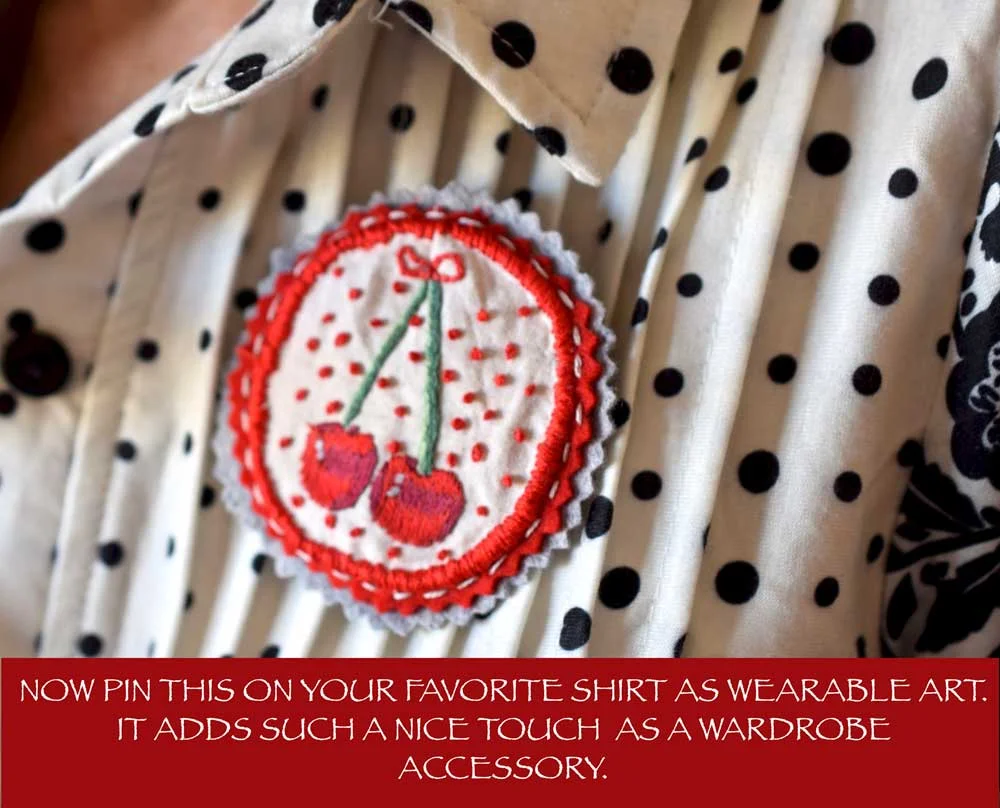

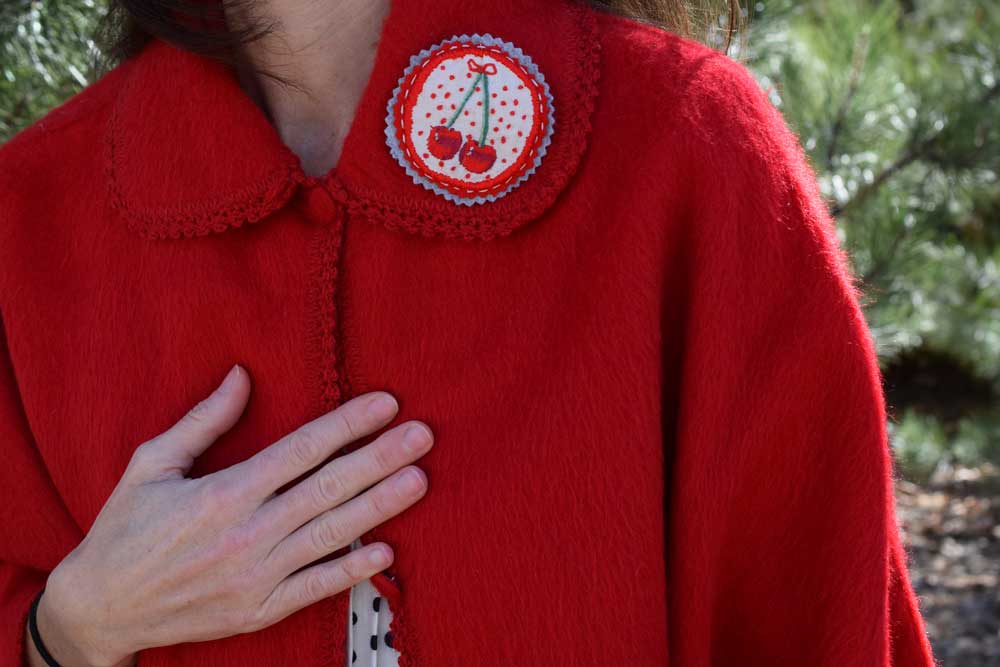
Pin it on your favorite jacket lapel.
It would also look great on your favorite purse, a backpack, maybe even on a hair clip or barrette to adorn your mane!
If you like the cherry pattern if can be found HERE at my etsy shop.
This is a super fun design that can be used as unique wall art but is also great for so many other applications. You can isolate the cherries to use for this pin project or use the design on other things such as clothing;

Adorable on jeans or a jean jacket.

or a charming baby onesie!
Thanks for stopping by! Happy embroidering!
Warmly,
Pam